Introduction to the Glossary #
Please use the table of contents on the right side of your screen to see the list of keywords that are included in this glossary. Once you’ve found the keyword that you’re looking for, click on it. You will be automatically redirected to the section for that keyword.
Note: This glossary is still a work in progress. We're continuously adding new entries to this list.
A #
Activating a Product Order #
After you’ve created a product order, you must activate it. Otherwise, the product order won’t be visible on the operator’s screen. Here’s how to activate a product order:
- Click on Quality Management in the homepage sidebar and select “Product orders”.
- Select the targeted product order and click on it.
- Click on “Activate”.
Click here to learn more about product orders.
Article Category ID #
An Article category ID tells the location of an article category within your workspace. An article category ID is generally used for automation purposes. 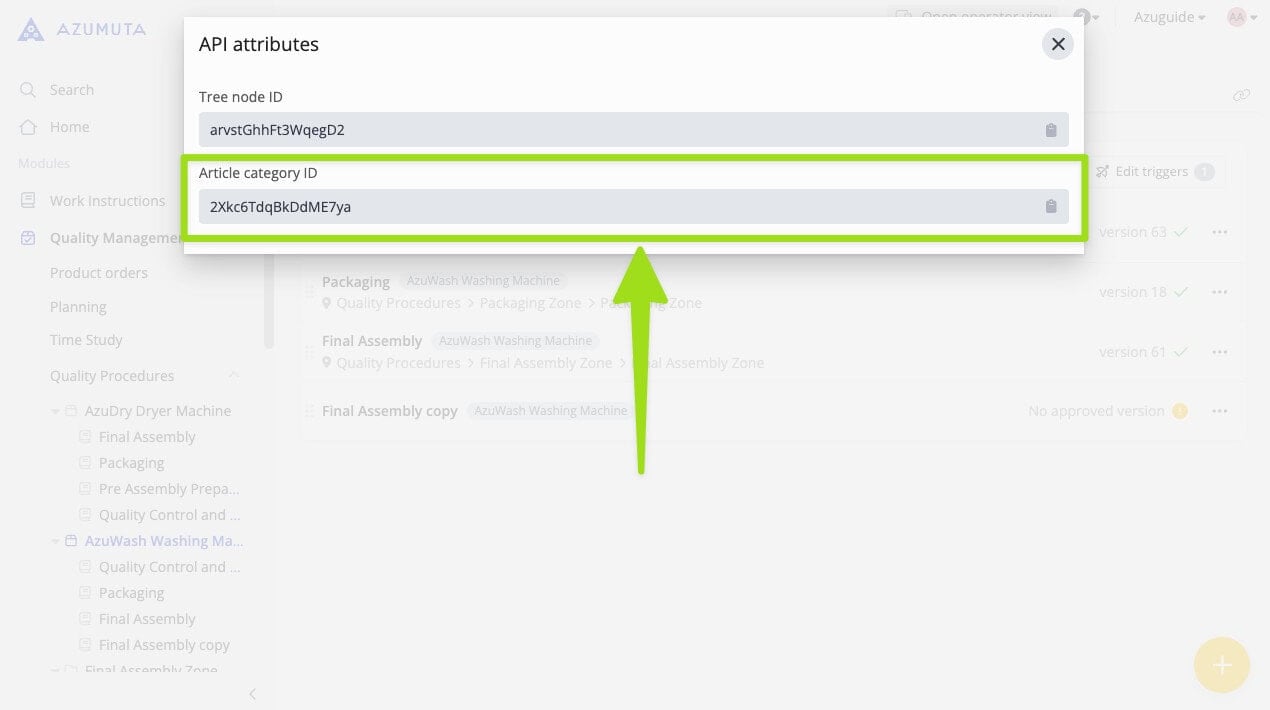
Here’s how you can find the ID of an article category:
- Navigate to the article category that you would like to see the ID of .
- Click on the question mark icon. It’s located on the top right corner of your screen, next to the close icon.
- Click on the “API attributes” button.
- You will find it under “Article category”. You can also click on the clipboard icon to copy it.
Click here to learn more about article categories.
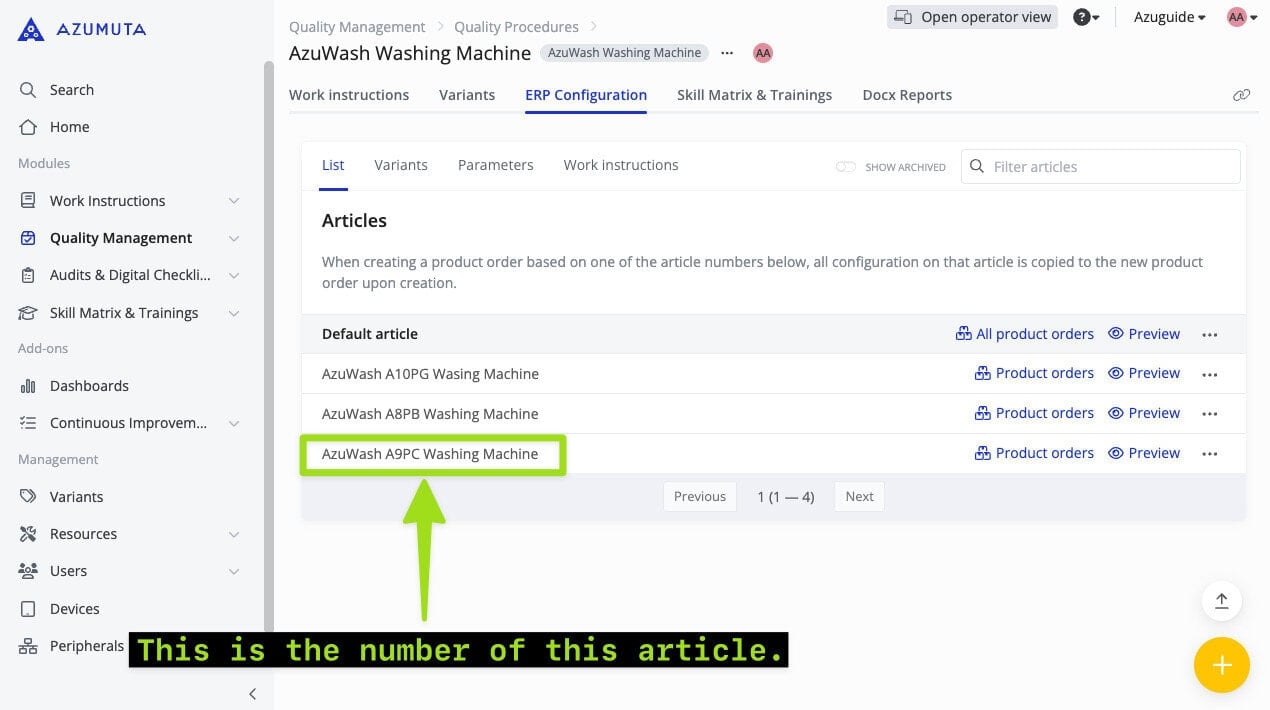
Article Number #
An article number is the name of an article.
Click here to learn more about articles.
P #
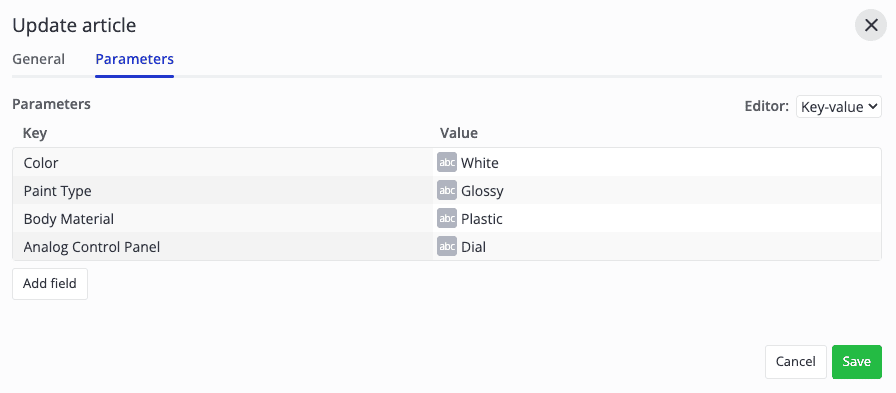
Parameter #
A parameter is a set of values that belong to a certain article or product order. It can be defined as the directly measurable properties of a product (e.g., its color, its dimension, etc.). A parameter can also be defined as a mathematical combination of numbers and letters that make up a parameter formula.
This way, crucial information can be linked to a specific article or product order. This is aimed to make your production process as precise as possible.
Parameters can then be used, for example, to make visual variables based on an article or product order, automatic completion of certain templates, and many more.
Click here to learn more about parameters.
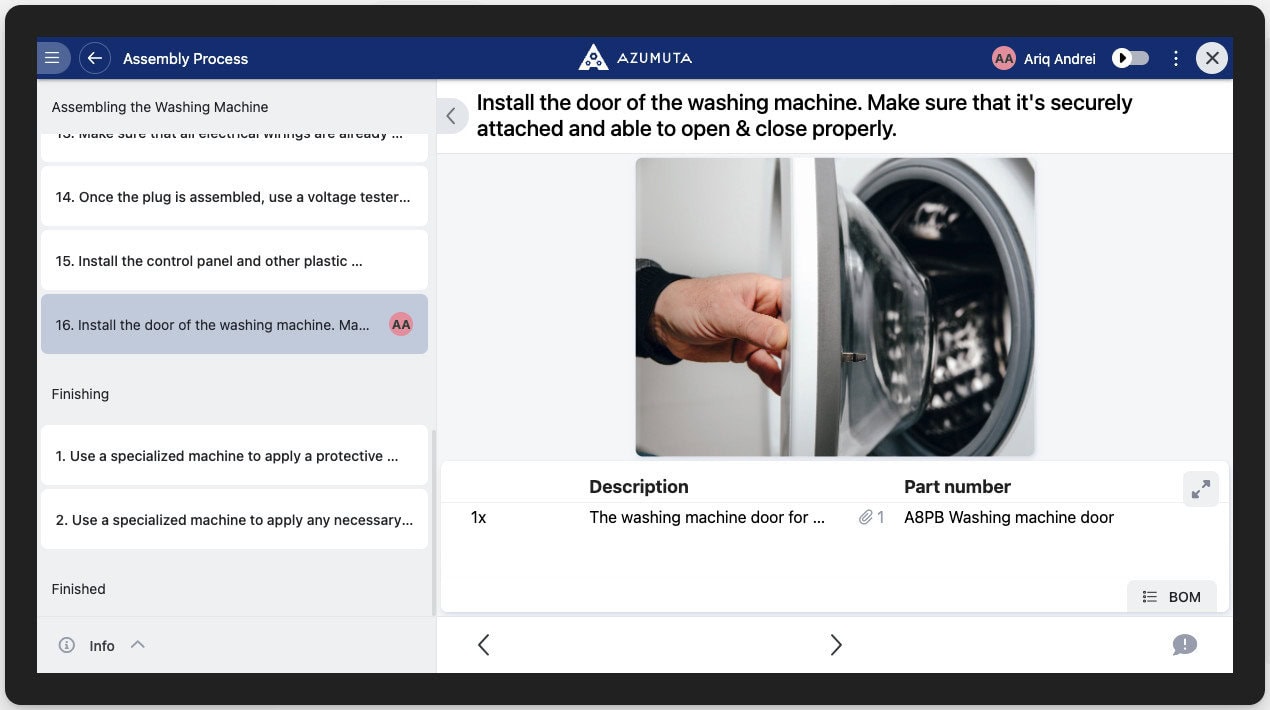
Part #
Just as the name suggests, a part is an individual component that will be used in the production process of an item.
A product generally consists of numerous parts. In an Azumuta instruction step, you can specifically mention which part(s) must be worked on/installed to the product. This will increase the precision of your work instruction and minimize ambiguity. A list of parts is known as a Bill of Materials (BOM).
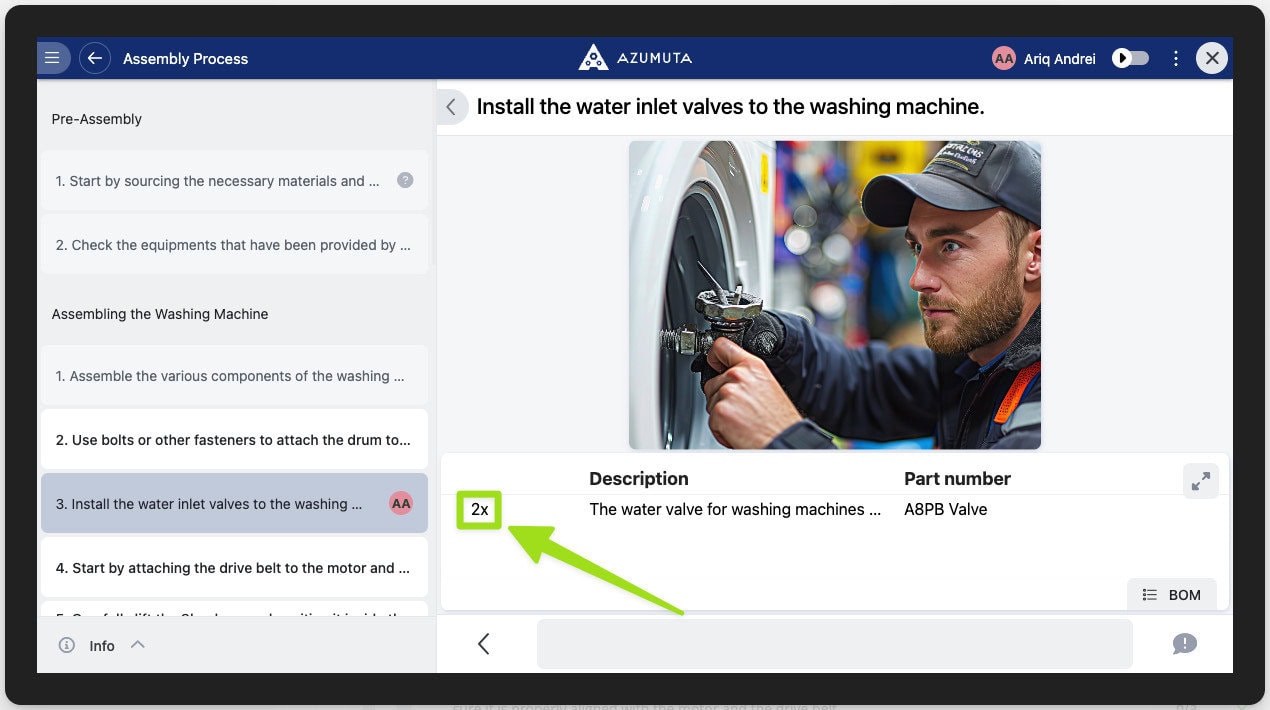
Part Amount #
Part amount refers to the quantity of the part that is used in an instruction step.
When you enter a part into an instruction step, the default part amount is 1. Here’s how you can change the part amount:
- Navigate to the work instruction step that contains the part that you would like to edit and click on “Open”.
- Click on the “Parts” tab.
- Click on the part quantity that you would like to edit.
- Type in the new part quantity. Alternatively, you can scroll up using your mouse to increase the part quantity and down to decrease the part quantity.
- After you’re done adjusting the part quantity, click at any point on your screen.
Part Description #
A part description is meant to briefly explain a part to operators on the shop floor.
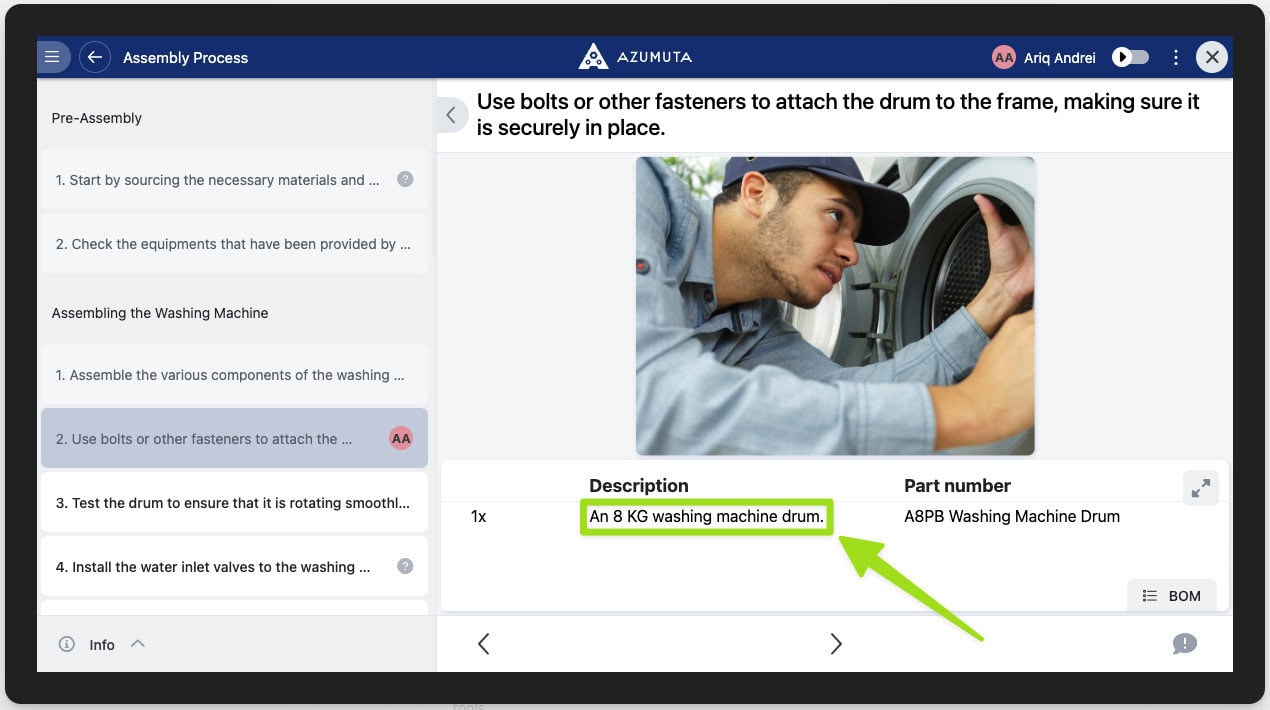
When you’re creating a part, adding a part description is mandatory. You can also edit it after the part has been created.
Part Number #
In Azumuta, a part number is the name of a part.
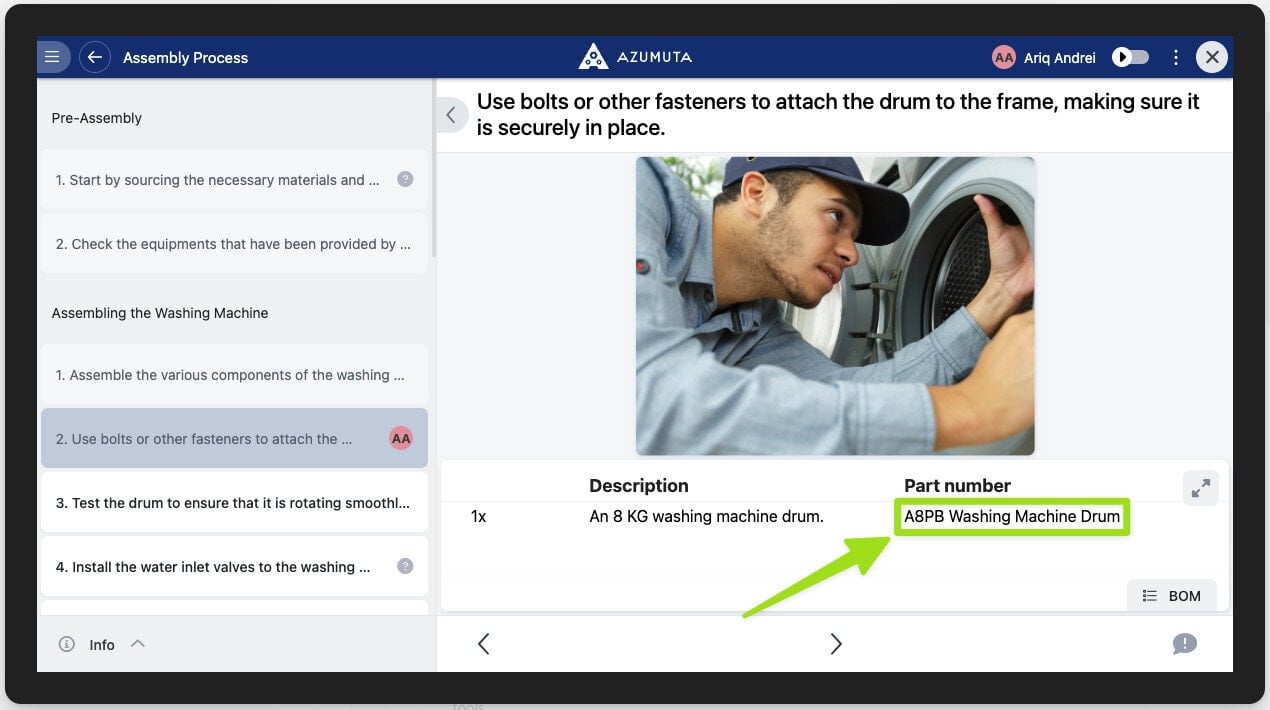
When you’re creating a part, adding a part number is mandatory. You can also edit it after the part has been created.
Product Order Amount #
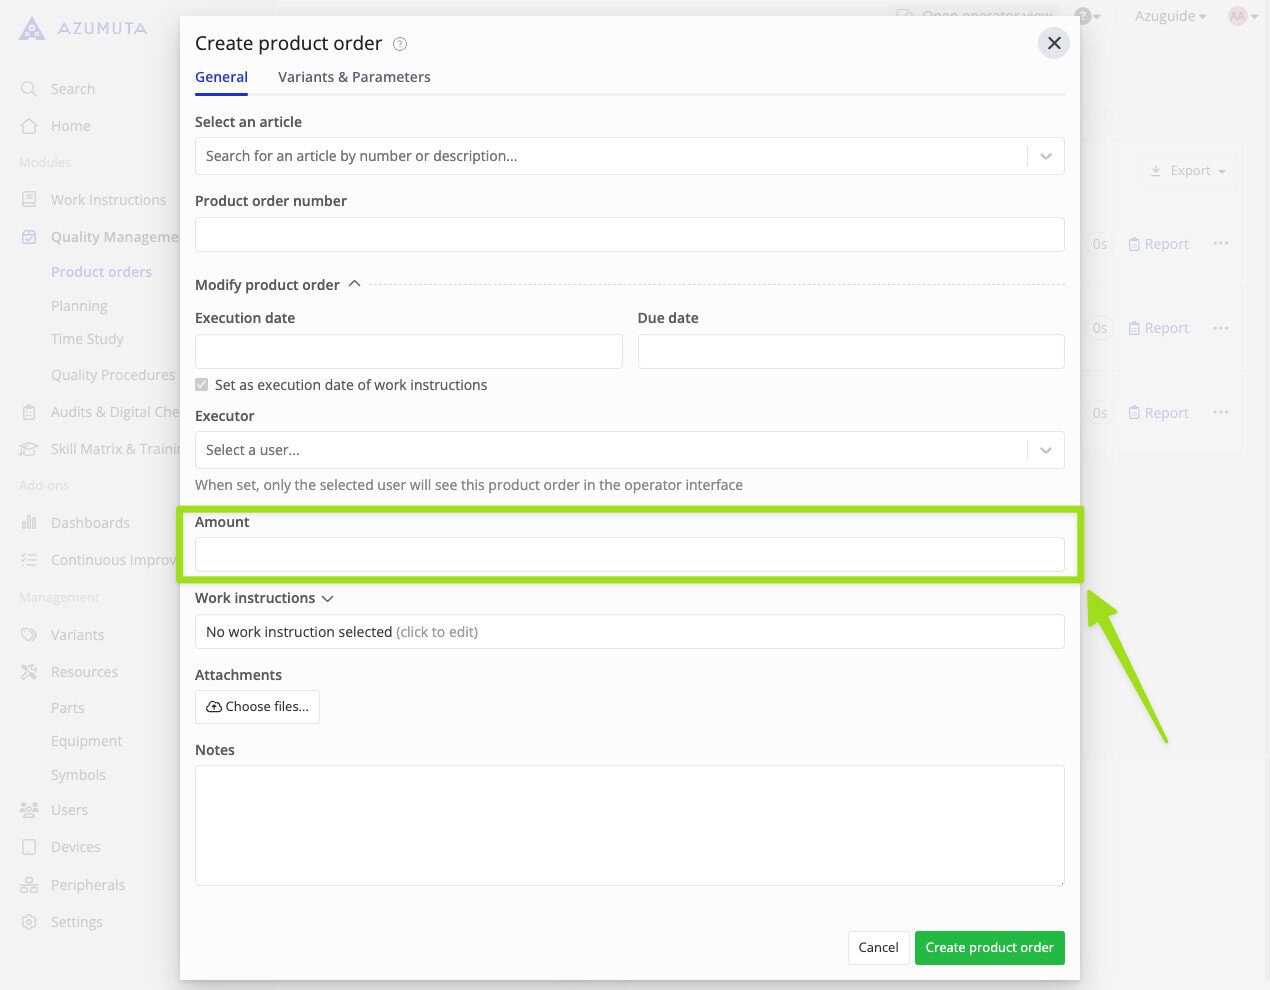
Product order amount refers to the amount of products that will be made within a single product order.
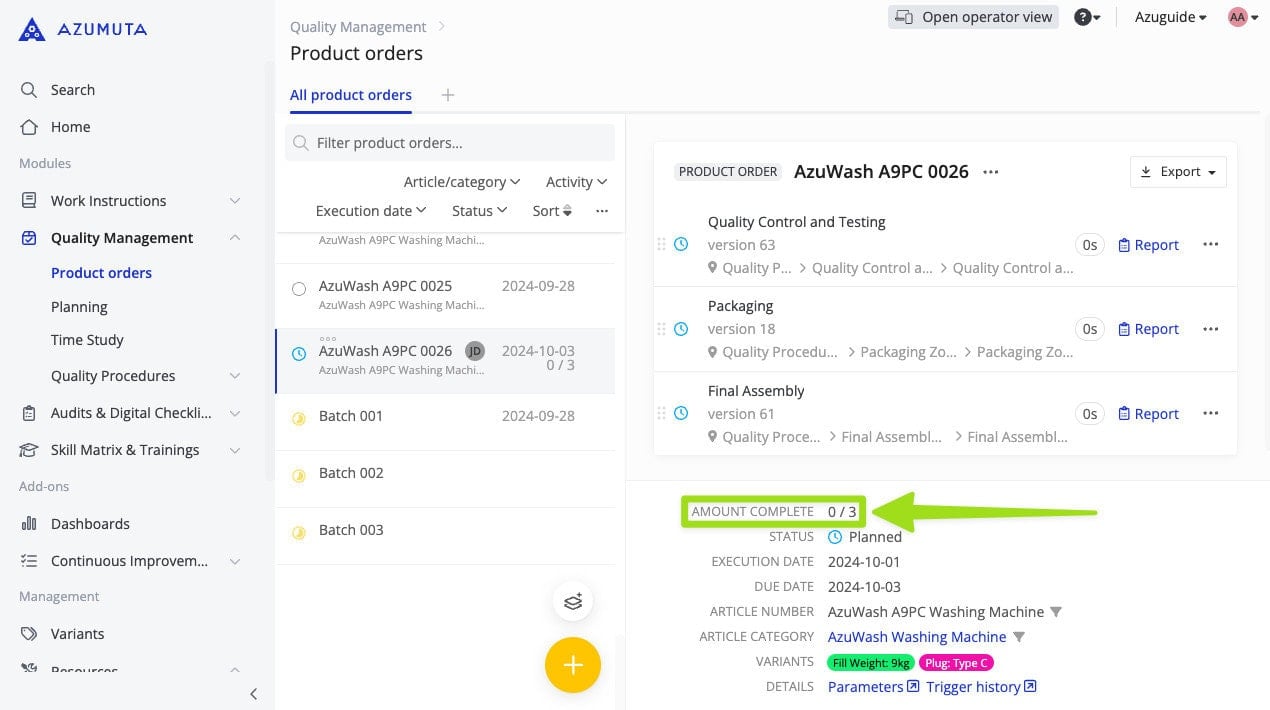
When creating a product order, you can input the product order amount in the following field:
You can also change the product order amount within an existing product order by editing it, specifically in this field:
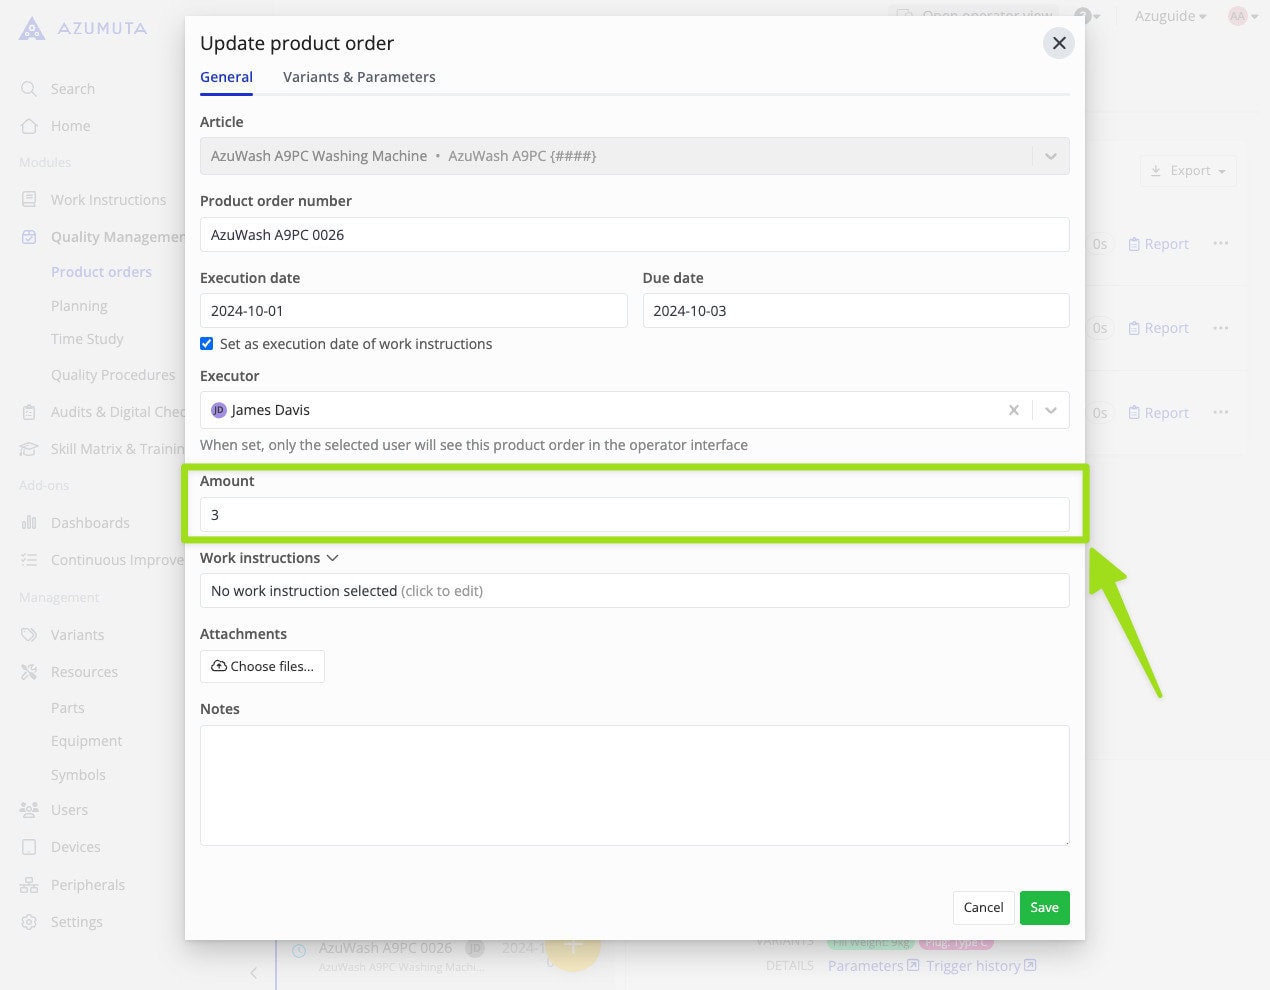
Click here to learn more about product orders.
Product Order Due Date #
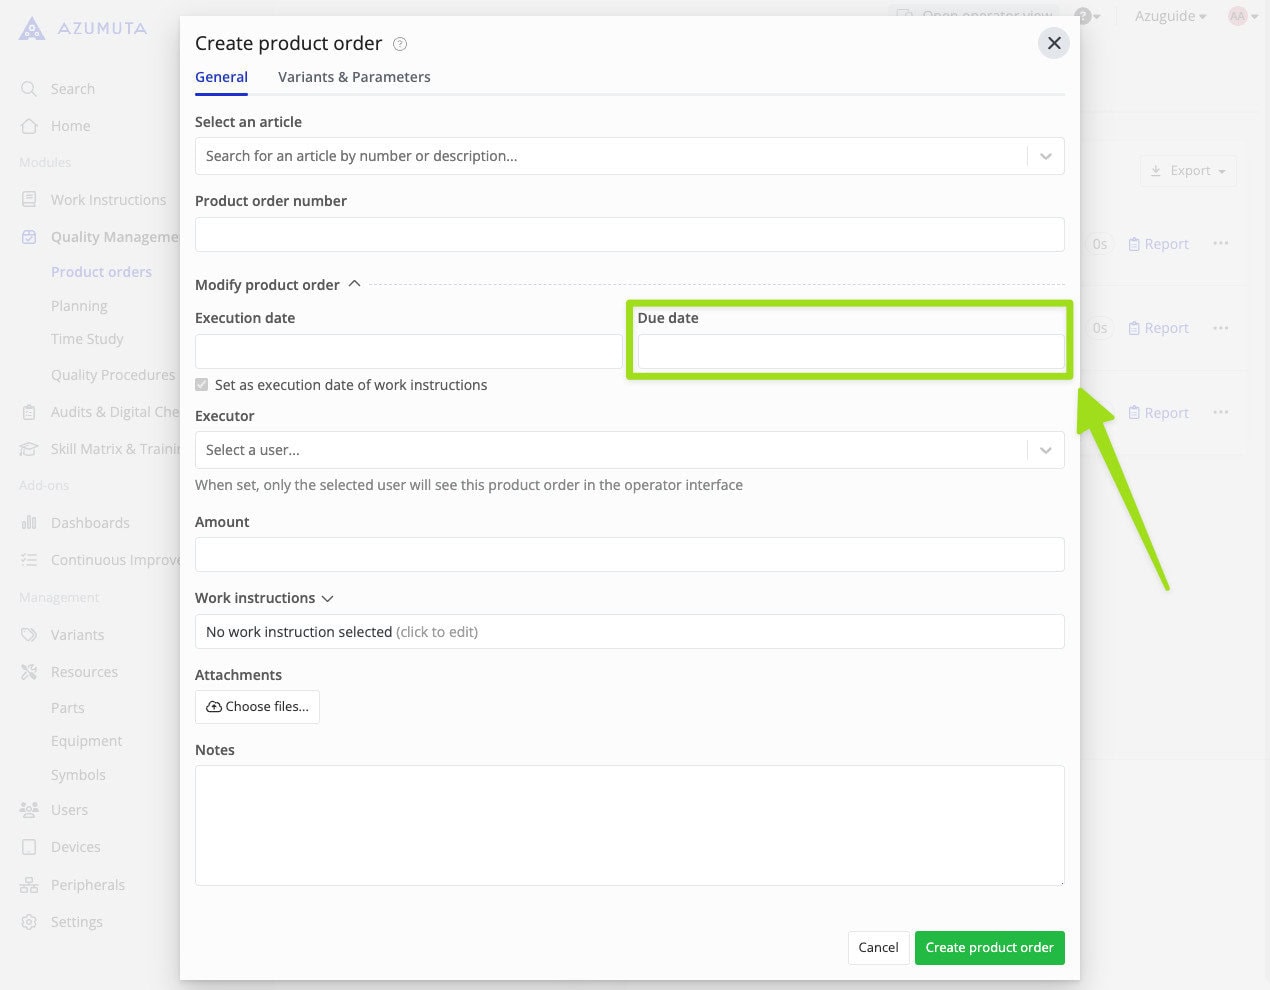
The product order due date refers to the deadline for when the product order must be finished by your operator.
When creating a product order, you can input the product order due date in the following field:
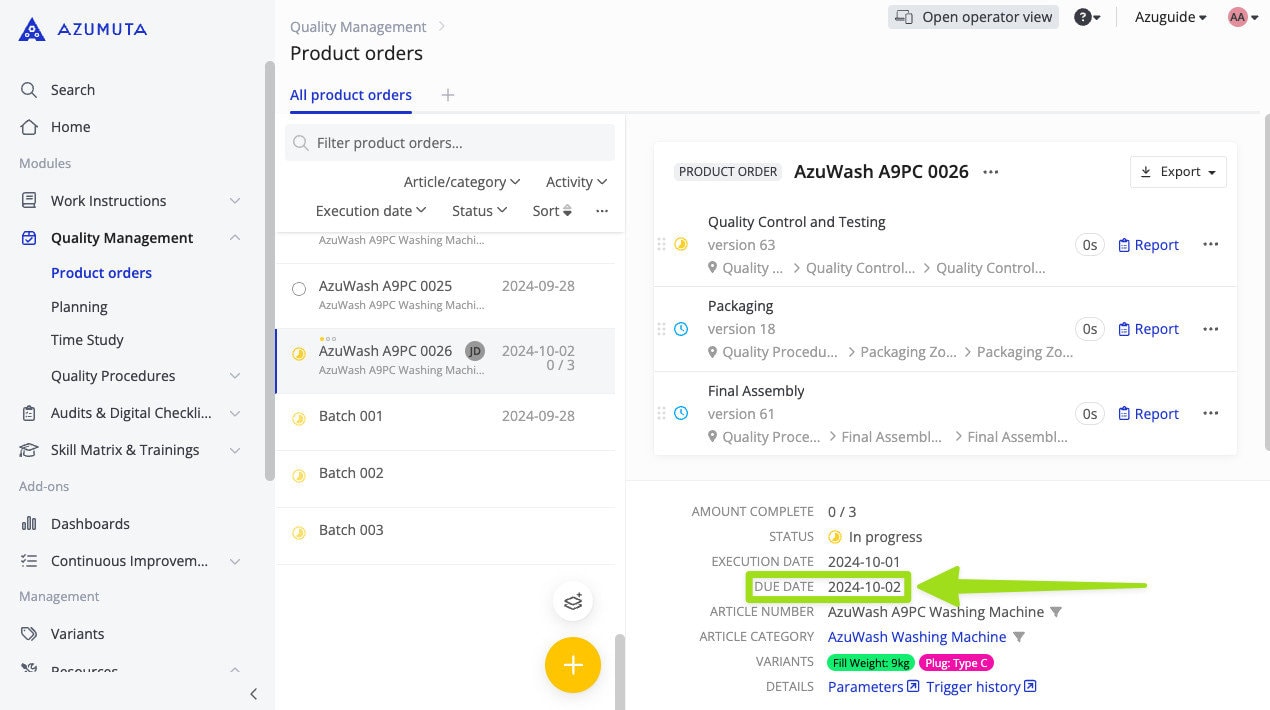
You can also change the product order due date within an existing product order by editing it, specifically in this field:
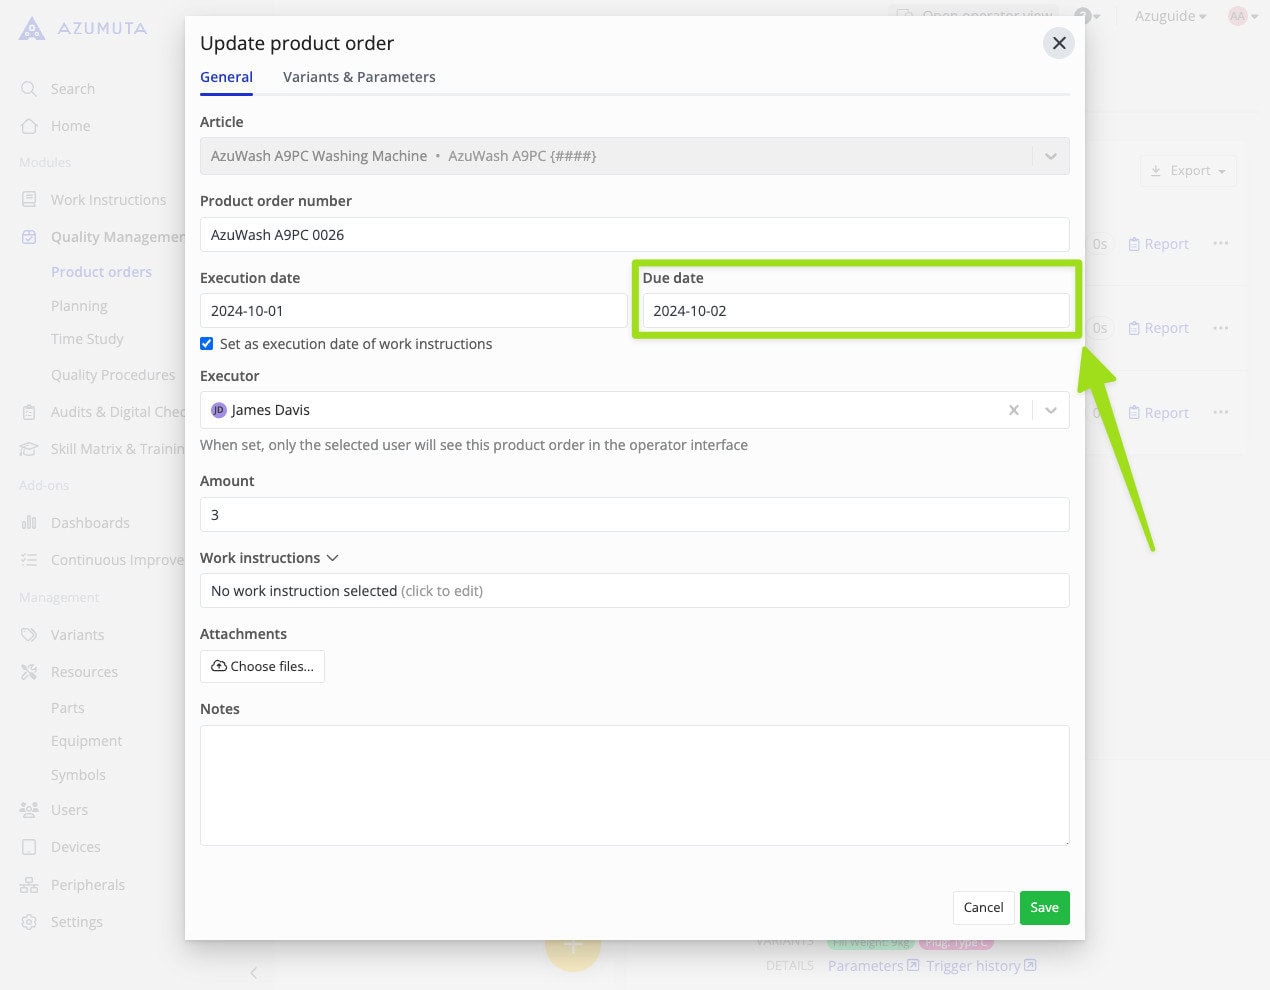
Click here to learn more about product orders.
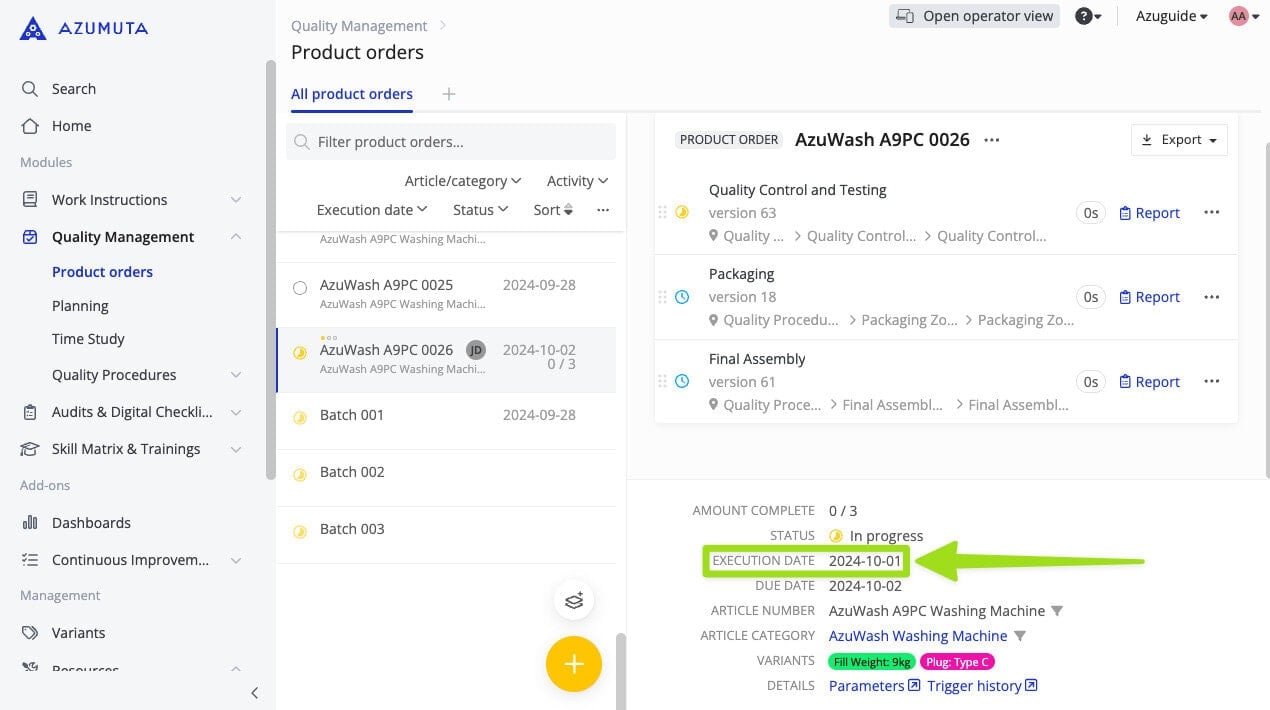
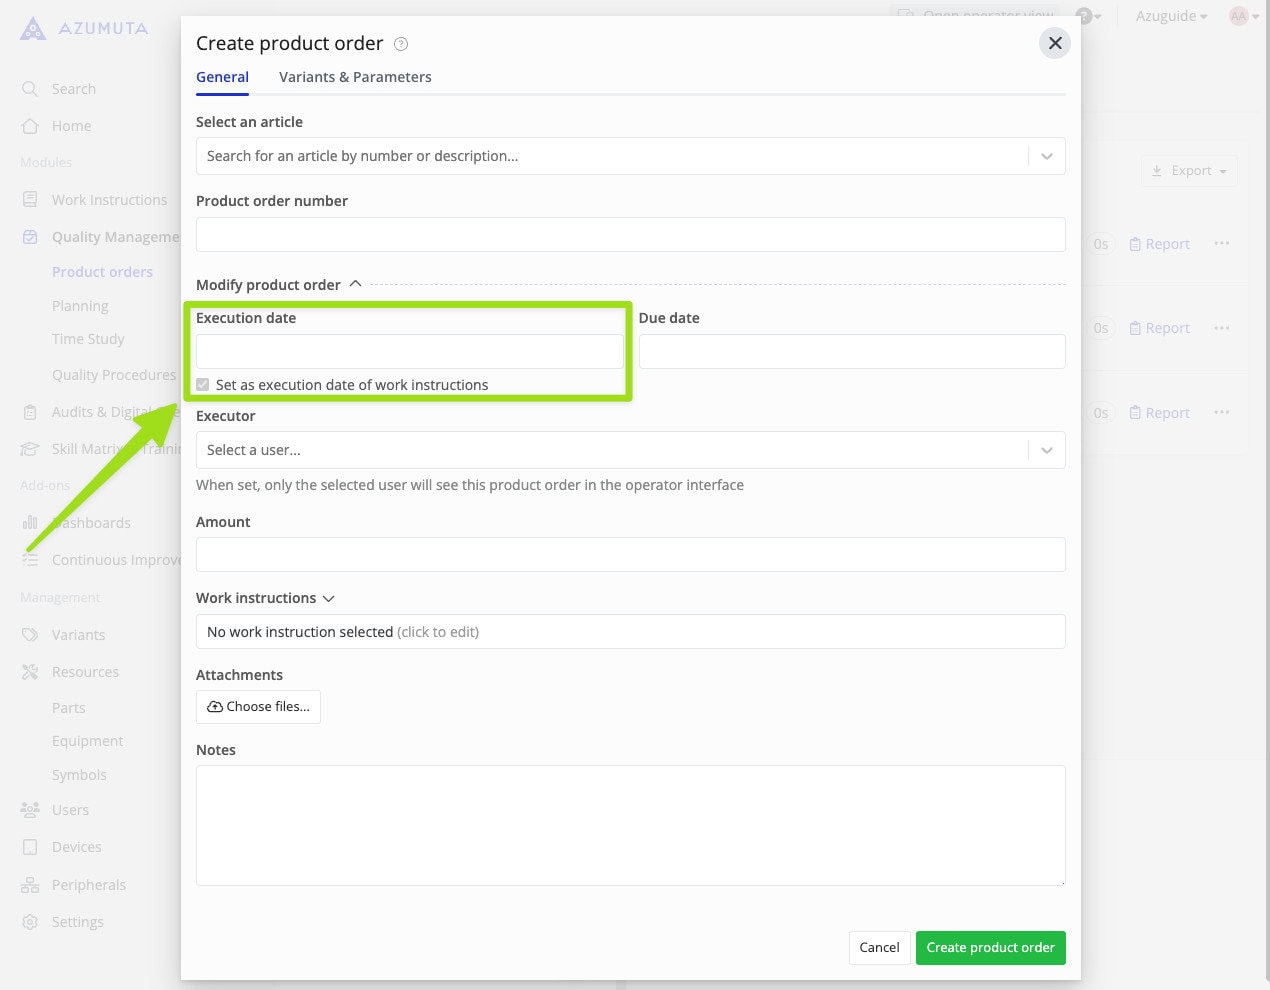
Product Order Execution Date #
The product order execution date refers to the date when your operator must start working on that product order.
When creating a product order, you can input the product order execution date in the following field:
You can also change the product order execution date within an existing product order by editing it, specifically in this field:
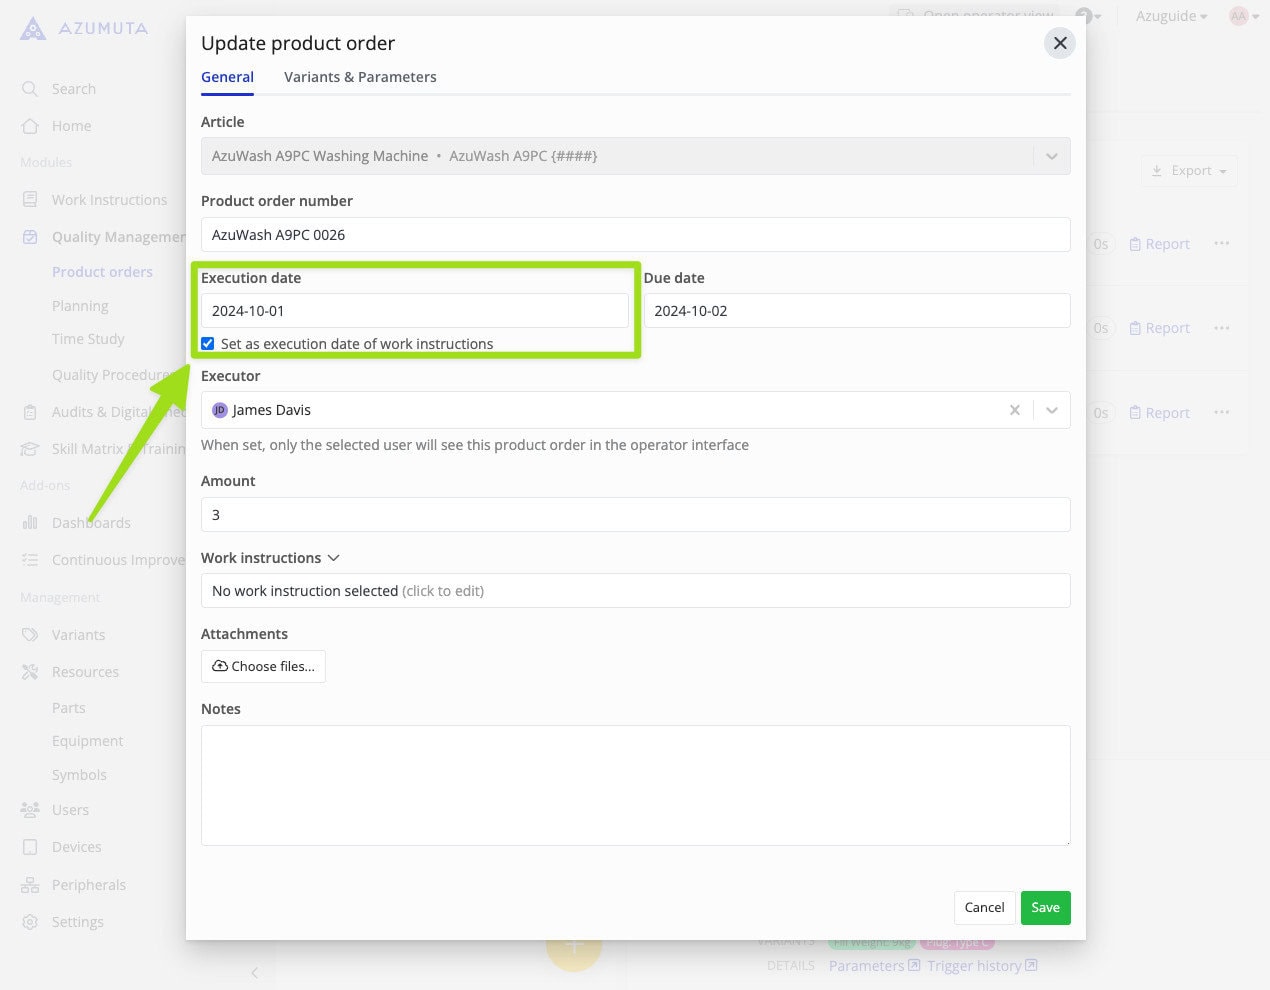
Click here to learn more about product orders.
Product Order Executor #
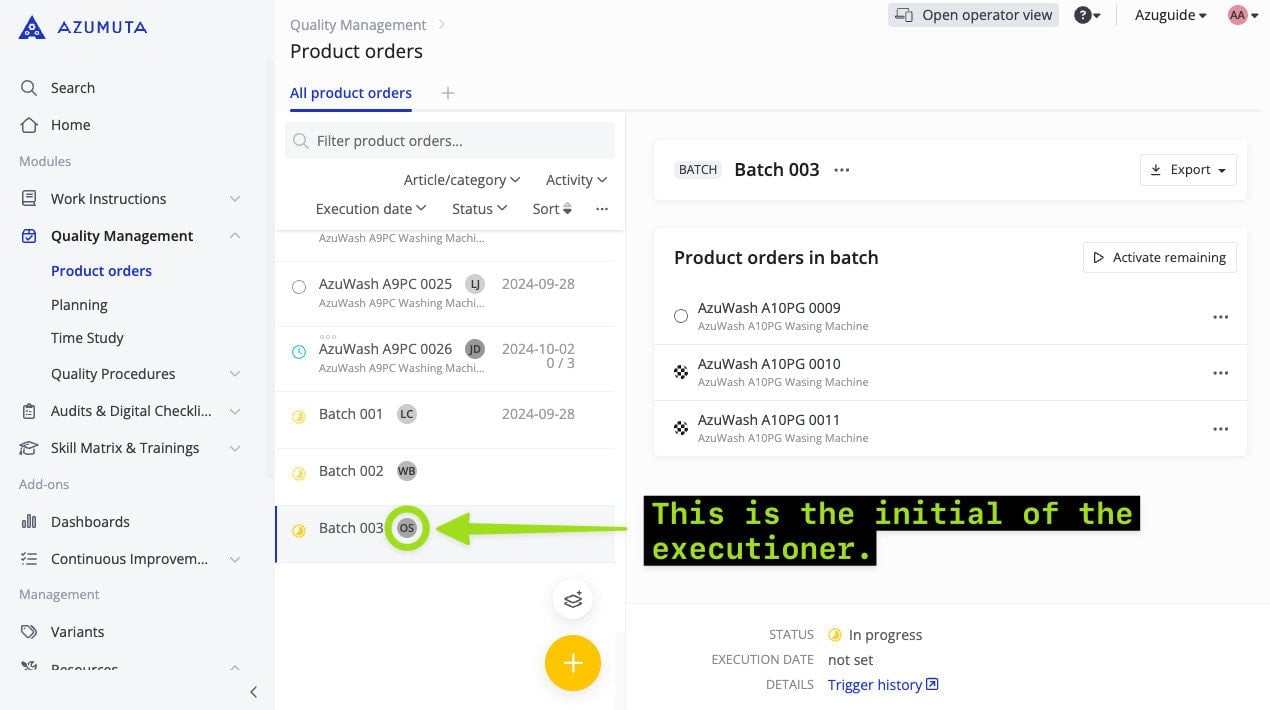
The term “product order executor” refers to the operator that is assigned to execute a particular product order.
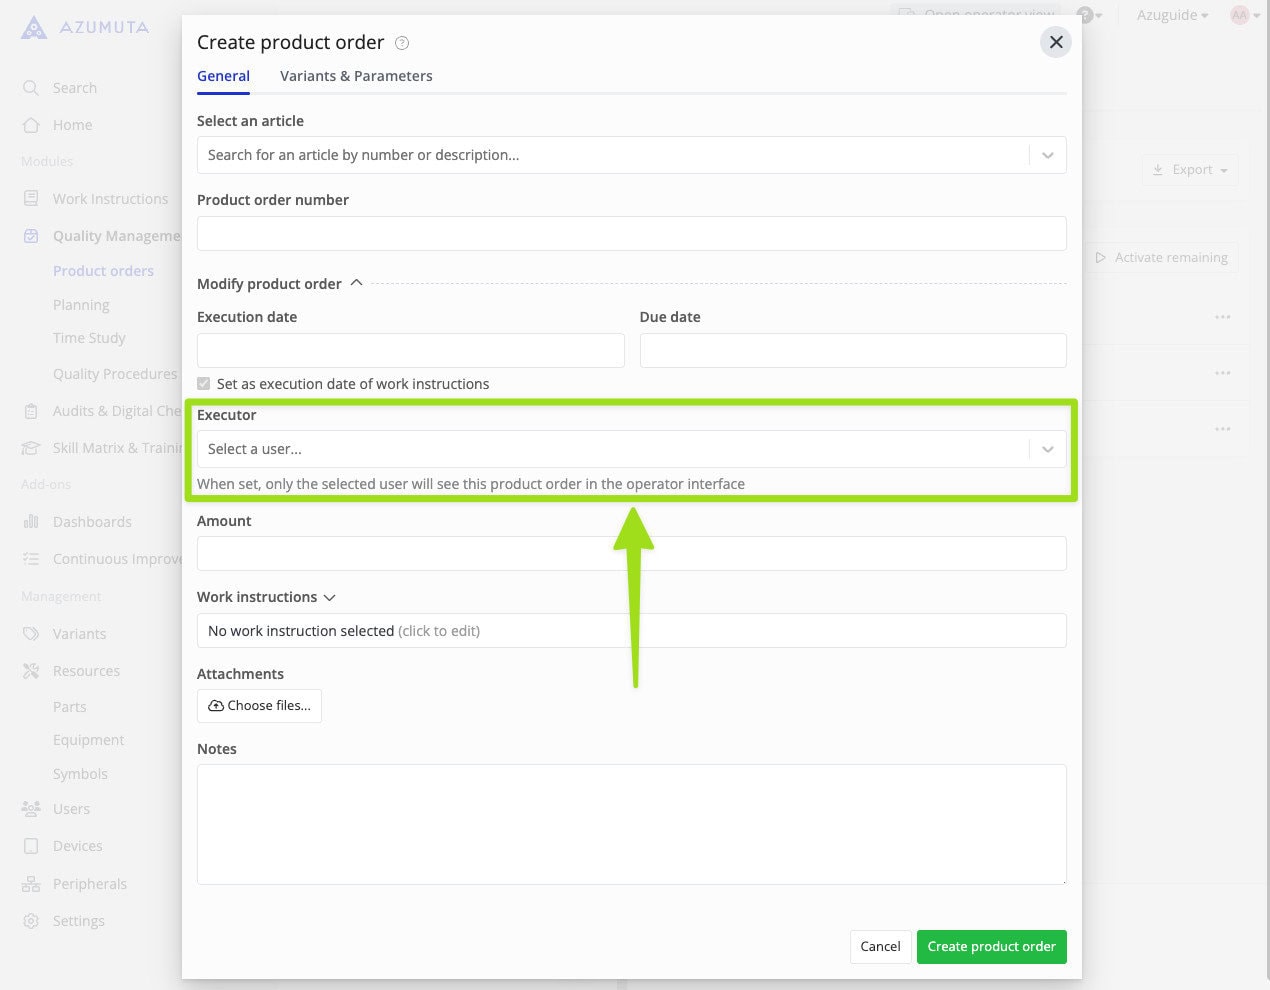
When creating a product order, you can select the product order executor in the following field:
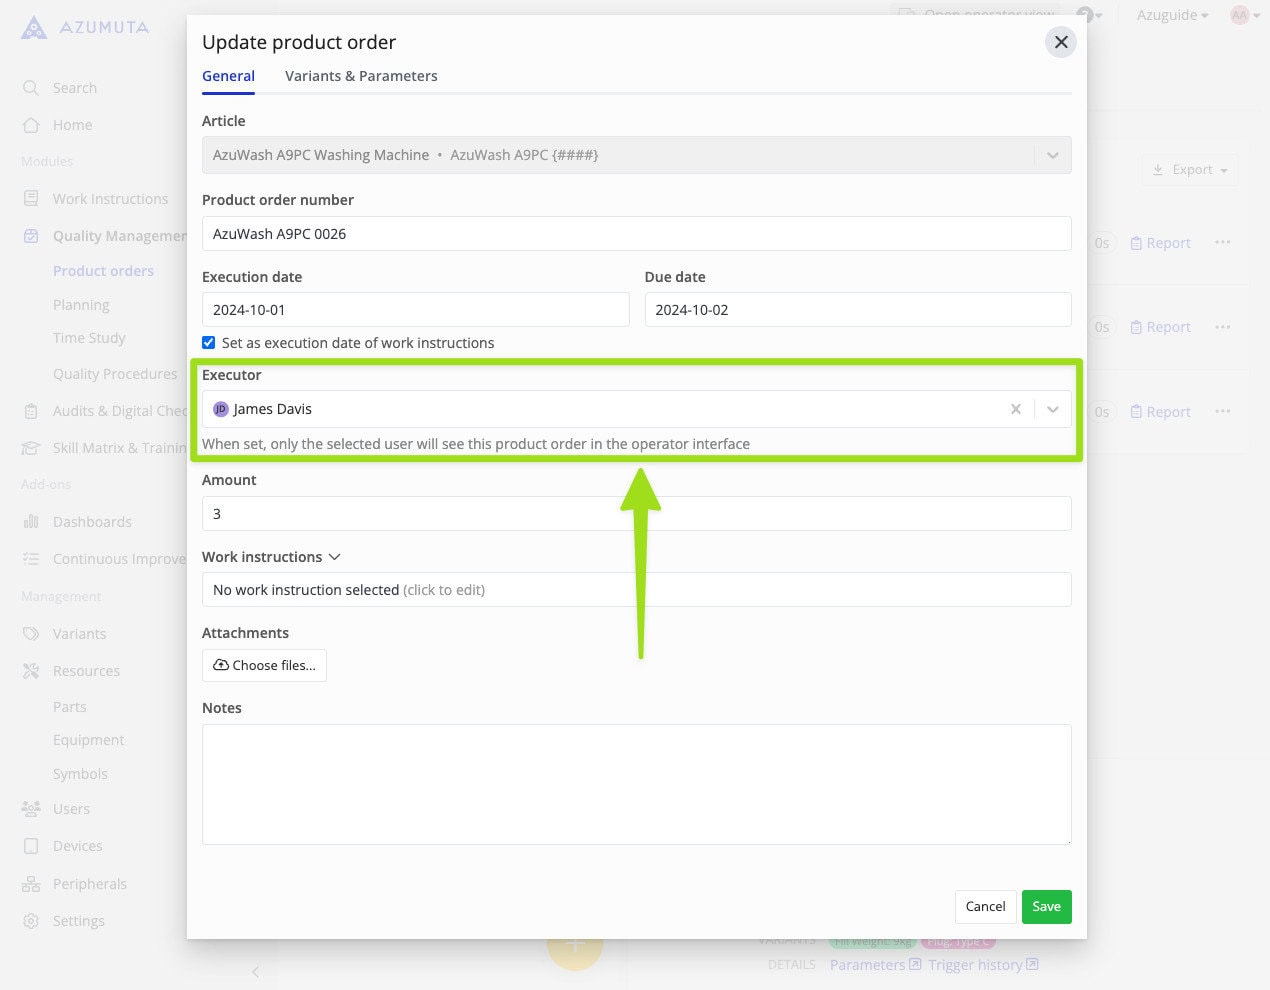
You can also change the product order executioner within an existing product order by editing it, specifically in this field:
Click here to learn more about product orders.
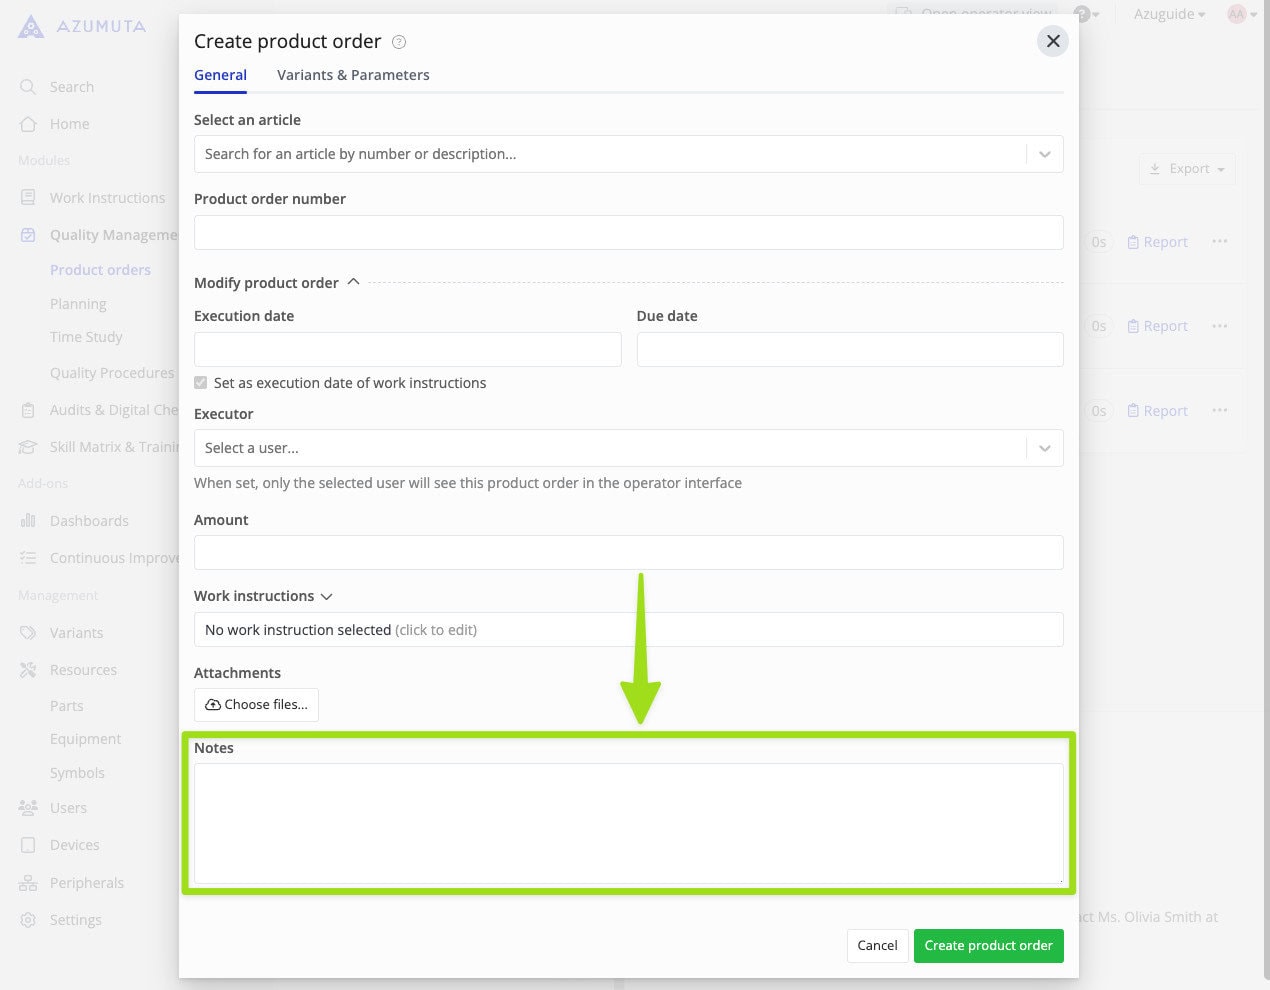
Product Order Notes #
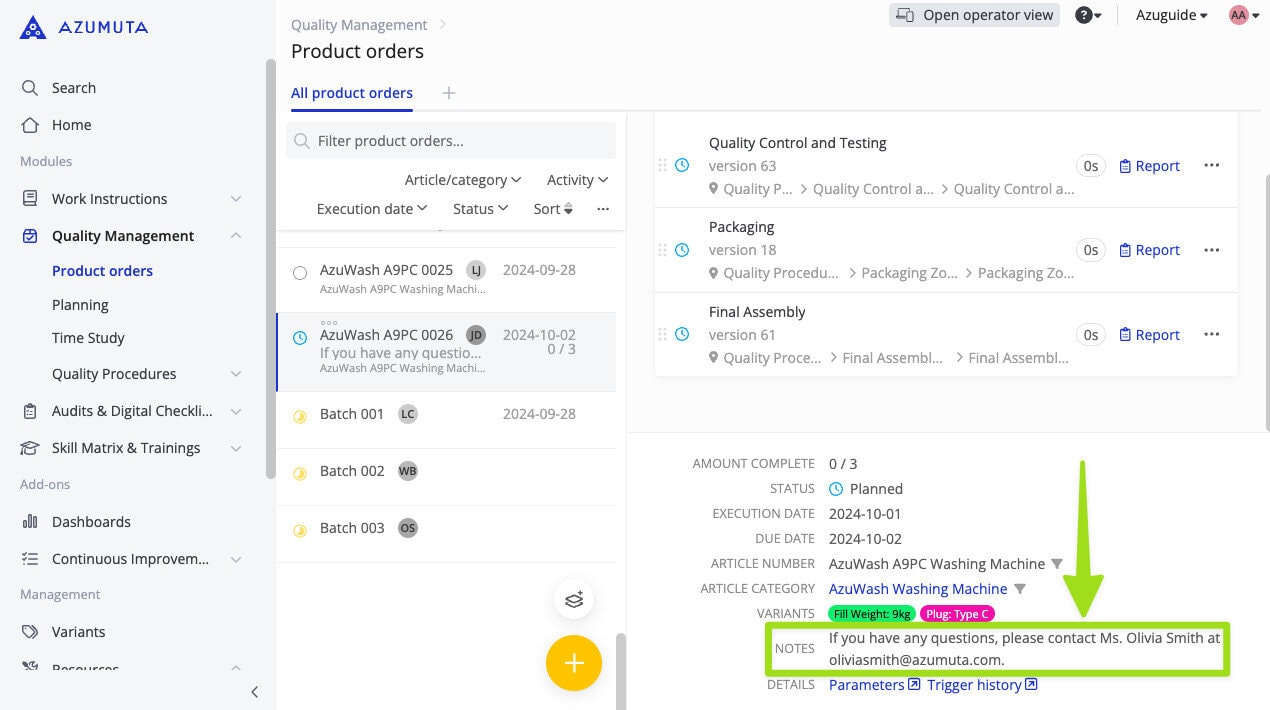
In a product order, you write some notes. These notes can be used to provide additional product order information to your operators and other admins.
When creating a product order, you can type in your product order notes in the following field:
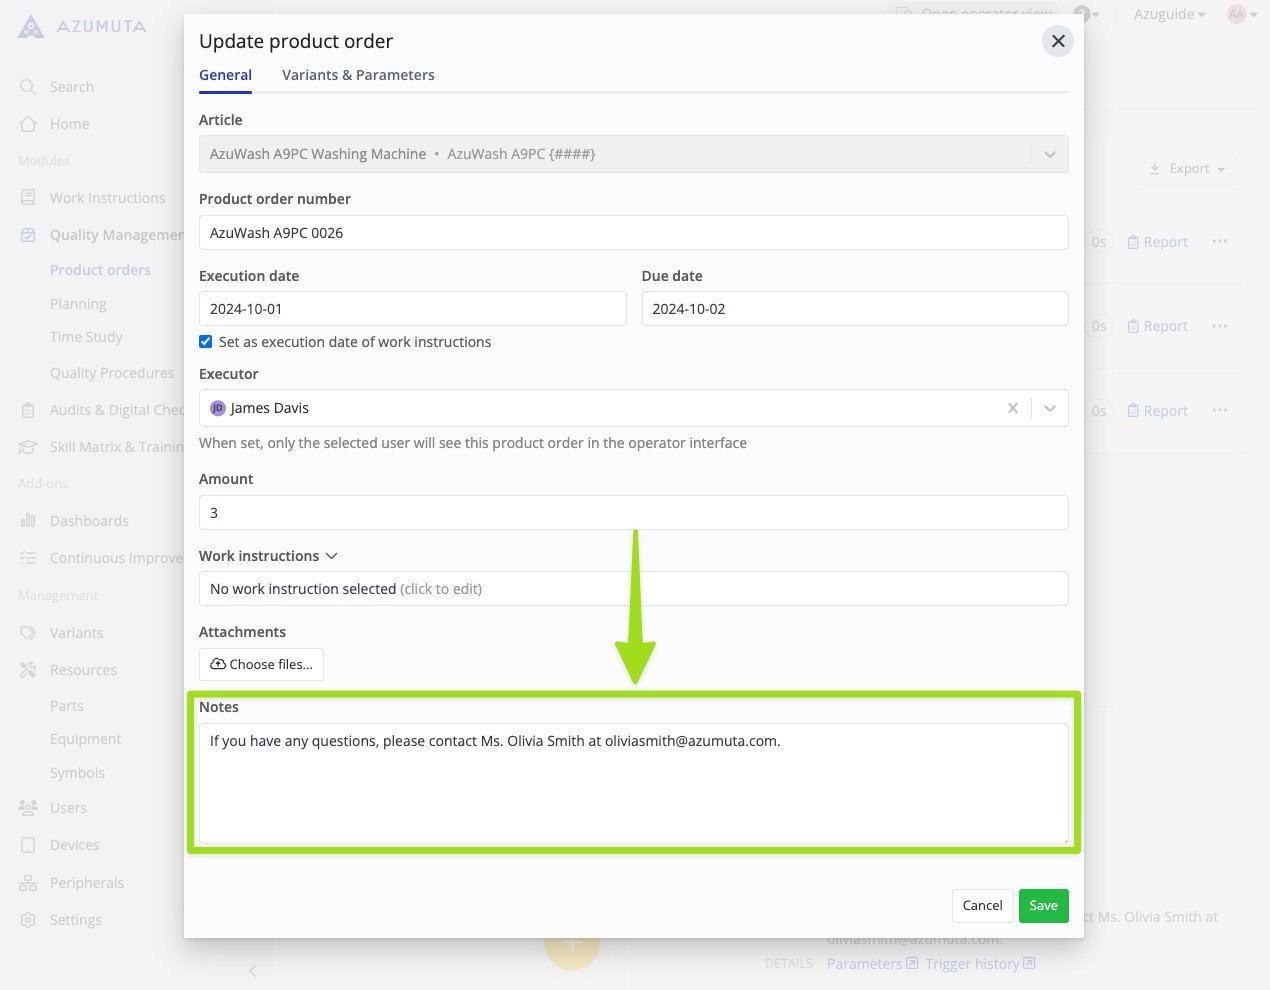
You can also add/edit notes to an existing product order by editing it, specifically in this field:
Click here to learn more about product orders.
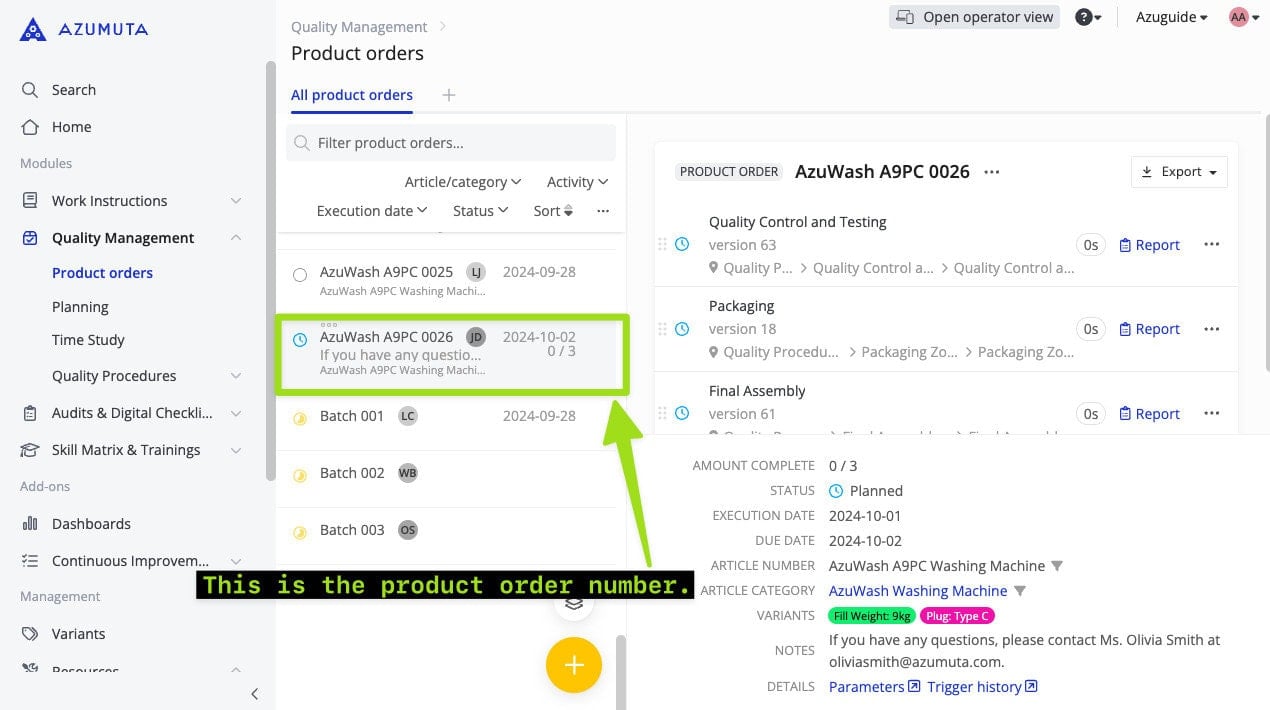
Product Order Number #
A product order number is the number is the name of a product order.
V #
Variant #
A variant is a variation of a product based on their specifications. For example, several washing machines might have an identical build, but they have different cable plug types because they will be sold in countries with differing power outlet types. Thus, each cable plug type is a variant.
As a result, the work instructions might change (slightly) depending on the variant of this product. These specific steps can be configured per option/variant by using “variants” within Azumuta.
Therefore, you can simply define in a grid which steps are applicable to all variants and which ones are applicable only to specific variants. Hence, you don’t have to create a new & separate work instruction for each variant. You can use one work instruction for multiple product variants.
In addition, if your Azumuta workspace is linked to an ERP system and the information about variants is transferred with a production order, the work instructions are automatically configured for these applied variants. This ensures that the operator only sees the instruction steps that are applicable to that specific product variant – preventing any possible human error in the process.
Please contact support@azumuta.com to learn more.

Click here to learn more about variants.