
How to Manage User Groups
What Is a User Group?
Just as the name suggests, a user group is a group consisting of Azumuta user accounts within a workspace. They’re usually grouped together because of their similarities (such as their status as an admin/operator, their expertise level, their department, etc.).
How to Add a New User Group
- Click on “Users” under “Management”.
- Click on “Groups”.
- Click on the yellow plus button.
- Type in the group’s name.
- If this is a group for admins, then tick the box. If this is a group for operators, then don’t tick the box. You can’t change this setting later on.
- Choose the group’s color.
- When you’re done, click on “Add”.
How to Add a User to a User Group
- Click on “Users” under “Management”.
- Click on “Groups”.
- Click on “Assign to Groups”.
- Tick the appropriate box(es) as desired.
How to Edit a User Group
Here’s how to open the user group editor:
- Click on “Users” under “Management”.
- Click on “Groups”.
- Click on the three-dot icon next to the group that you would like to edit.
- Click on “Edit group”.
- When you’re done, click on “Save”.
Here’s what you can edit:
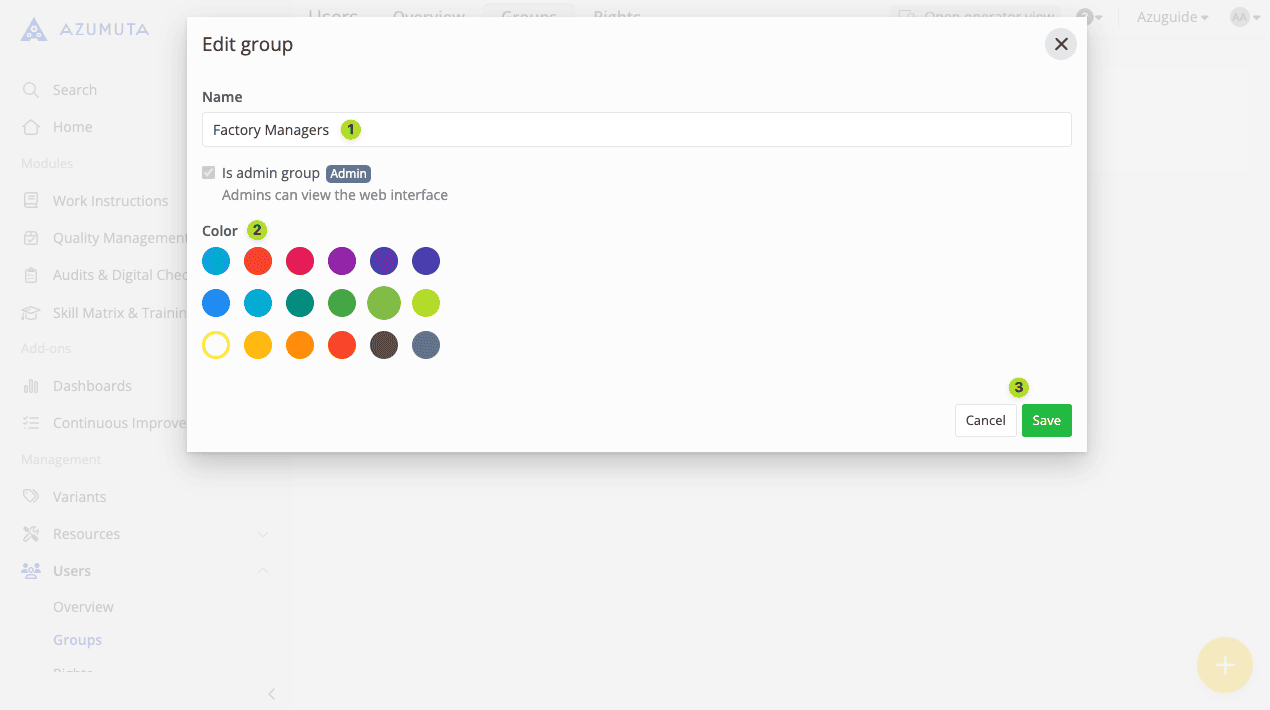
- Edit the user group’s name here.
- Edit the user group’s color here.
- When you’re done with your edits, click on “Save”. However, if you would like to cancel your edits, click on “Cancel”.
How to Delete a User Group
- Click on “Users” under “Management”.
- Click on “Groups”.
- Click on the three-dot icon next to the group that you would like to edit.
- Click on “Delete group”.
- Click on “Delete”.