
How to Add a Torque Check to an Instruction Step
Note: Before following the steps below, you must first integrate a digital torque wrench into your Azumuta workspace. See how to integrate a digital torque wrench for instructions.
How to Add a Torque Check to an Instruction Step
Just like any other product check, a torque check can be added to an instruction step. Here’s how to do it:
- Navigate to the instruction step where you would like to add a torque check into, and click on “Open”.
- Click on the “Check” tab.
- Select “Torque”.
- Configure the torque check (we will explain the details in the guide section under the video).
How to Configure a Torque Check
In this guide section, we will show you the configuration options of a torque check. The torque check configurations can be divided to 4 option sections:
- Operator Preview
- Peripheral Options
- Torque Options
- General Options
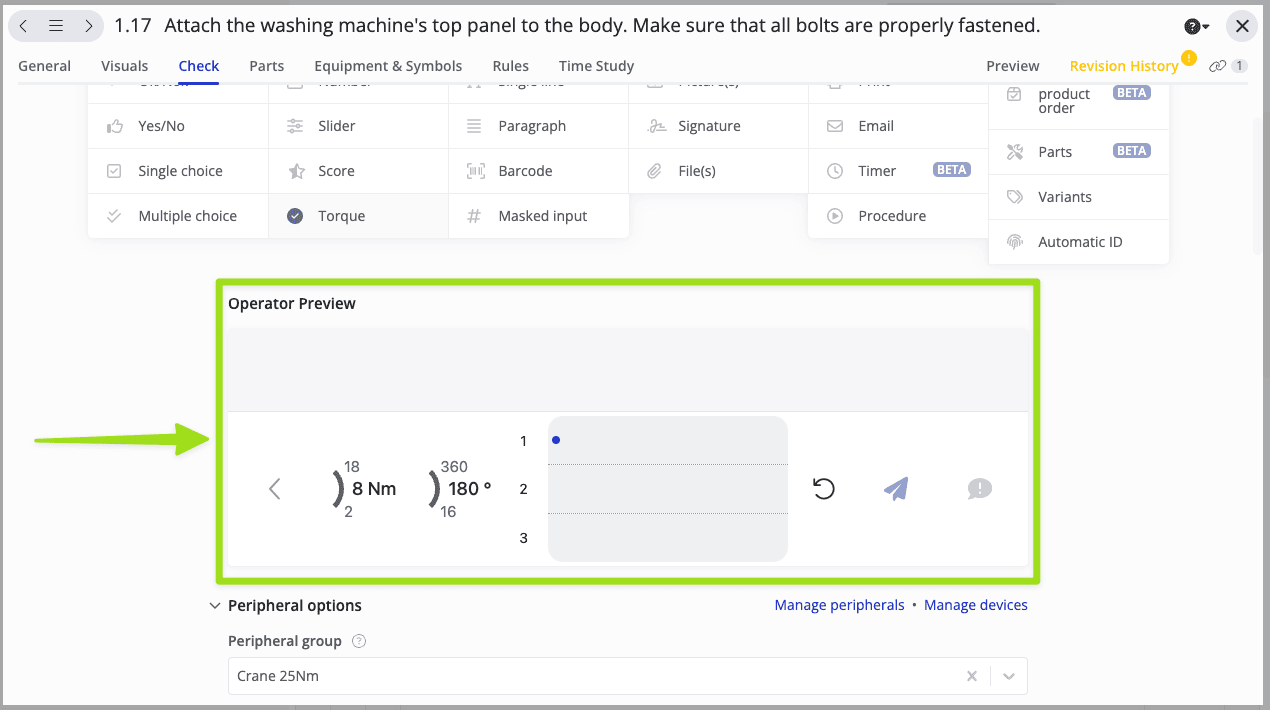
Operator Preview
The operator preview shows how the torque check will appear on an operator’s screen. The edits that you’ve made on the other options will be automatically applied here in real-time.
Therefore, after you’ve finished configuring all other torque check configuration options, it’s a good idea to consult the operator preview. That way, you can check whether everything is in order, before assigning it to an operator.
Peripheral Options
The settings here mainly revolve around configuring the digital torque wrench that your operator will use in this torque check.

- Click to manage the peripheral devices that are linked to your Azumuta workspace.
- Click to manage the devices that are linked to your Azumuta workspace.
- Select the peripheral group that your operator will use in this torque check. Hover your cursor over the question mark icon to learn more.
- Select the peripheral preset that your operator will use in this torque check (if any). Hover your cursor over the question mark icon to learn more.
- Enter the parameter set name (if any).
- Choose the torquing rotation direction (clockwise/counterclockwise/automatic).
- In Azumuta, if the torque value that was given by the operator’s digital torque wrench doesn’t match the torque value (or its tolerance limits) set by the admin on an instruction step, then the operator must repeat that step again until their torque value fulfills the requirements set by the admin. Otherwise, the operator can’t proceed to the next instruction step. In this field, you can choose the time that an operator has to wait after giving the incorrect torque value, before they can re-try again. See the description under “cycleEndTime” to learn more.
- These are the settings to adjust the digital torque wrench that your operator will use. The available settings that will pop up here will be based on the digital torque wrench type that your operator will use.
- Select whether to allow your operator to manually type in the torque value that they’ve provided on this torque check.
- Select whether to turn on the auto-submit feature (and configure the auto-submit time). If this is turned on, then your operator won’t need to click on the submit button after they’ve finished all tightenings within an instruction step.
Torque Options
These settings allow you to set the standards that your operator must follow when performing this torque check.

- Input the number of torque tightening(s) that your operator must do in this torque check.
- Input the targeted torque value that your operator should deliver at each tightening.
- These two fields show the tolerated maximum and minimum torque values that your operator must deliver at each tightening. You can’t edit these two fields manually. Instead, you should use the fields on No.4 or No.5 instead.
- Input the tolerated deviations from the targetted torque value (measured in nominal Newton-meter/Nm) on these 2 fields. You can also input “0” if you tolerate no deviations. If you want to use these 2 fields, then make sure that the toggle on No.7 is off.
- Input the tolerated deviations from the targetted torque value (measured in percentage) on these 2 fields. You can also input “0” if you tolerate no deviations. If you want to use these 2 fields, then make sure that the toggle on No.7 is on.
- If you switch this toggle on, then the tolerated maximum & minimum torque values (be it on Nm or percentage) will be automatically synchronized.
- If this toggle is on, then you will use the fields on No.5 (and not on No.4). On the other hand, If this toggle is off, then you will use the fields on No.4 (and not on No.5).
- Input the targeted torquing angle that your operator should adhere to at each tightening.
- Input the tolerated maximum to the torquing angle that your operator should adhere to at each tightening.
- Input the tolerated minimum to the torquing angle that your operator should adhere to at each tightening.
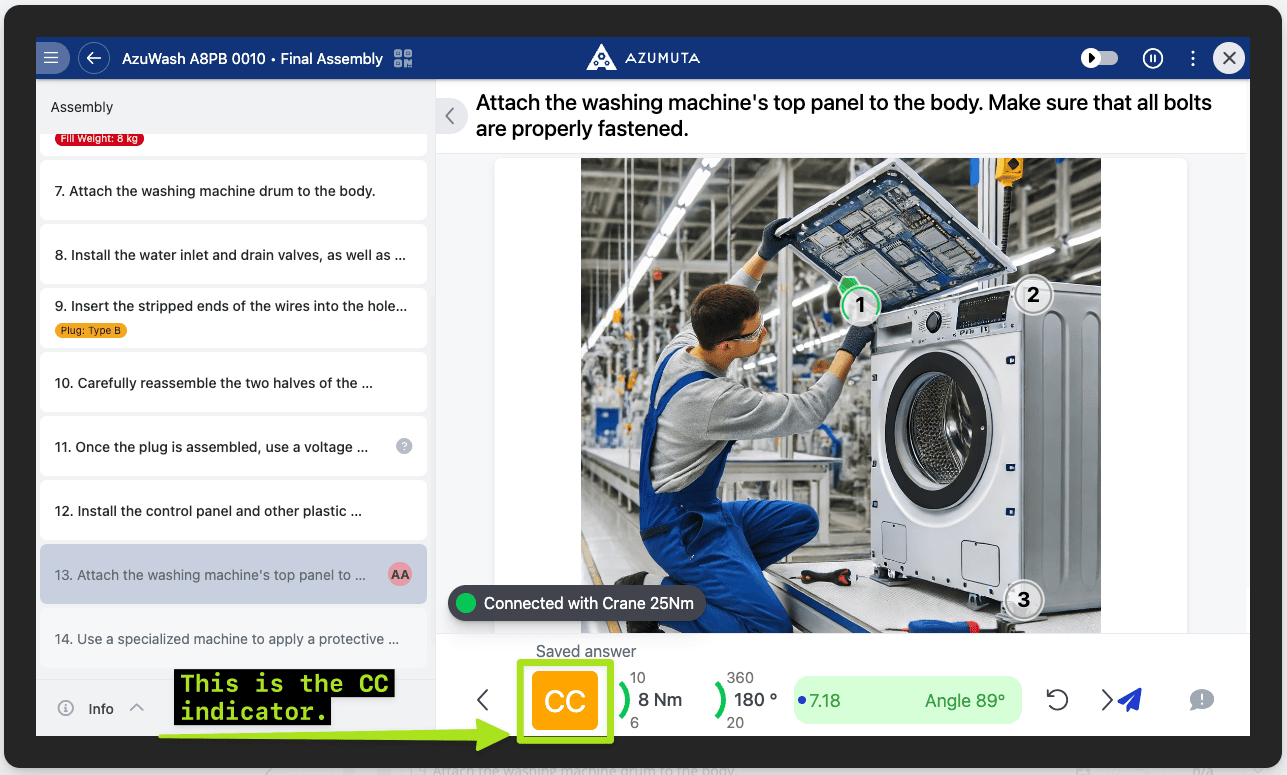
- If this toggle is on, then you will have the Critical Characteristic (CC) indicator. It emphasizes to your operator that this particular instruction step is critical and that there’s no room for error. Take a look at the image below to see the CC indicator.
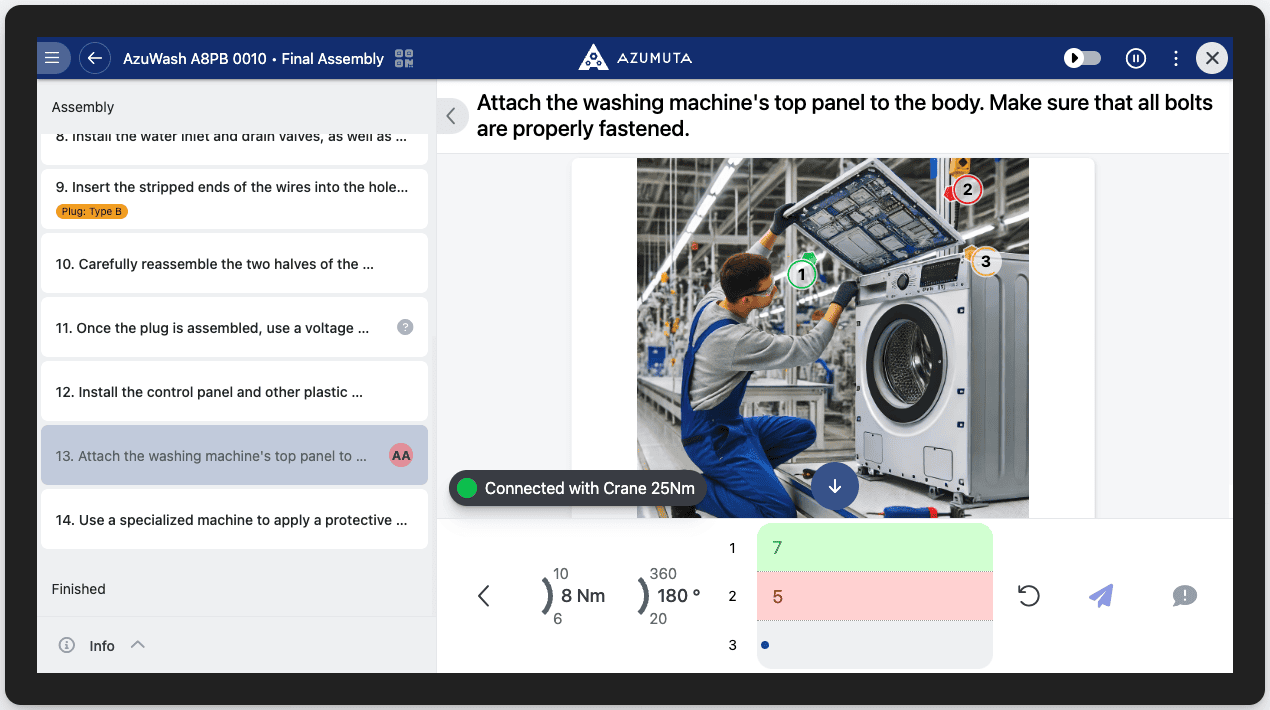
- If this toggle is on, then you can add numbers with a highlighter on this particular instruction step. Each number’s highlighter is color-coded: green for tightenings that fulfill the standards set by the admin (OK) and red for tightenings that don’t fulfill these standards (NOK). These two colors are fixed and can’t be edited. However, you can edit the color of the number highlighter of the tightening that the operator should currently do. For example in the image below, tightening 1 is OK, tightening 2 is NOK, and the operator is currently on tightening 3 (we set the custom color to be yellow).
- Select whether you would like to display the reset button on the operator’s screen. The reset button can be used by the operator to re-do a tightening
General Options
These are the generic product check settings that administer the general properties of a product check.
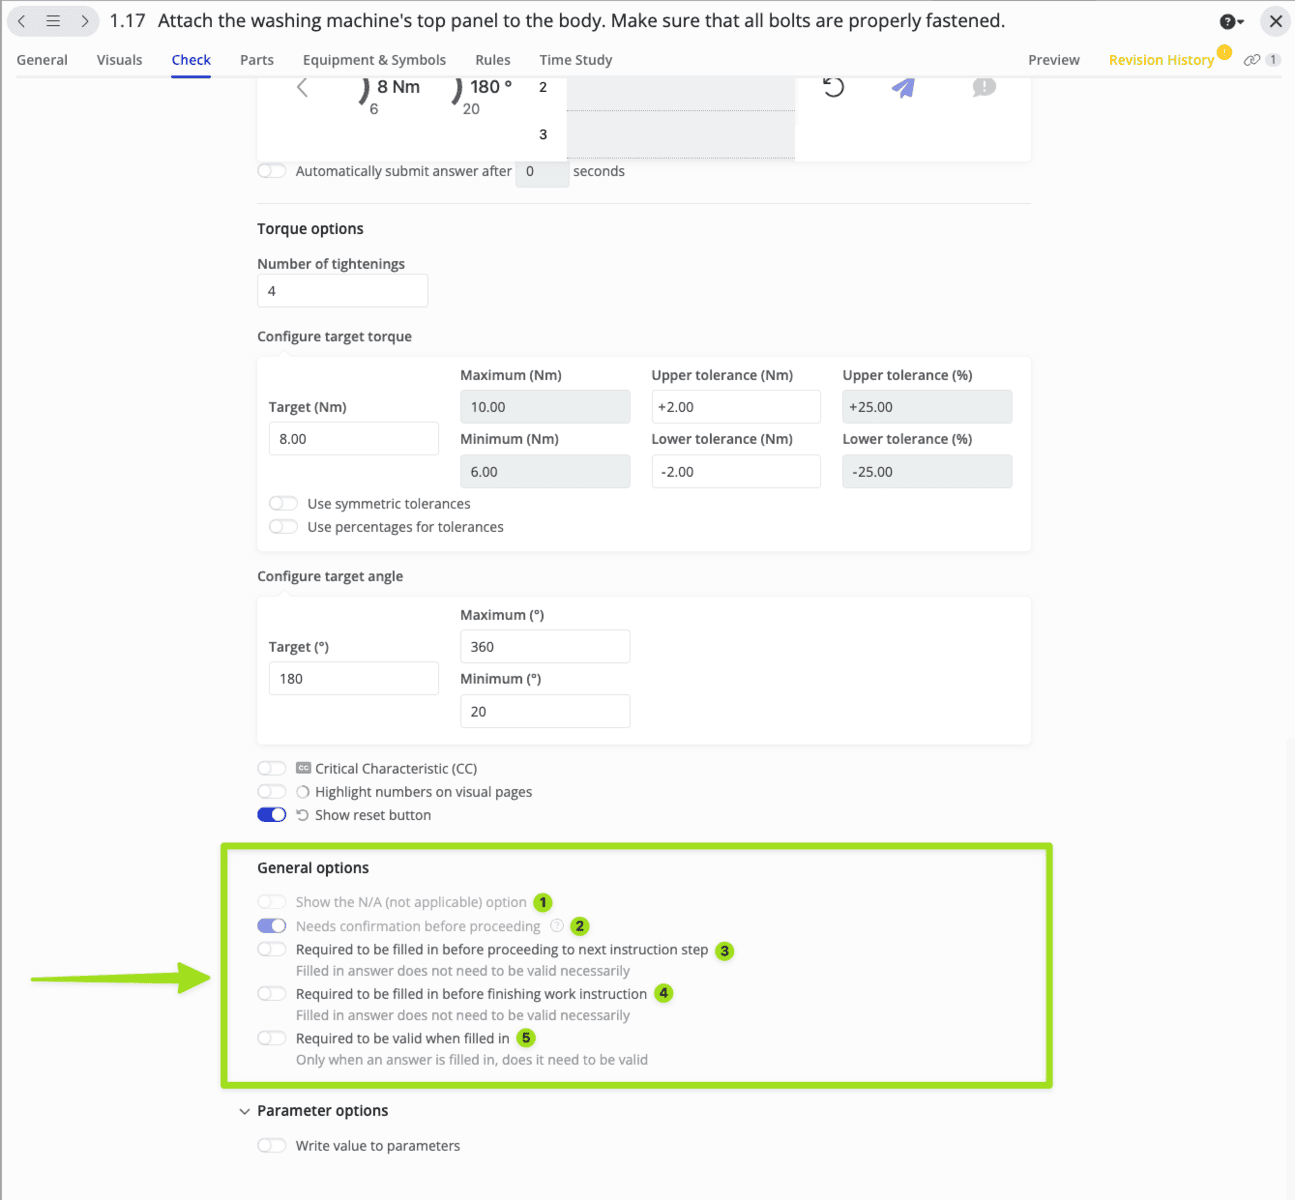
- Select whether to allow the operator to input the answer(s) to this product check as “not applicable/NA” (this toggle can’t be activated on this product check).
- Select whether the answer(s) to this check can only come from a digital torque wrench (this toggle can’t be deactivated on this product check).
- Select whether this product check must be filled in before the operator can proceed to the next instruction step.
- Select whether completing this product check is mandatory in order to finish the work instruction.
- Select whether the answer(s) to this product check should conform to the pre-set format & tolerated value limits.
Note: To speed up the configuration process of your torque checks, you can also use our peripheral preset feature.