
Multi Person Approval: How to Edit or Delete an Approval Board
See how to create an approval board for background. This article explains how to edit or delete it.
Note: When creating an approval board, you can choose whether to use a single-wave approval template or a dual-wave approval template. See single-wave and dual-wave approval templates to learn more about both templates. The examples in this article use the dual-wave approval template.
How to Get to the Approval Board Editor
Here’s how you can access the approval board editor:
- Go to “Continous Improvement” in the side panel.
- Click on “Settings”.
- Click on the three-dot icon next to the approval board that you wish to edit.
- Click on “Edit board”.
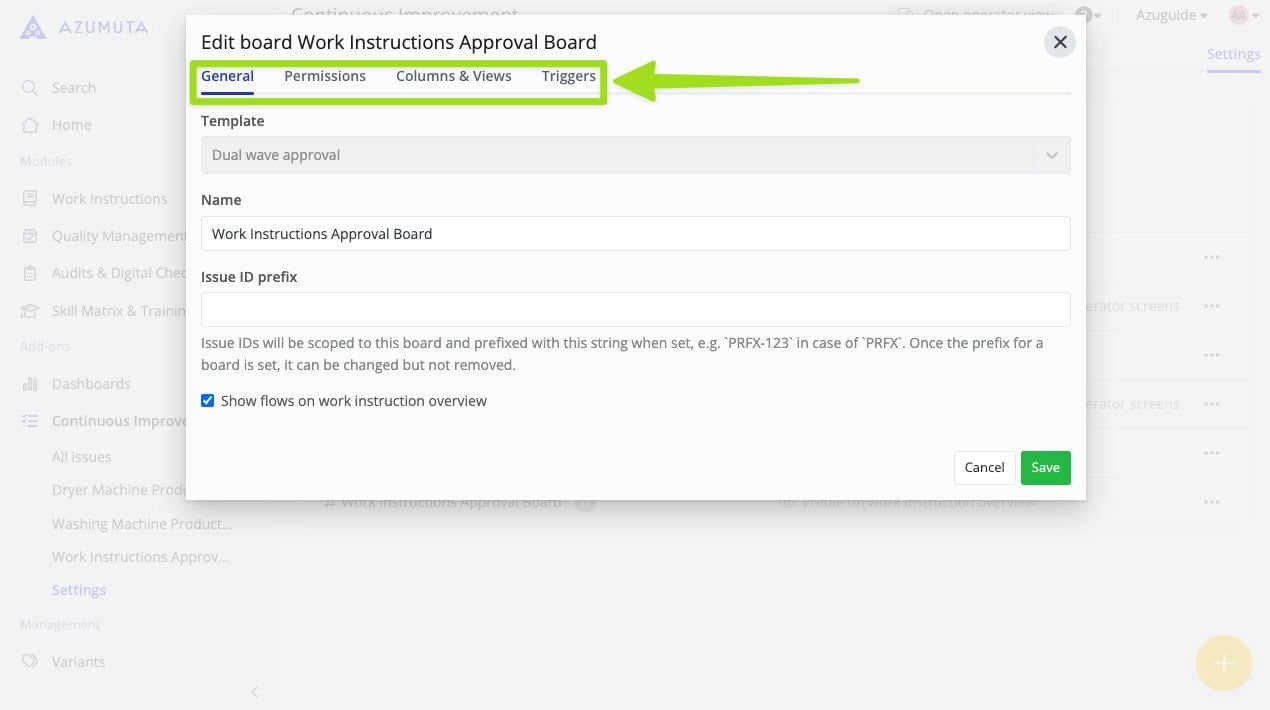
There, you will see 4 editor tabs: General, Permissions, Columns & Views, and Triggers. Simply click on a tab to open it. We will cover each tab further in the guide sections below:
The General Tab
The General tab is the first tab that will appear whenever you open the approval board editor. Here’s what you can edit on this tab:
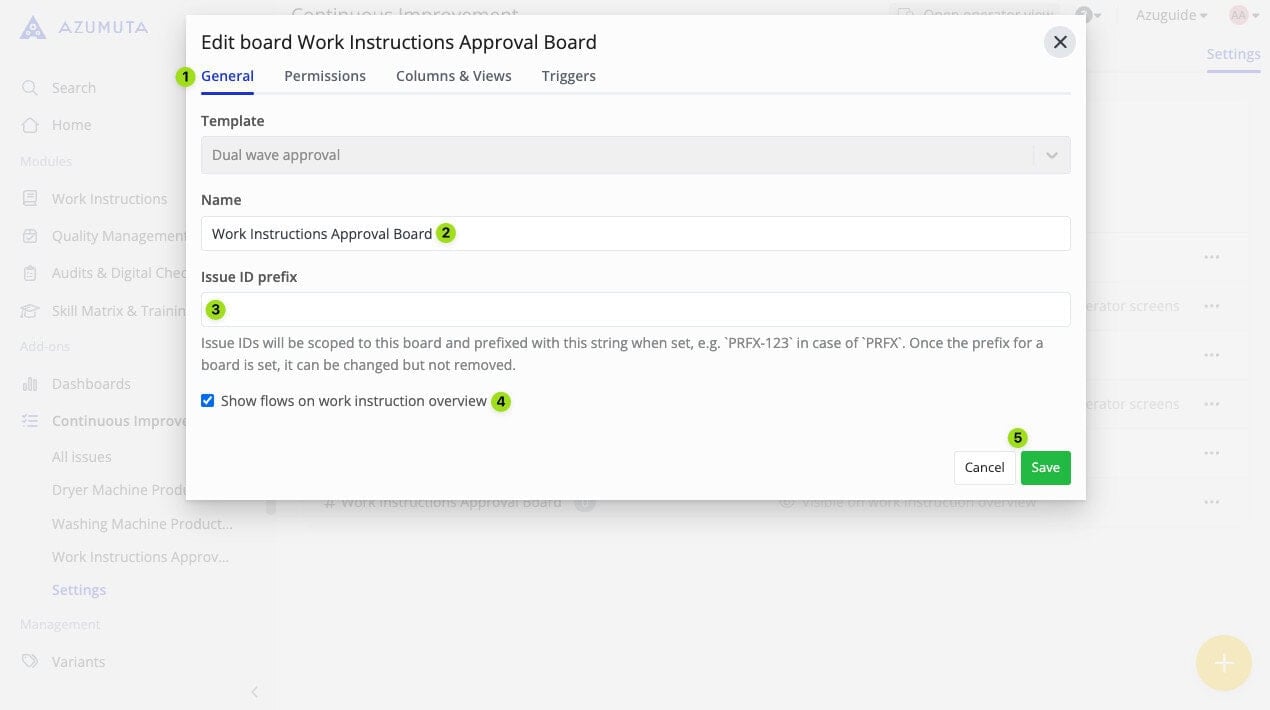
- Click to open the General tab.
- You can edit the approval board’s name here.
- If you want the approval requests that fall under this approval board to have a predetermined prefix, then type the predetermined prefix here. Please be aware that there’s a 5-character limit for the prefix. For example, you can use the prefix “RQST” (which is short for “request”). Thus, the approval requests in this approval board will be named “RQST-1”, “RQST-2”, and so forth.
- Select whether the approval flows that fall under this approval board are to be visible on the work instruction overview.
- When you’re done editing, click on “Save”. However, if you would like to proceed without saving the changes that you’ve made, click on “Cancel”.
The Permissions Tab
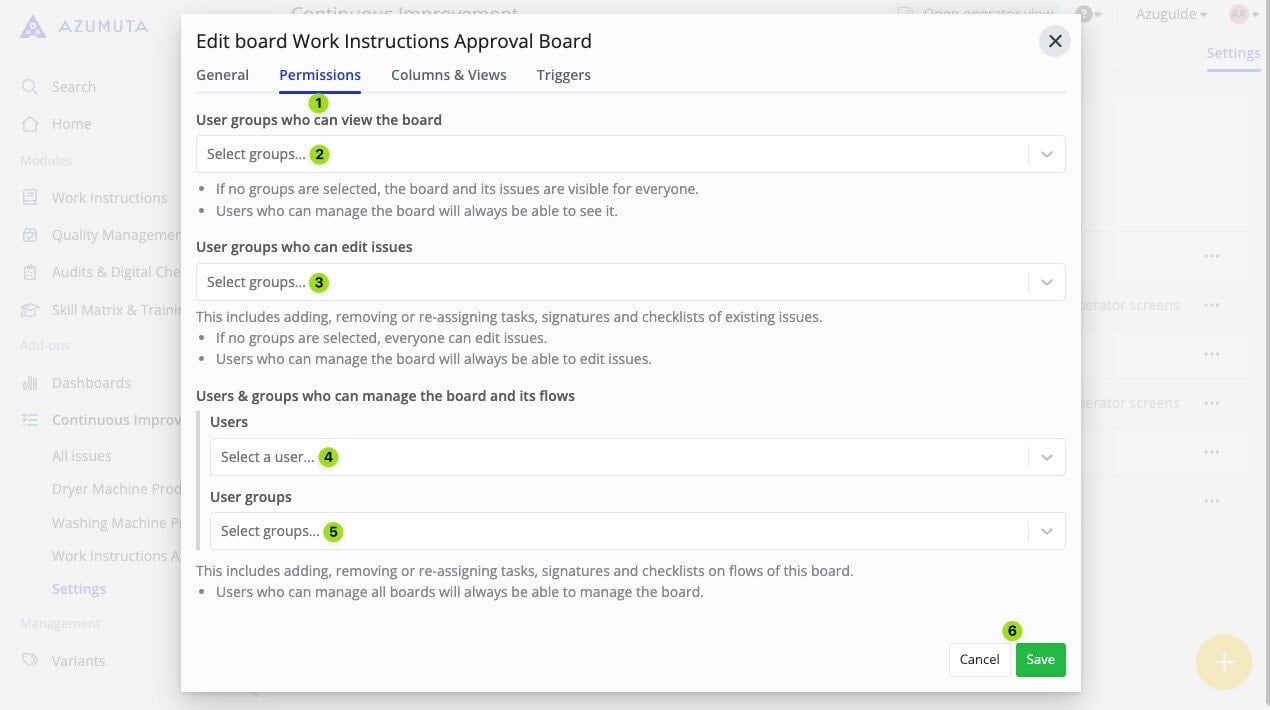
- Click to open the Permissions tab.
- Select which user group(s) can view this approval board. If no groups are selected, then it will be visible to everyone.
- Select which user group(s) can create and edit approval requests on this approval board. If no groups are selected, then everyone will be able to do it.
- Select which user(s) can manage this approval board and all approval flows that fall under it.
- Select which user group(s) can manage this approval board and all approval flows that fall under it.
- When you’re done editing, click on “Save”. However, if you would like to proceed without saving the changes that you’ve made, click on “Cancel”.
The Columns & Views Tab
This tab allows you to edit columns within an approval board and adjust their visibility. It consists of two main settings: the Columns Settings and Views Settings, which we will further explore in the two guide sections below.
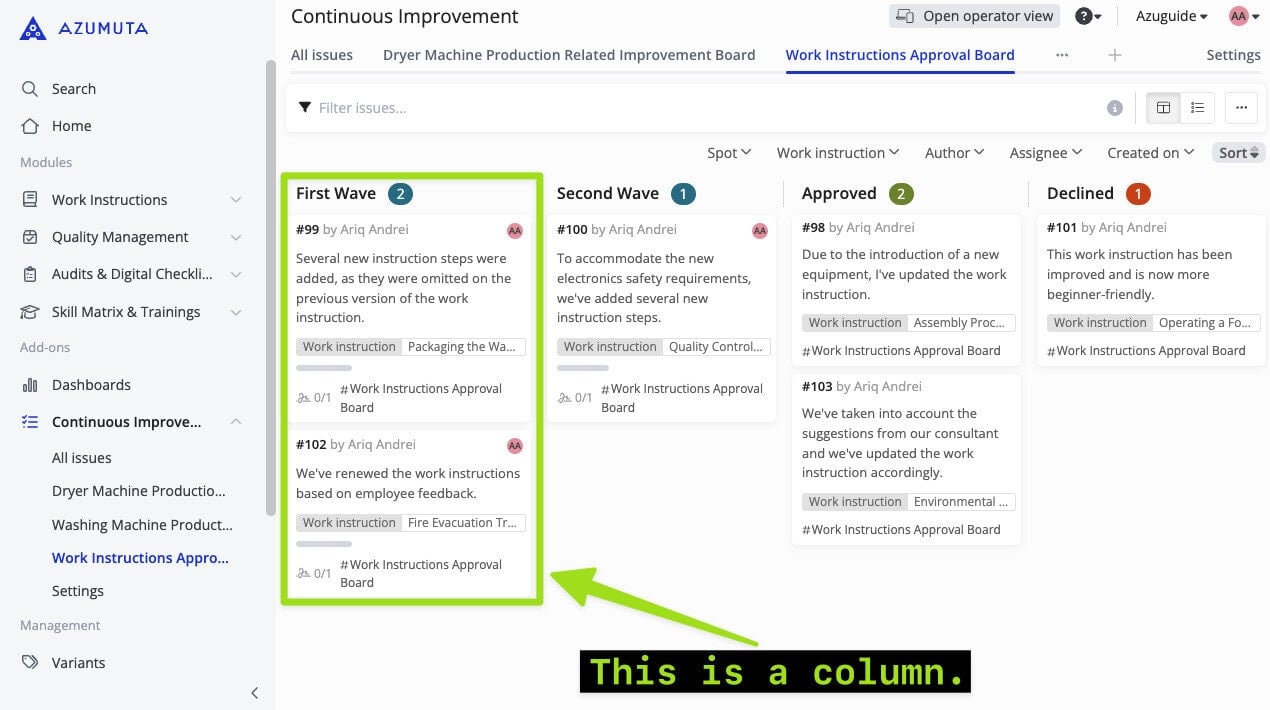
In an approval board, a column represents the status of an approval request, such as the “First Wave” column shown in the screenshot below. On this approval board, there are 4 columns in total (the First Wave, Second Wave, Approved, and Declined columns).
The Columns Settings
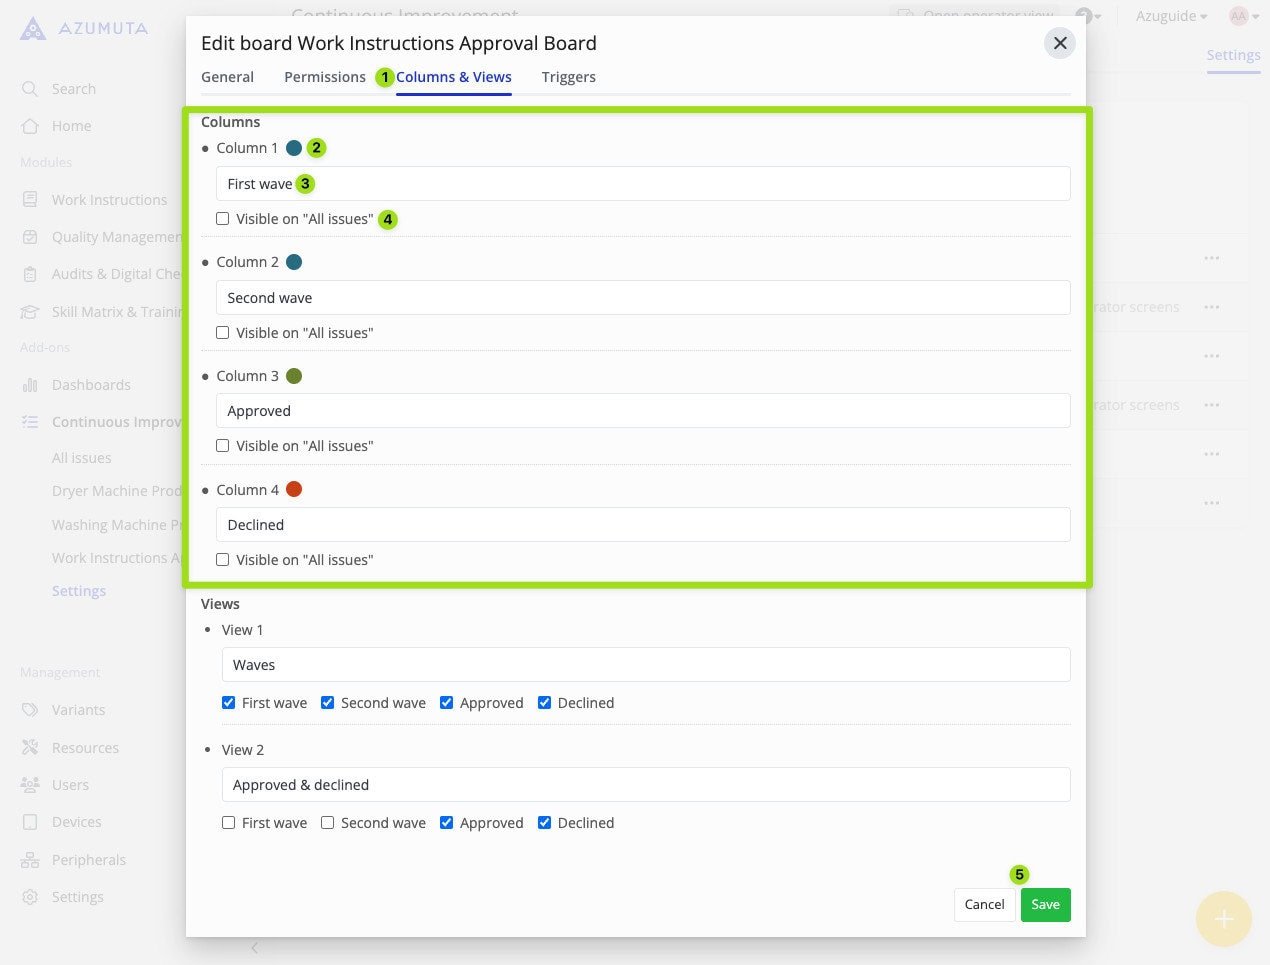
- Click to open the Columns & Views tab.
- Click to change this column’s color.
- Click to change this column’s name.
- If you tick this option, then all approval requests on this column will also be displayed on the “All approval requests” tab.
- When you’re done editing, click on “Save”. However, if you would like to proceed without saving the changes that you’ve made, click on “Cancel”.
The other columns have the same editing options as No.2-4.
Note: By default, there are only 2 columns. However, you can also request for extra columns by contacting us via our support@azumuta.com email address.
The Views Settings
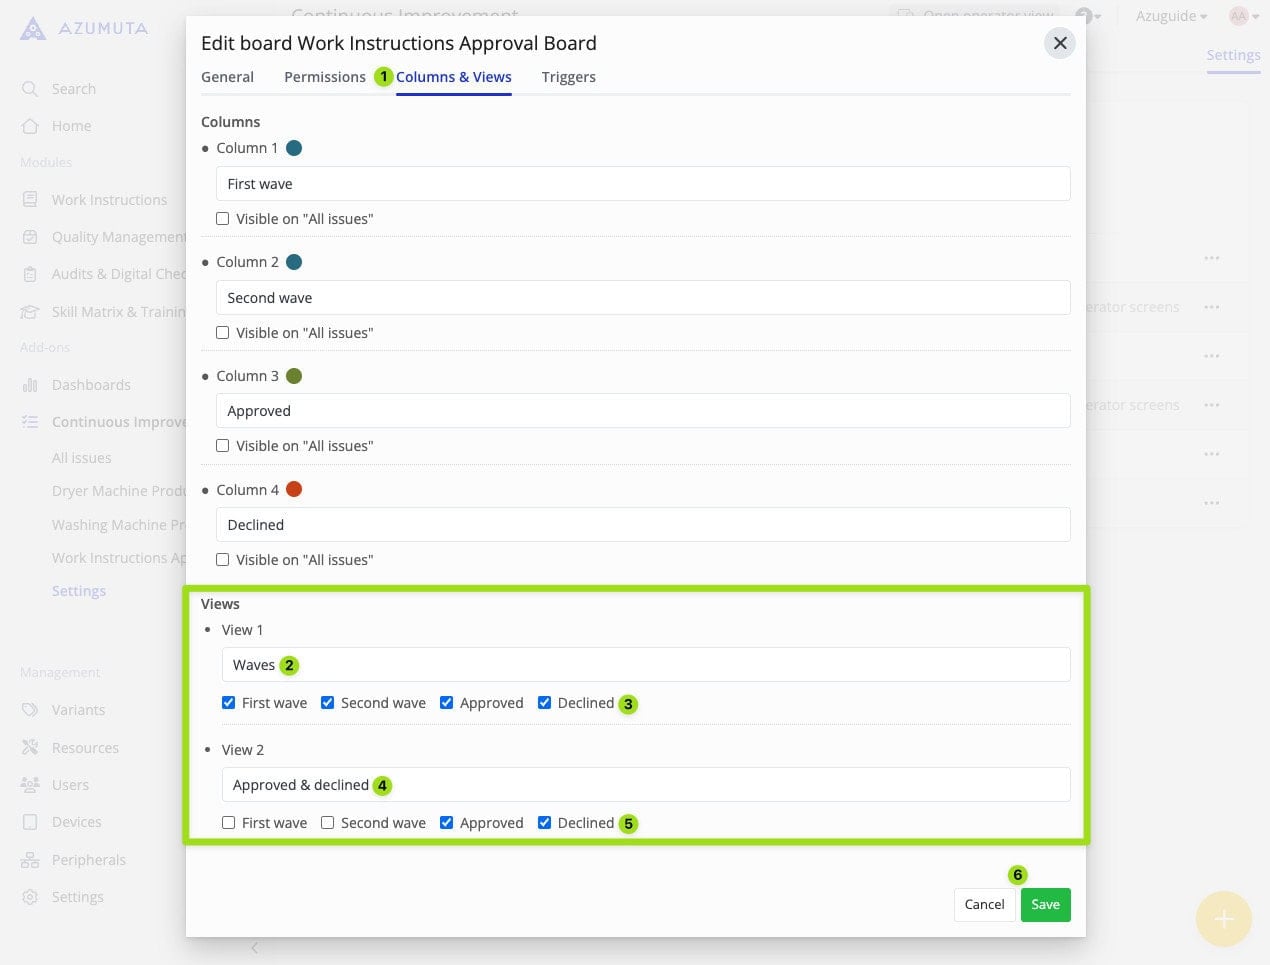
- Click to open the Columns & Views tab.
- Click to change View 1’s name.
- Select which column(s) are to be displayed on View 1.
- Click to change View 2’s name.
- Select which column(s) are to be displayed on View 2.
- When you’re done editing, click on “Save”. However, if you would like to proceed without saving the changes that you’ve made, click on “Cancel”.
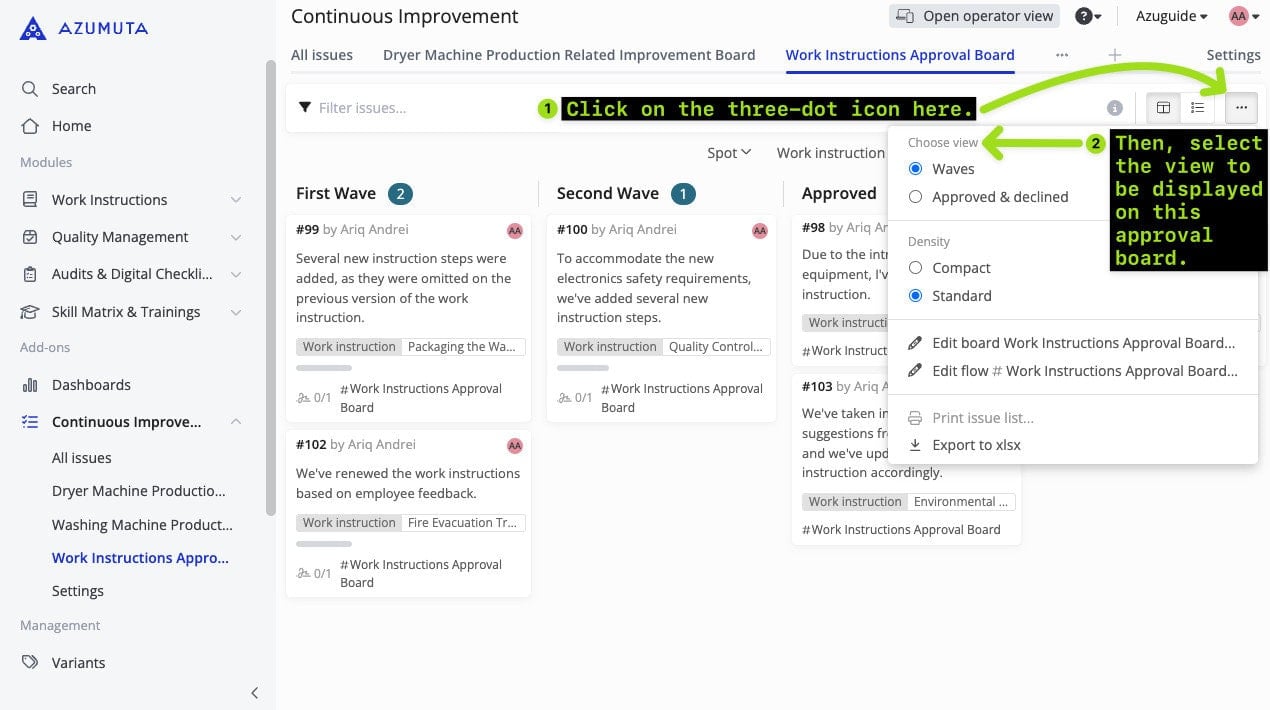
After you’ve configured the Views Settings, you can choose the view that you would like to view on your approval board by following the steps below:
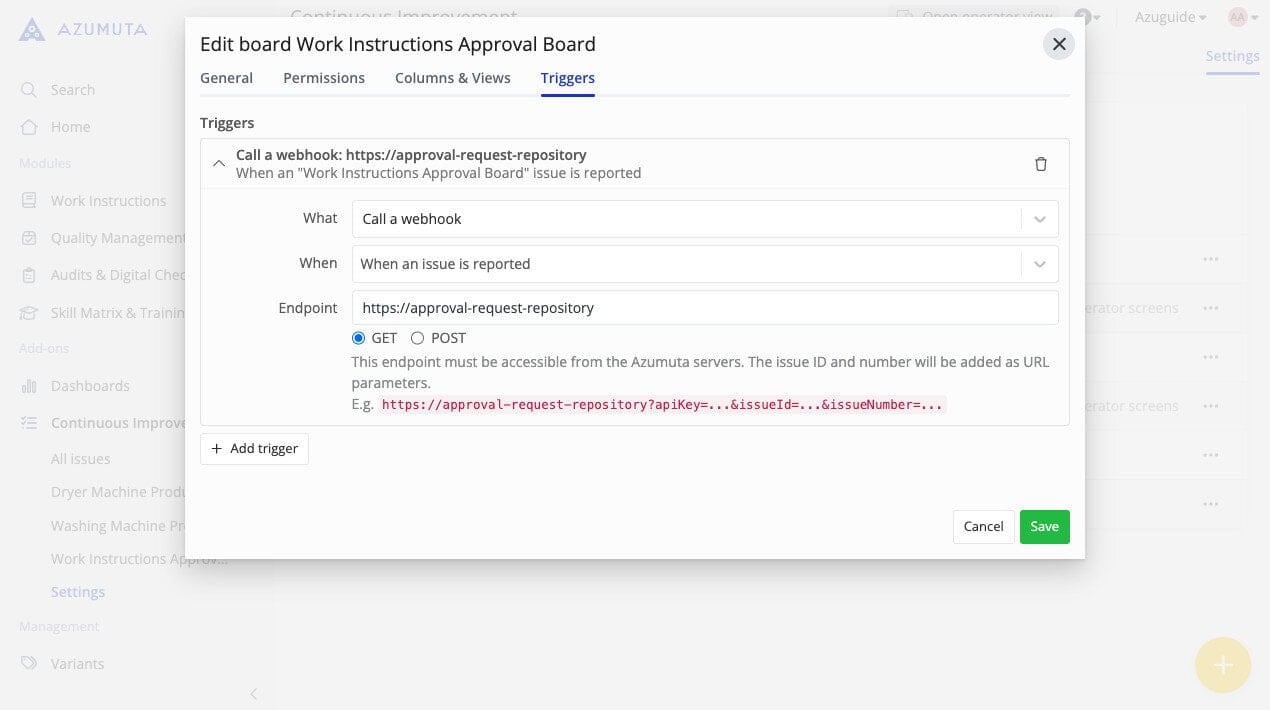
The Triggers Tab
A trigger is a tool that is used to automate a certain process based on an event that takes place within an Azumuta workspace. With triggers, you can automate various tedious tasks, saving both you and your employees valuable time.
See the triggers guides to learn more about triggers.
How to Delete an Approval Board
- Go to “Continous Improvement” in the side panel.
- Click on “Settings”.
- Click on the three-dot icon next to the approval board that you wish to delete.
- Click on “Delete board”.
- Click on “Delete”.
Note: Before deleting an approval board, make sure that there are no approval flows that fall under it. If there are, you must delete these approval flows first before deleting the approval board.