
Work Instructions Layout from the Operator’s Perspective
In this section, we will explain how the work instruction is shown to the operator. We’ll start with the basics, and we’ll continue with more advanced layouts.
Basic
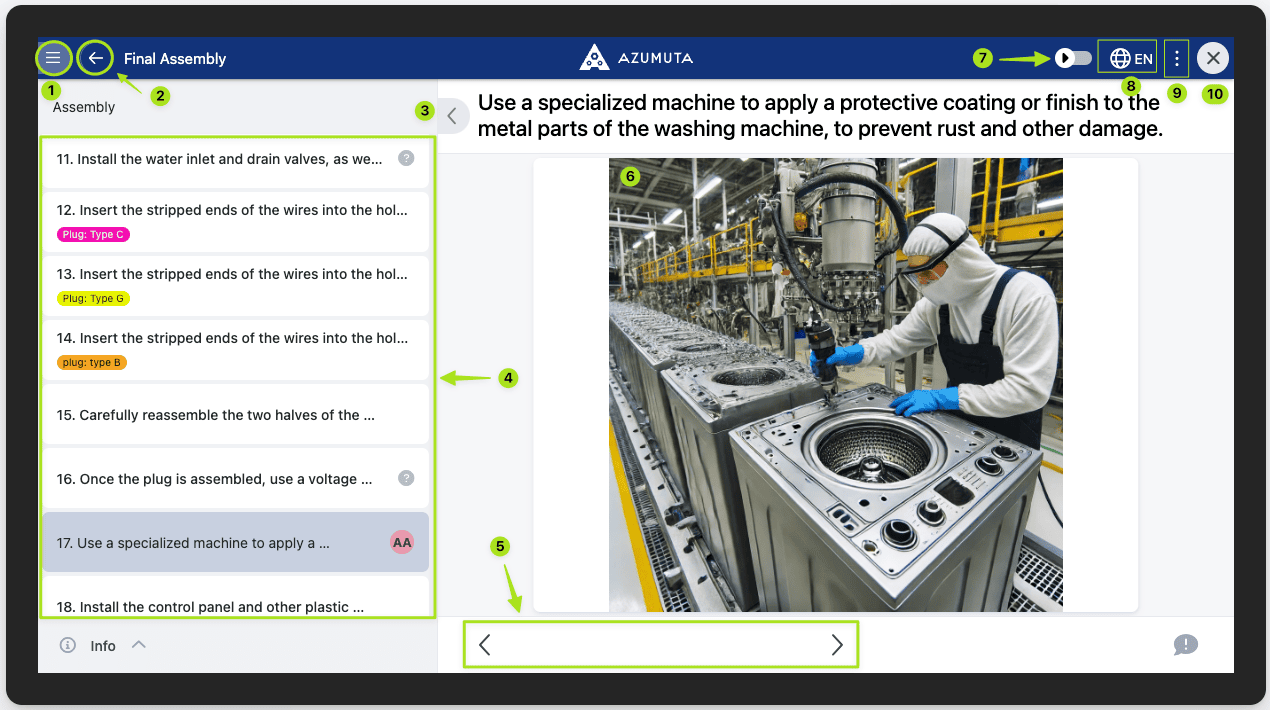
- The Sidebar button
- Click to leave the work instruction
- Click to enlarge the work instruction step page
- Navigate upwards or downwards between the work instruction steps. You can also scroll up or down using your mouse.
- Navigate sequentially using the arrows
- Click on the image to enlarge it
- Click to toggle Fast forward mode
- Change the work instruction language here
- Click to open the option to edit the work instruction, or to see the variants, attachments, and parts that are included in this work instruction
- Click to close the work instruction
Advanced: One Page
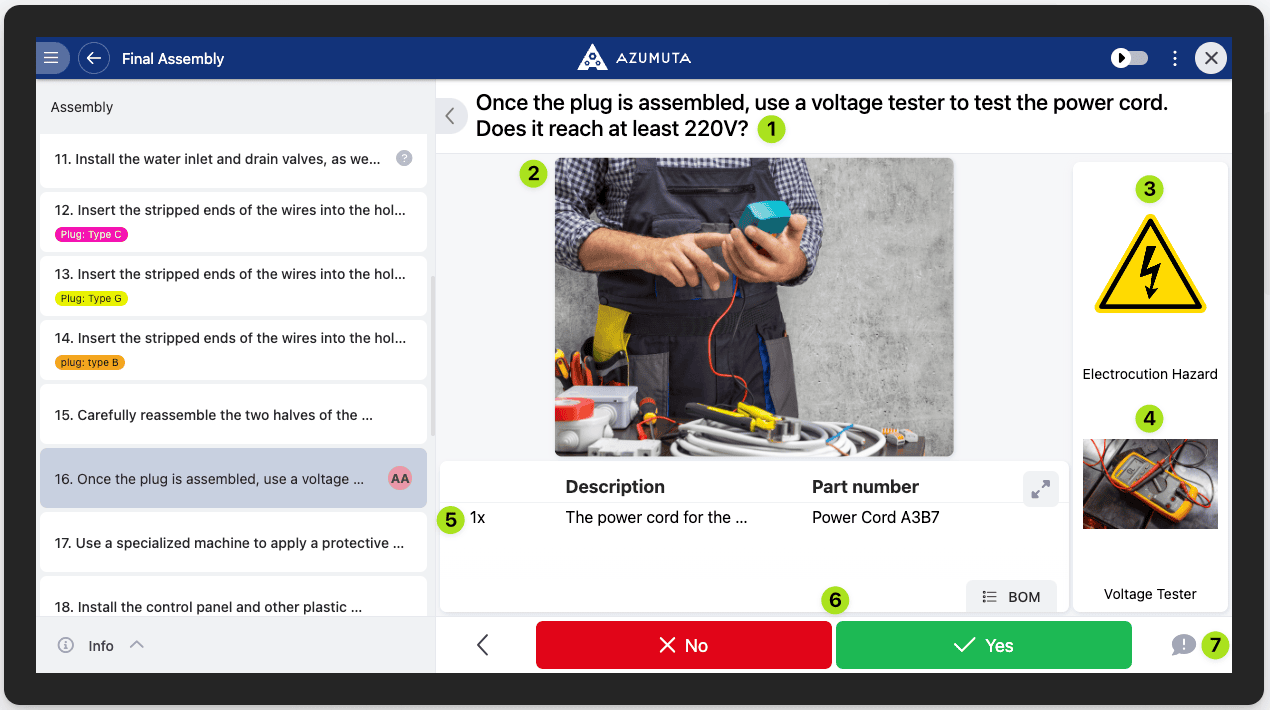
- The instruction step description
- An image (which serves as this instruction step’s only visual page)
- A symbol
- An equipment
- A part
- A product check
- A button to submit a ticket (in case there’s any issue on the shop floor)
Advanced: Multiple Pages
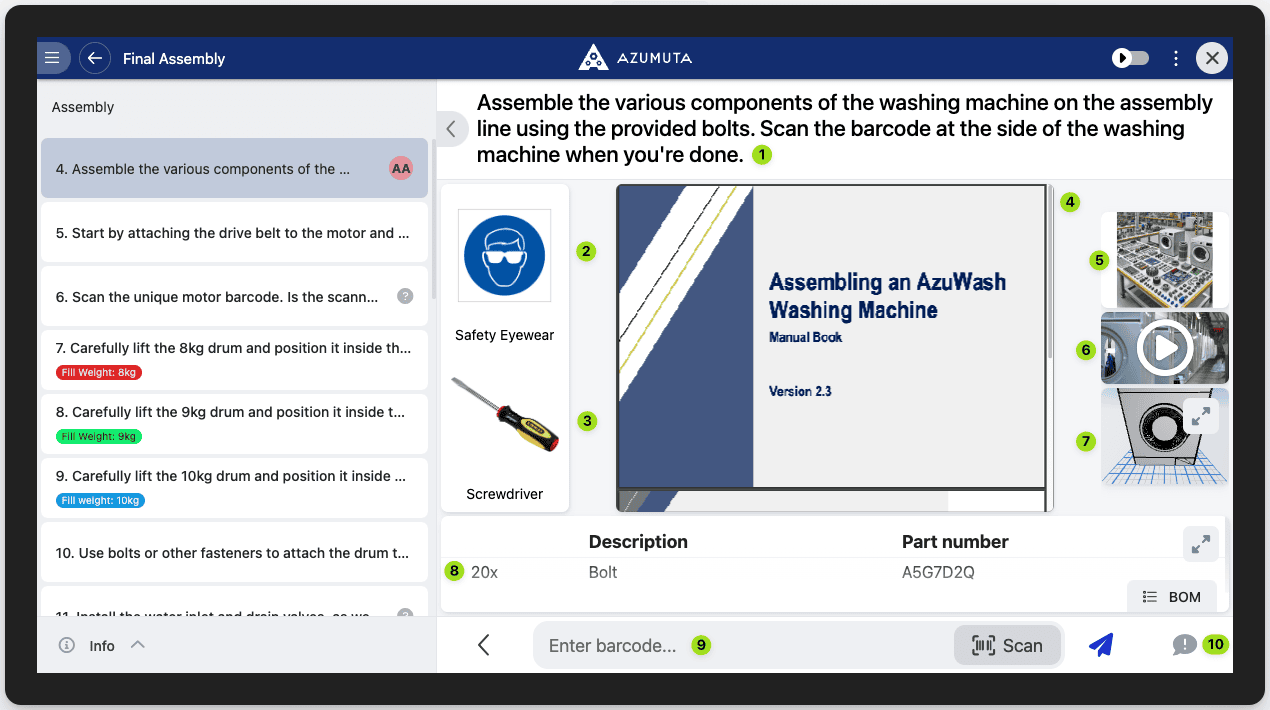
- The instruction step description
- A symbol
- An equipment
- A PDF file (which serves as this instruction step’s primary page)
- An image (the second page)
- A video (the third page)
- A 3D model (the fourth page)
- A part
- A product check
- A button to submit a ticket (in case there’s any issue on the shop floor)
How to Select a Page as the Primary Page
- Under “PAGES”, select a work instruction step that you wish to make a primary page, and right click on it.
- Select “Pin as primary page”.