Advanced Product Checks
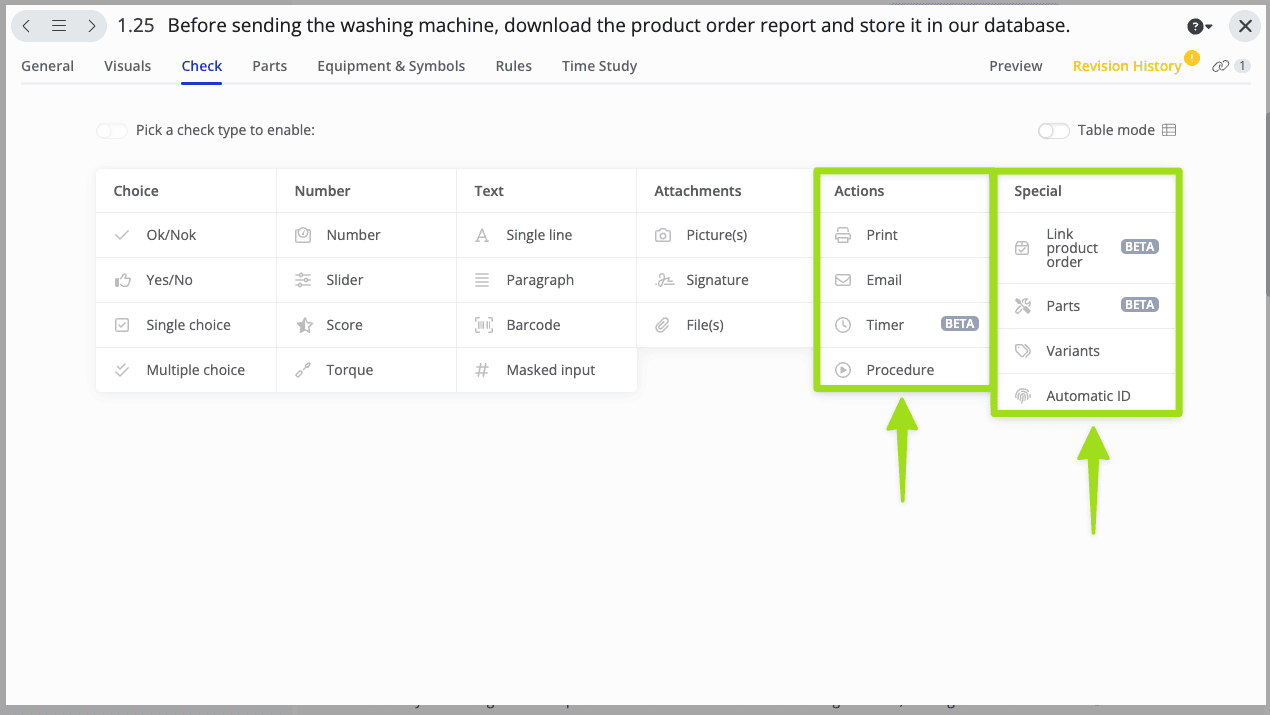
Besides the previously mentioned basic product checks, there are also advanced product checks [the ones that we highlighted in the image below]:
Action-Based Checks
Print Check
Before using a print check, you should have a Docx report beforehand.
What happens on this check: You can set up a “Print” button on a work instruction step. When an operator taps on it, the operator’s device will automatically download a product order docx report that you have previously set up. This guide allows your operators to access any product order report in an instance. Here’s how it works:
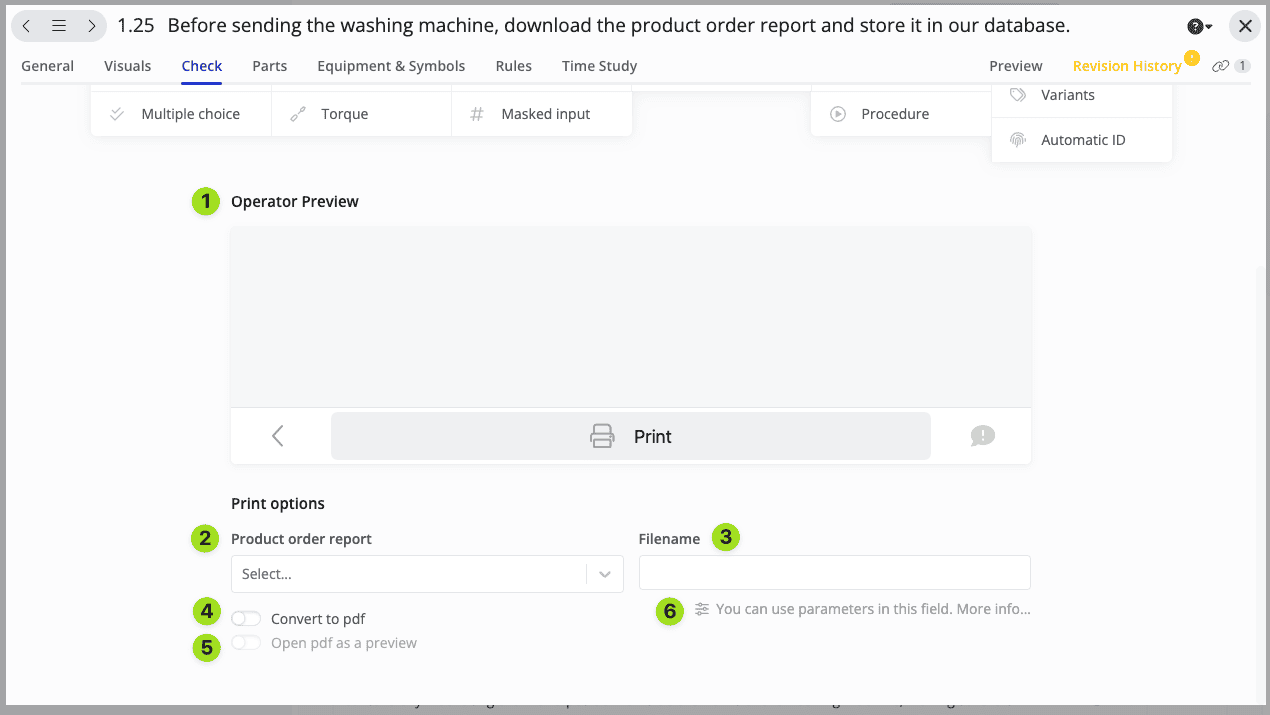
- Operator preview: It gives you a glimpse of how it will look on your operator’s device.
- Select the product order docx report you want your operator to download here.
- Here, you can set up the name of the file that your employee will download
- On the default setting, your operator will download a Docx file. However, you can also change it to a PDF file with this toggle.
- If activated, this toggle will automatically open the PDF file on your operator’s screen.
- Learn more about parameters guides.
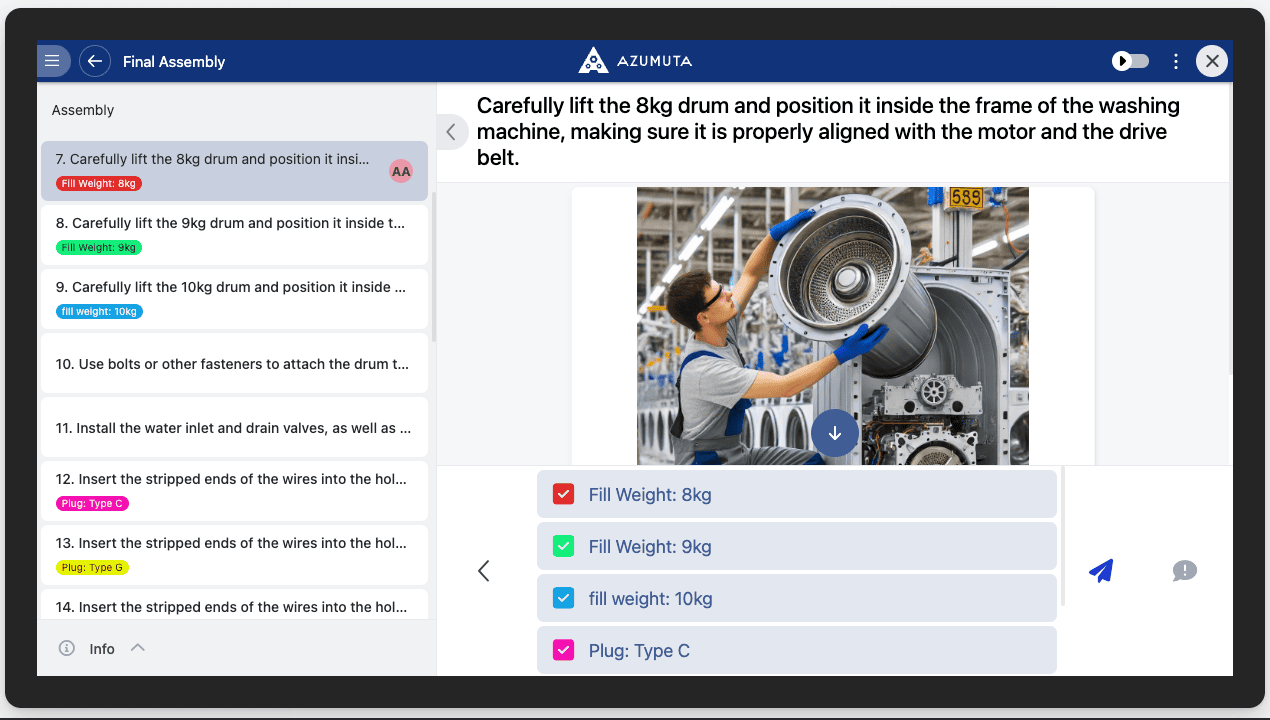
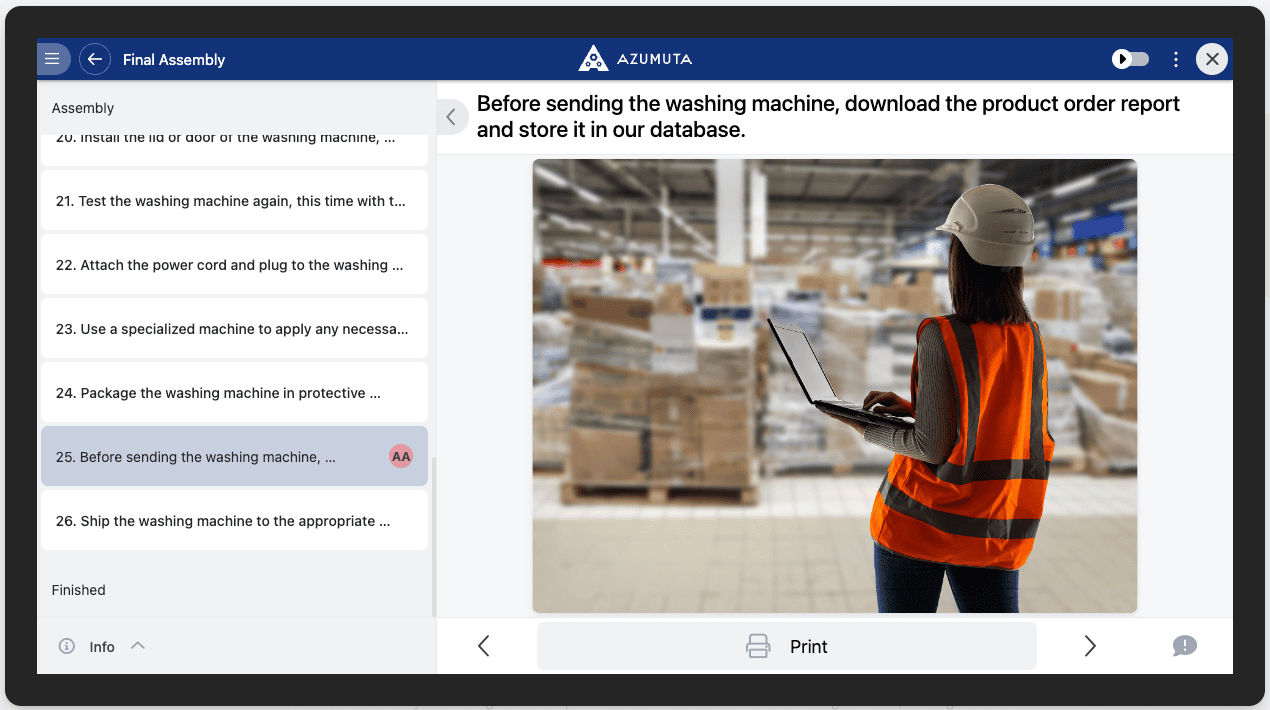
This is how this check appears on the operator view:
Email Check
What happens on this check: You can set up a “Print” button on a work instruction step. When an operator taps on it, it’ll direct them to send an email with pre-made content to a predetermined receiver. This allows email reporting to happen in a blink of an eye. Here’s how it works:
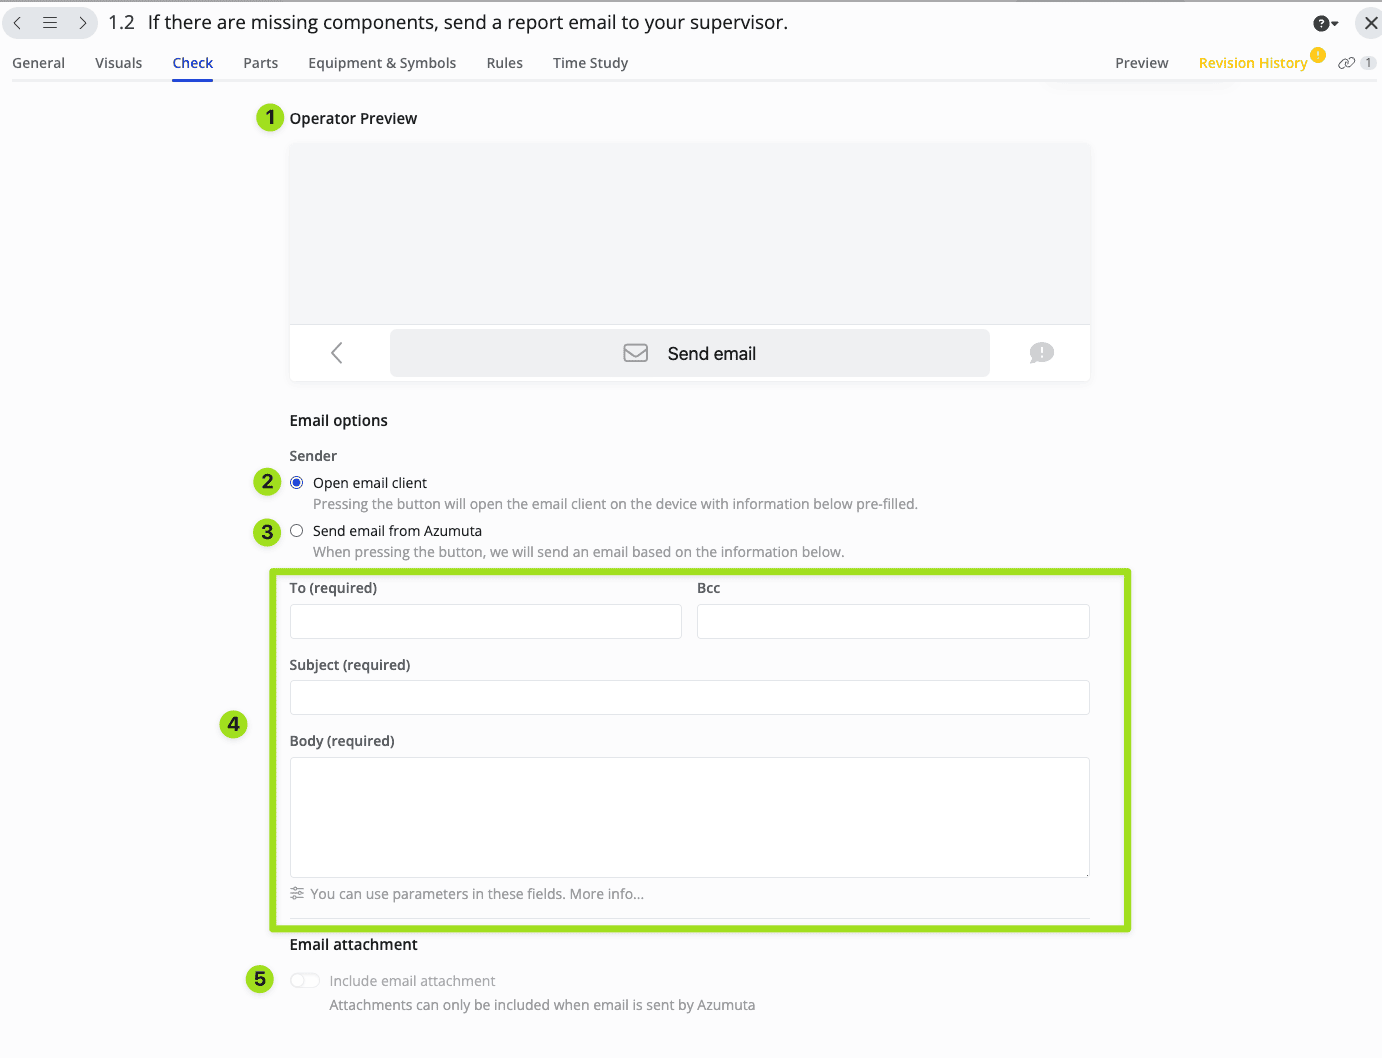
- Operator preview: It gives you a glimpse of how it will look on your operator’s device.
- If you select this, then it’ll open your operator’s default email program once an operator taps “Send email”. However, with this option, you can’t include any Docx report attachments with this option.
- If you select this, then the Azumuta platform will send an email once an operator taps “Send email”. On No.5, you can select the Docx report attachment that will be sent.
- Fill in the available fields to create a complete email. Read more about parameters guides.
- Use this toggle to choose whether you want to include a Docx report to be sent on the email (only available if you selected “Send email from Azumuta”).
This is how this check appears on the operator view: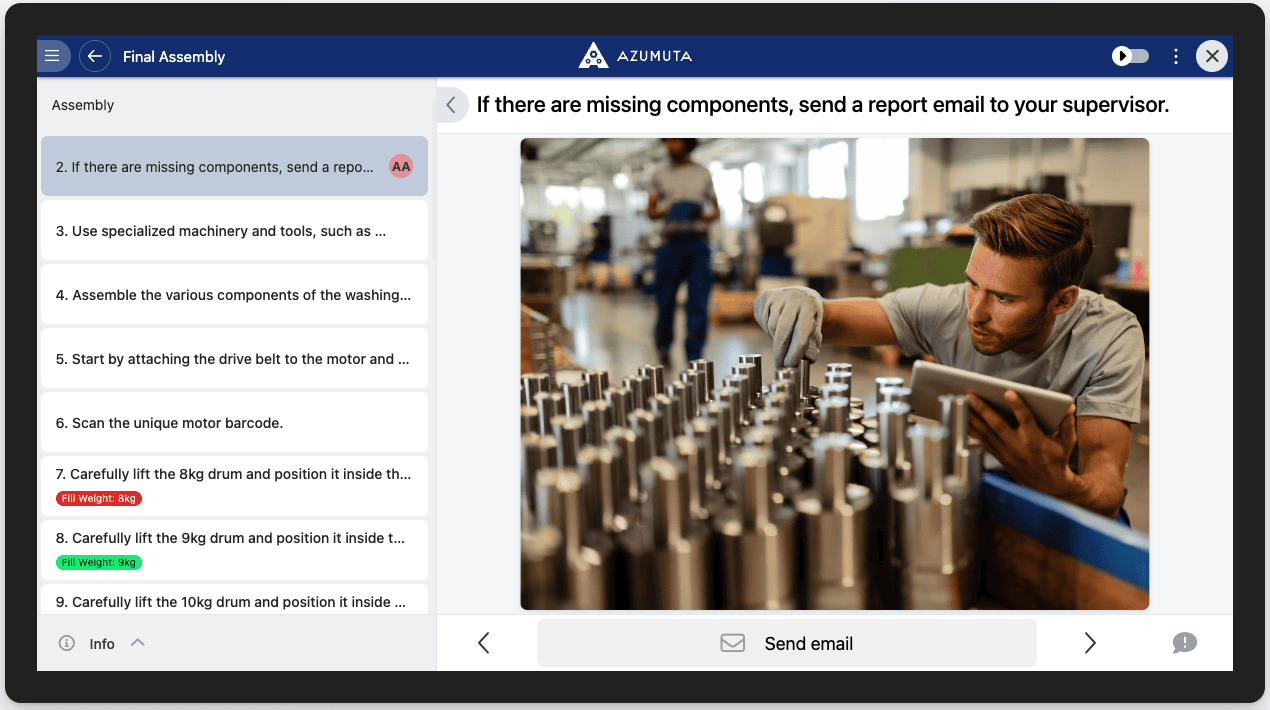
Timer Check
What happens on this check: The timer check functionality ensures that operators spend a minimum or maximum predefined amount of time on a specific step before proceeding to the next.
The timer check is designed to standardize the time spent on specific steps, ensuring operators don’t rush critical processes, thereby maintaining consistency and quality in operations. In addition, it can also be used to prevent operators from spending too much time on a single task.
Here’s an explanation of the timer check:
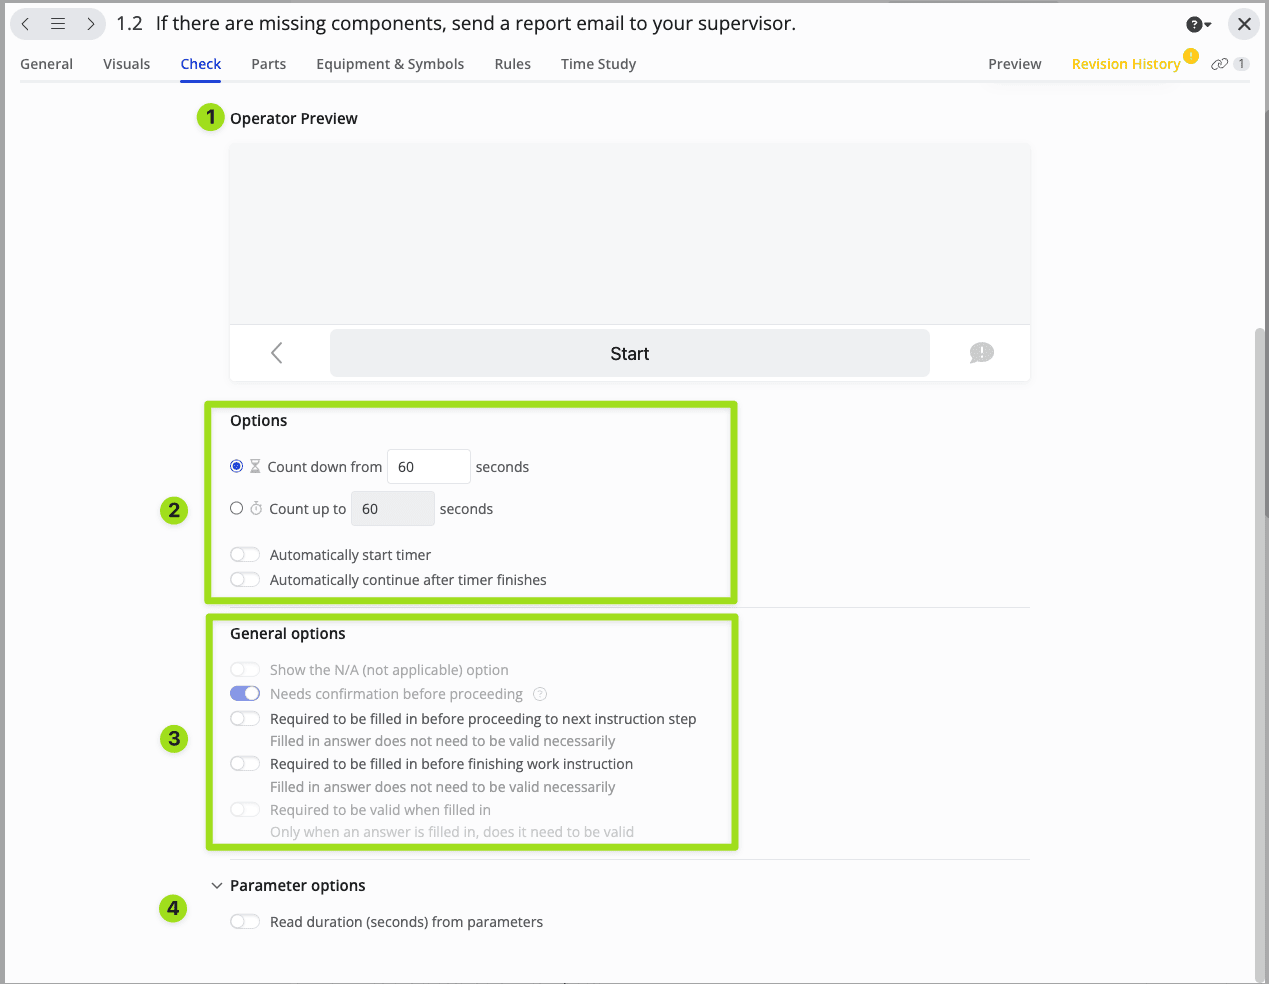
- Operator preview: It gives you a glimpse of how it will look on your operator’s device.
- Configure your timer settings here.
- Adjust your check’s general settings here.
- You can also use a parameter in your here. Learn more about parameters guides.
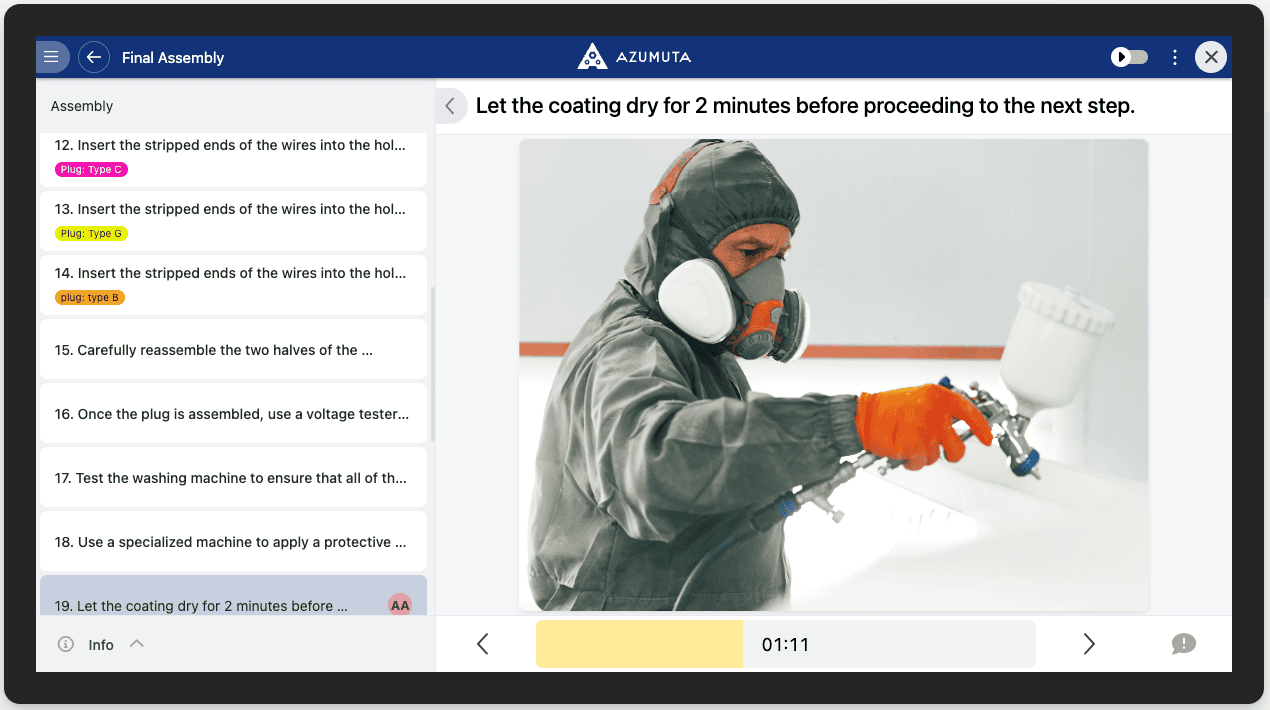
This is how this check appears on the operator view:
Procedure Check
What happens on this check: You can set a certain procedure to happen once an operator taps “Call procedure”. Here’s how to do it:
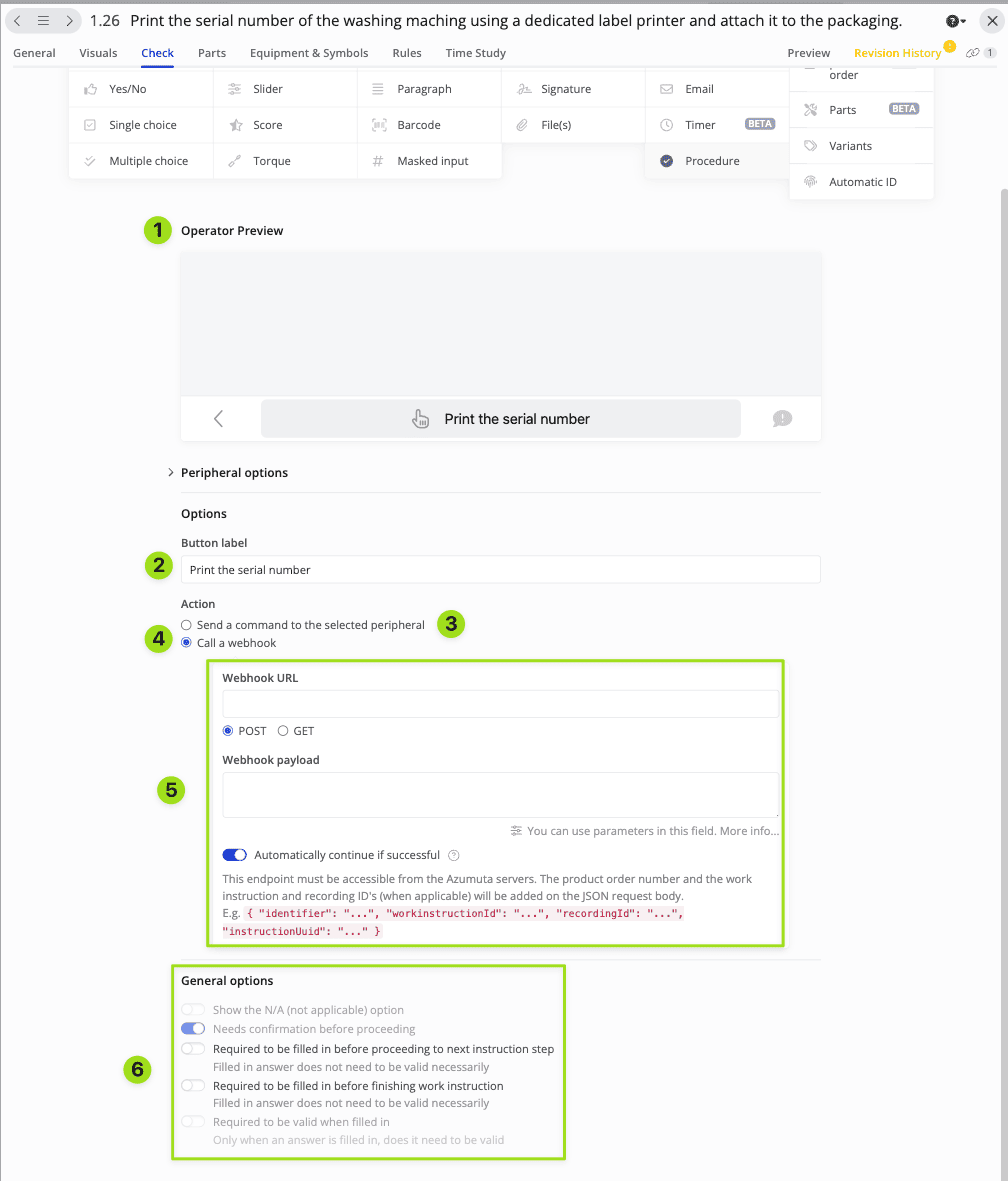
- Operator preview: It gives you a glimpse of how it will look on your operator’s device.
- You can configure what’s written on the button here. On this screenshot, it’s “Print the serial number”.
- If you choose this option, a pre-programmed peripheral device will execute a pre-arranged task. Learn more about integrating Azumuta with peripherals.
- If you choose this option, you can configure your own webhook.
- This is the option that appears if you’ve chosen No.4. You can execute countless procedures with a webhook. Learn how you can use webhooks in Azumuta.
- Adjust your check’s general settings here.
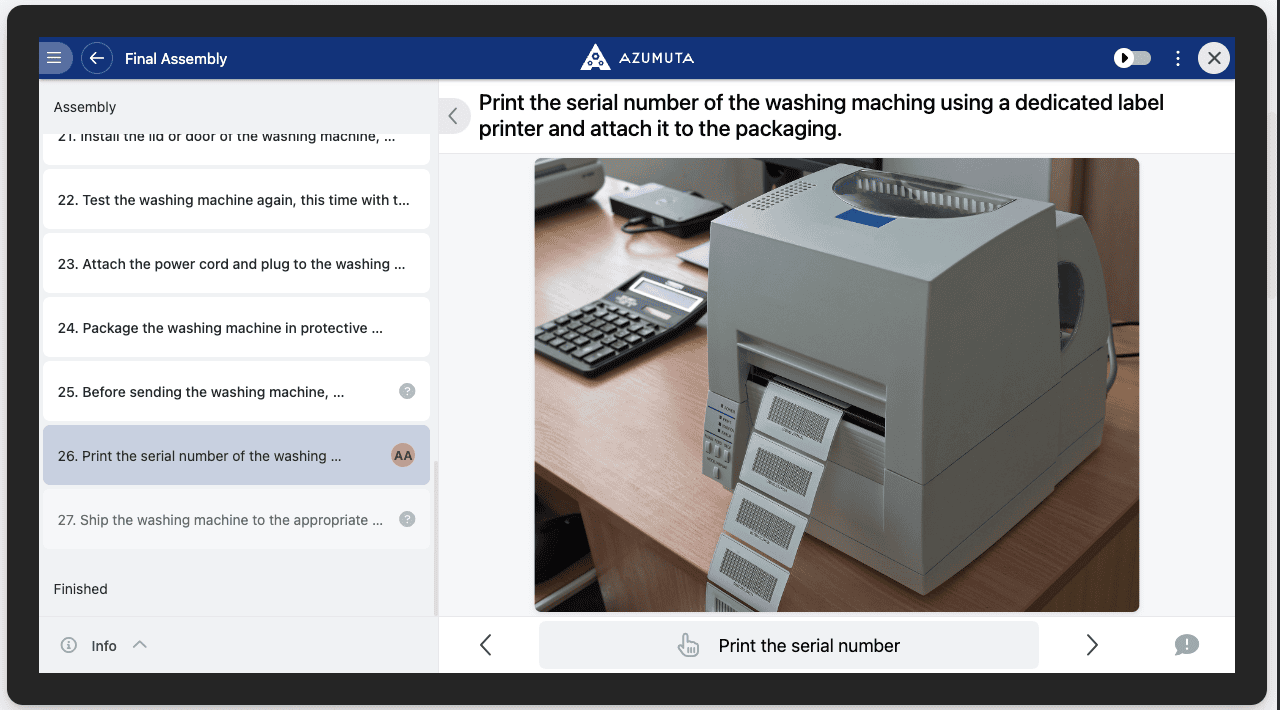
This is how this check appears on the operator view:
Note: You can contact support@azumuta.com if you need help in integrating peripehral devices or making your own webhooks.
Special Checks
Link Product Order Check
Learn more about the link product order check guide.
Parts Check
What happens on this check: This product check is used to ensure that operators only use the correct parts (and in the correct quantity) when assembling a product. In this product check, an operator must either scan a part’s barcode or manually input the part number. You can add one or multiple parts to a part check.
If the wrong barcodes/QR codes were scanned or the wrong part names were inputted, then the screen will show a red signal signifying that there’s an error, and the operator cannot proceed to the next step.
Similarly, if the number scanned barcodes/QR codes or inputted part names don’t match the required quantity set by the admin, a red error signal will appear, and the operator won’t be able to proceed to the next step until everything is in order.
This product check is useful to prevent incorrect parts from being used in the assembly process, as well as to ensure that the part quantity always matches the required specifications.
Here’s how to use this feature:
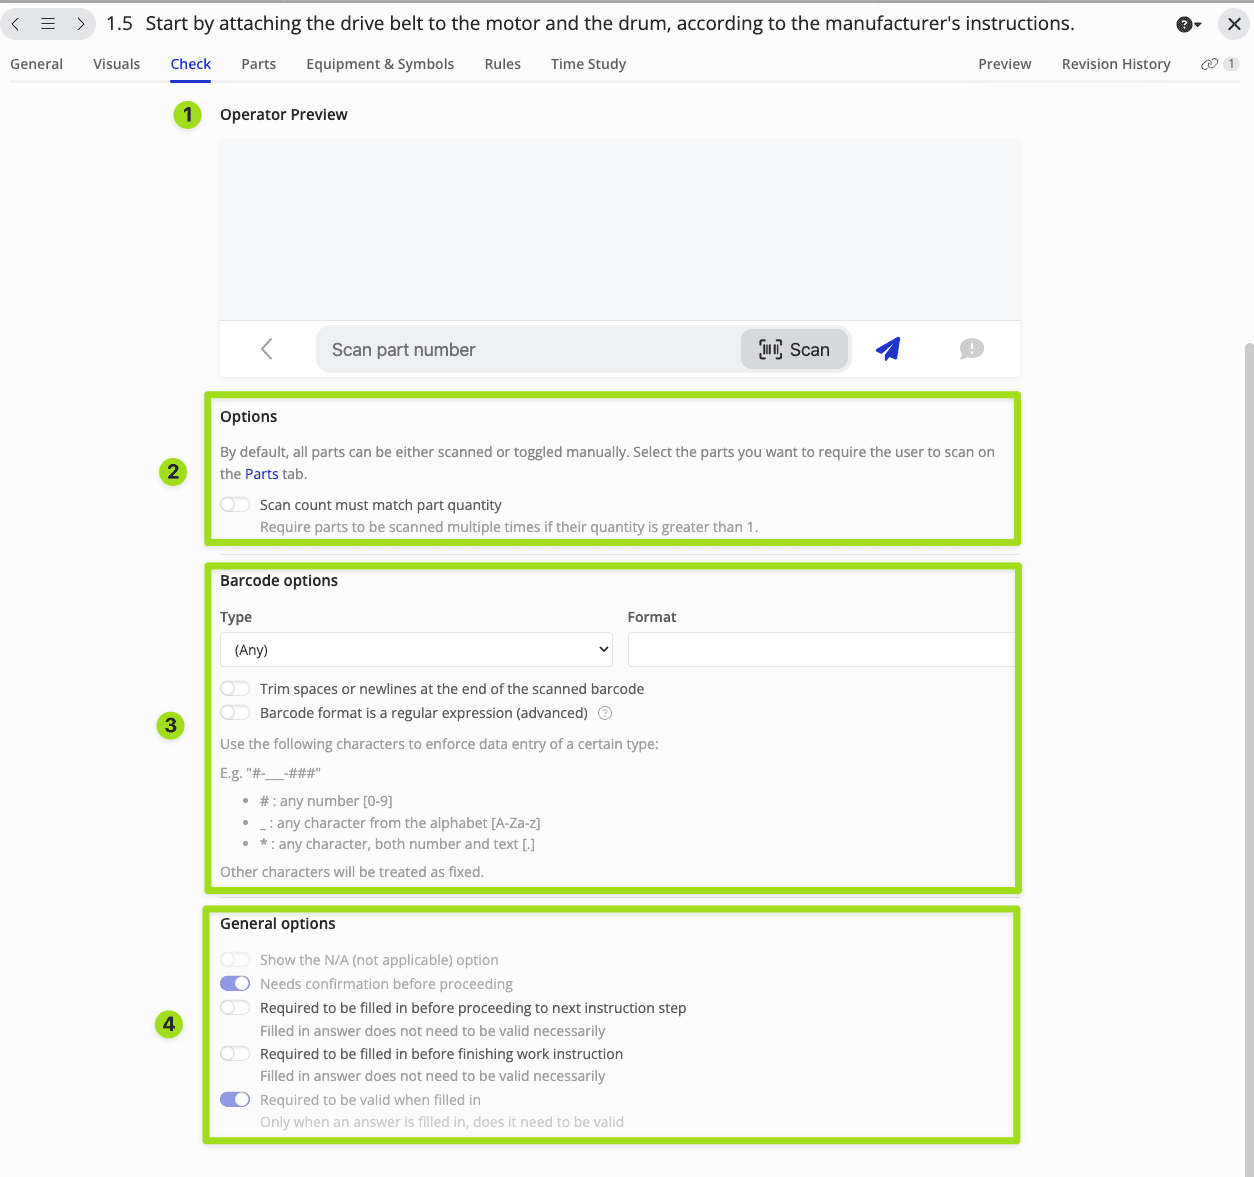
- Operator preview: It gives you a glimpse of how it will look on your operator’s device.
- Select whether the operator’s part count must match the quantity mentioned in the work instruction step.
- Configure your barcode type and format and its settings here. We provided a guide underneath. on how you can customize your barcode input.
- Adjust your check’s general settings here.
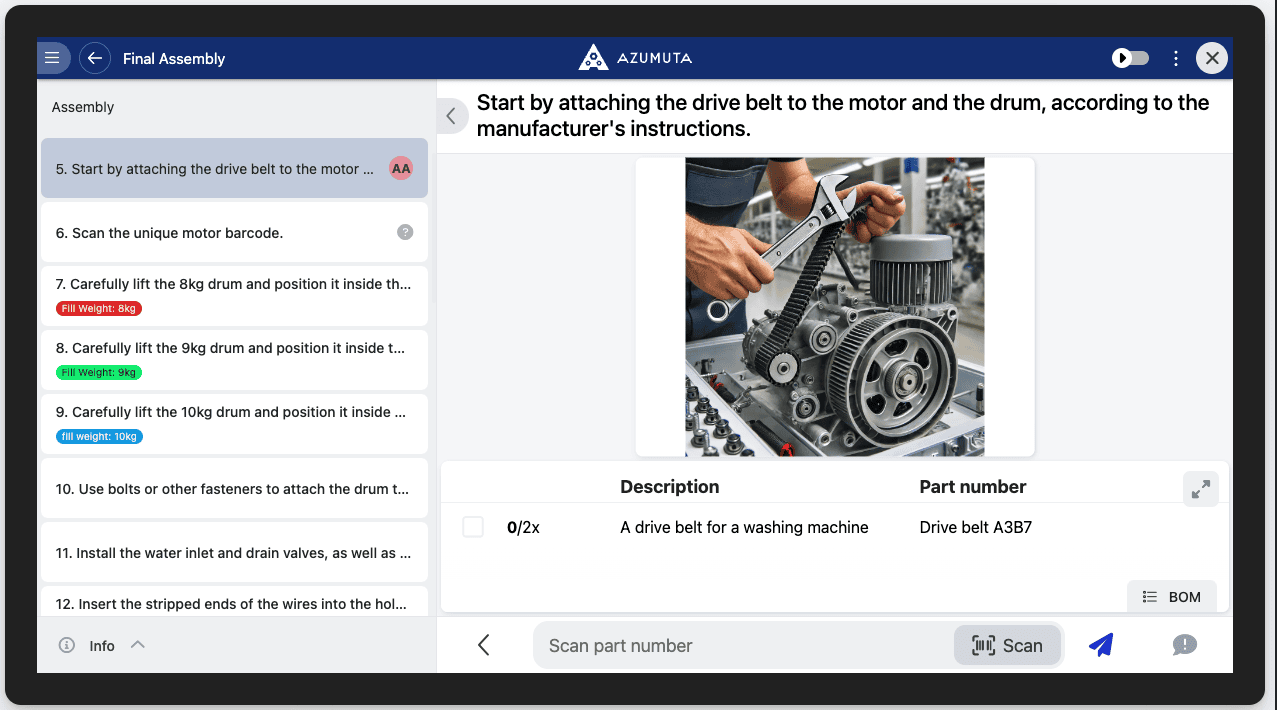
This is how this check appears on the operator view:
Variants Check
What happens on this check: In a work instruction, an operator can select which variants they’d like to see on their work instruction screen and which variants they wouldn’t want to see. This is important because:
- When an operator works for one specific variant for a long time, the presence of other variants on their work instruction can be distracting. Thus, operators can choose to hide irrelevant variants from their view.
- Operators can quickly adapt to changes in production requirements by switching between different variants quickly and easily. Showing & hiding variants in a work instruction can be done in a matter of seconds.
- Operators can skip variants that they aren’t familiar with yet.
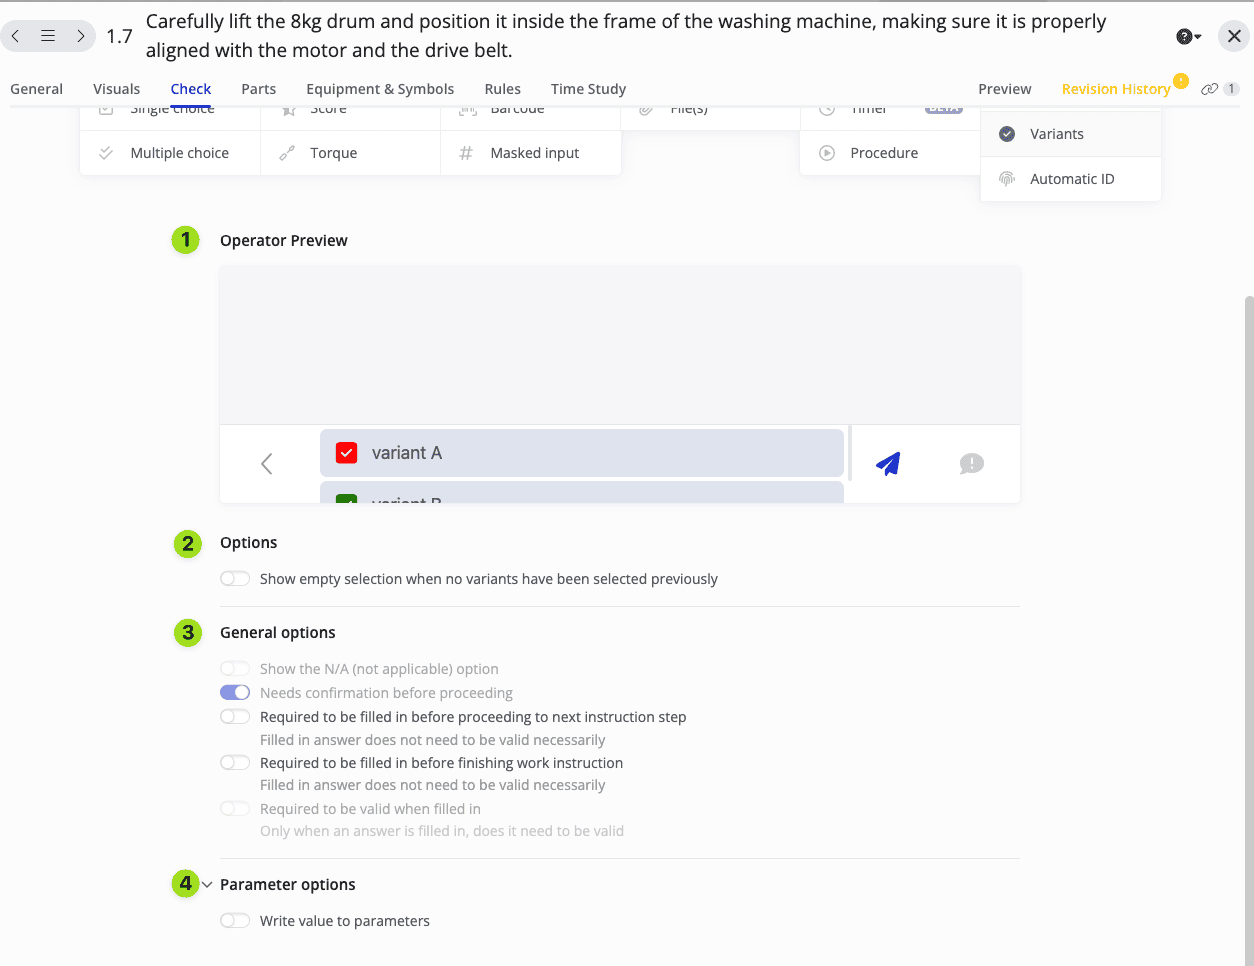
- Operator preview: It gives you a glimpse of how it will look on your operator’s device.
- Configure whether your operator’s screen should show no options if your work instruction doesn’t contain any variant.
- Adjust your check’s general settings here.
- You can also use a parameter in your here. Learn more about parameters guides.
This is how this check appears on the operator view: