
Device Settings: Product Order-Related
This article covers product order-related device settings.
How to Access the Product Orders-Related Device Settings
- Click on “Devices” under “Management”.
- Next to the device that you would like to configure, click on the three-dot icon.
- Click on “Edit device”.
- Click on the “Product orders” tab.
What Are the Possible Configuration Options?
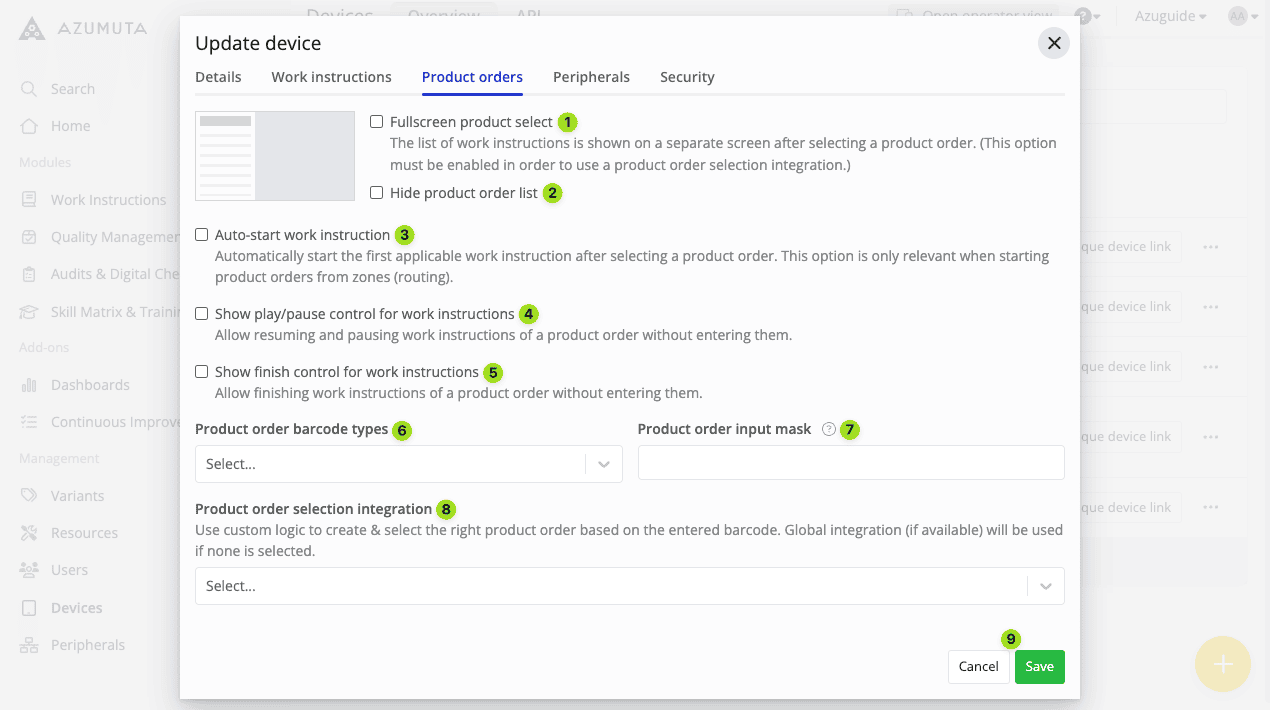
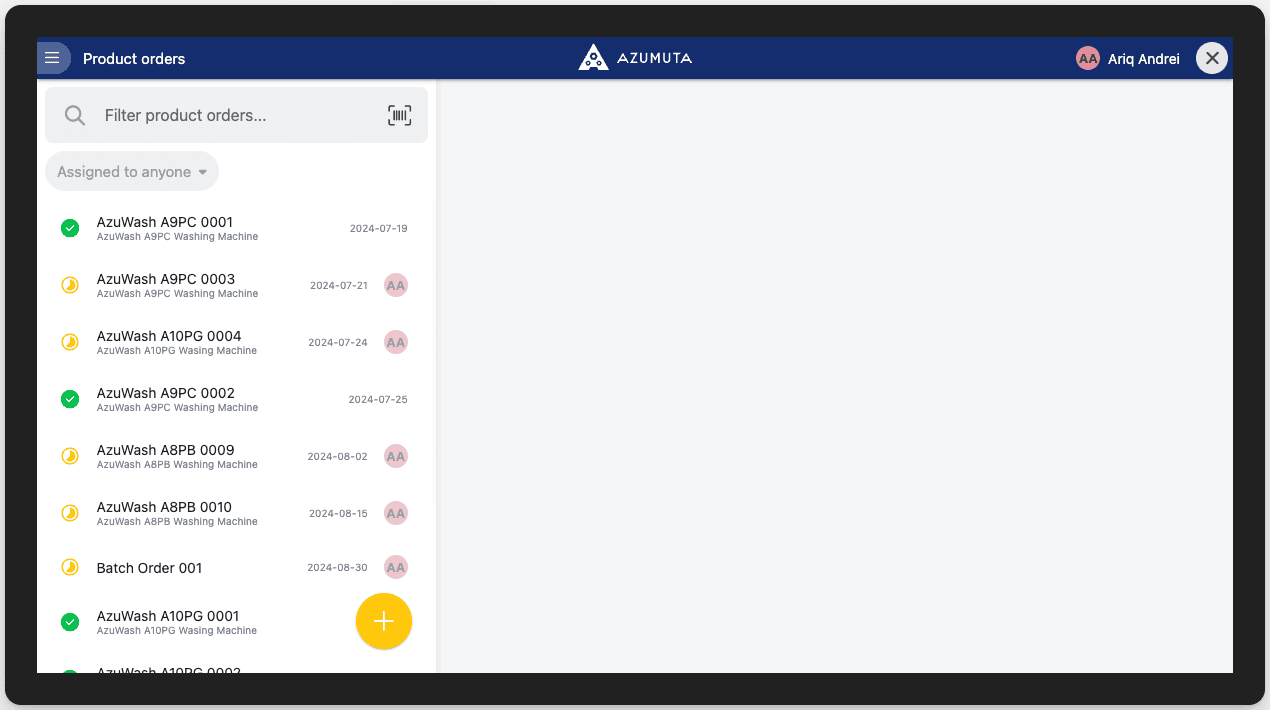
As a reference for options No.1 and No.2, this is how the original interface looks like if neither options are ticked:
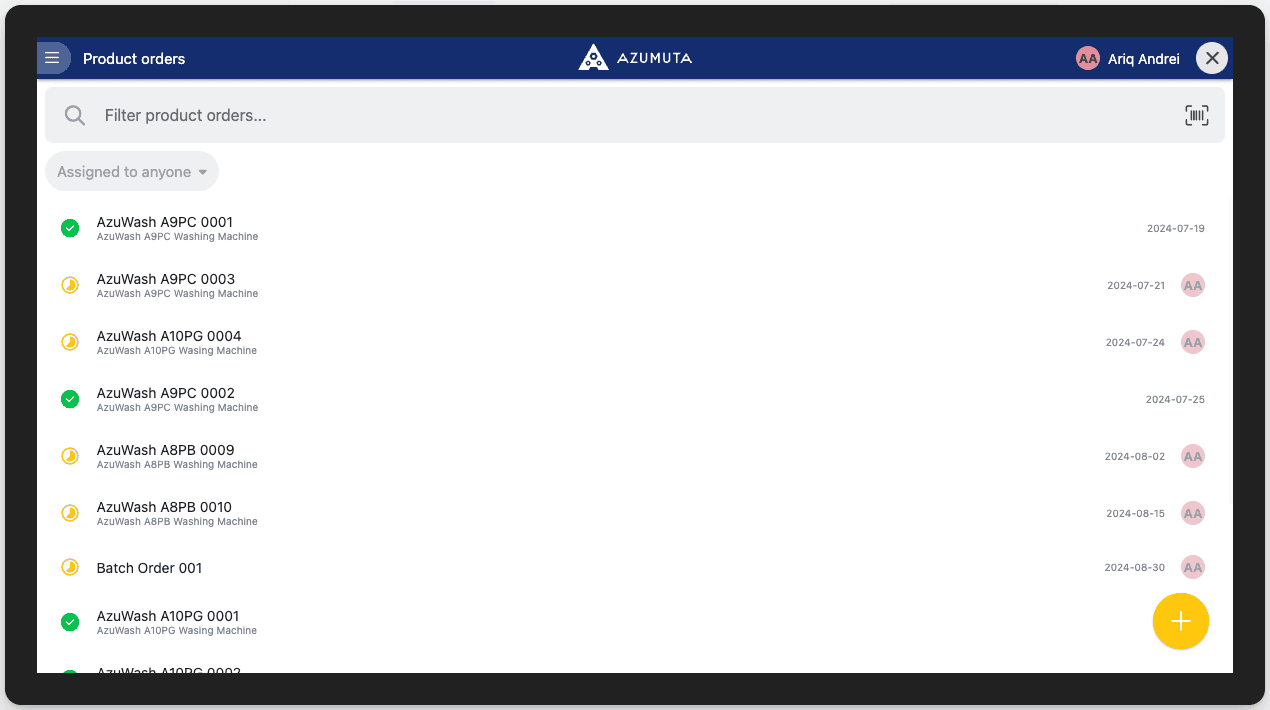
- If you tick this, then the list of work instructions linked to a product order will be displayed on its own page – separate from the product order list. This feature can be handy if your product orders contain many work instructions. Take a look at the image below to see what it will look like if you tick this option:
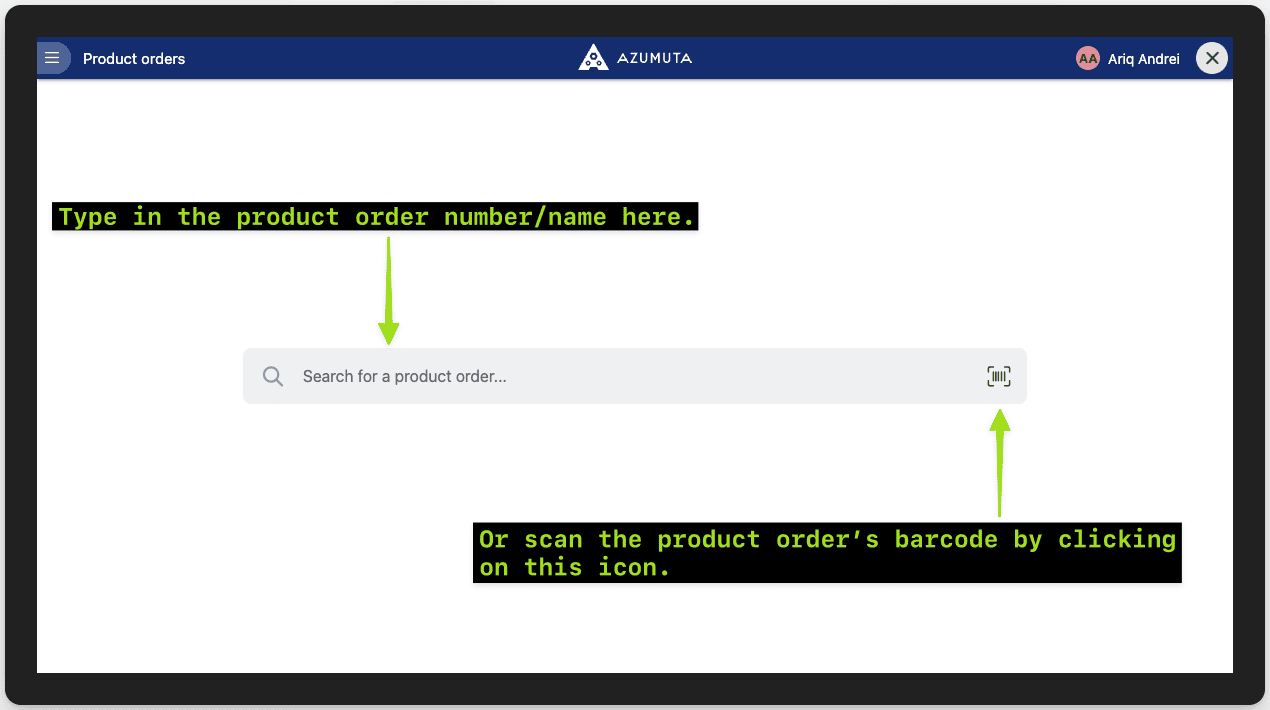
- If you tick this, then there will be no product order list on this device’s screen. That way, a user can only type in the product order’s number/name or scan its barcode/QR code. Afterward, their device’s screen will be automatically redirected to this targeted product order. This feature ensures that a user will always select the correct product order. It also saves the user’s time, as they don’t have to manually look for the product order that they’re going to execute. Take a look at the image below to see what it will look like if you tick this option:
- This option is obsolete and will be removed soon. Please ignore this option.
- If you tick this, then you will see a play/pause button on each work instruction that is linked to a product order. Thus, you can continue/pause a work instruction by just clicking on this button – without entering that work instruction. Please take a look at the image below to see where this button lies:
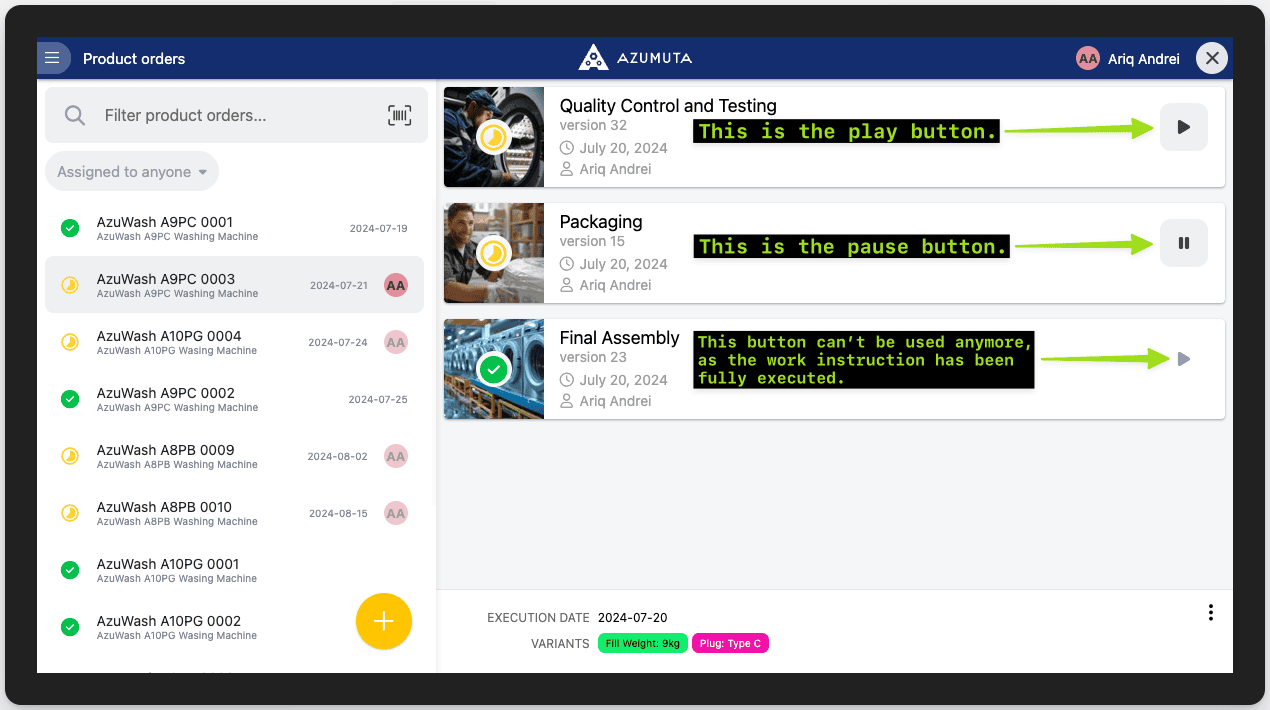
- If you tick this, then you will see a finish button on each work instruction that is linked to a product order. Thus, you can finish a work instruction by just clicking on this button – without having to enter the work instruction. However, you can’t use this button if there’s a mandatory product check that has to be filled. Please take a look at the image below to see where this button lies:

- Click to select the barcode/QR code type that can be scanned to get to a product order.
- In this field, you can create a certain format that a user has to follow when typing in a product order number/name. Click on the question mark icon to see the available formats that you can use.
- On this dropdown menu, you can select one of the integrations that you’ve previously installed in your Azumuta workspace. This feature is generally used to feed product order data from an ERP system to Azumuta. If you need any help in integrating anything into Azumuta, please contact us through support@Azumuta.com.
- When you’re done with your edits, click on “Save”. However, if you would like to cancel your edits, click on “Cancel”.