
Videos
In Azumuta, you can equip an instruction step with videos. Adding videos to an instruction step helps your operators by visually showing them exactly what they need to do.
Instead of just reading texts or looking at images, your operators can watch step-by-step demonstrations, which will certainly reduce error possibilities and speed up their learning process.
This feature is especially useful for guiding new employees or executing complex assembly tasks where visually seeing the process beforehand makes a big difference.
How to Add a Video to an Instruction Step
- Navigate to an instruction step where you would like to add a video, and open it.
- Click on the “Visuals” tab.
- Click on “Add page”.
- Select “Video”.
- Select the video file.
How to Use the Video Editor
Besides displaying videos, our platform can also perform basic video editing. Here’s how to access our video editor:
- Navigate to an instruction step with a video, and open it.
- Click on the “Visuals” tab.
- Click on the video that you would like to edit.
- Under the video below, you can see the list of edits that you can perform with our video editor.
Here are the editing possibilities that you can do to a video on an instruction step:
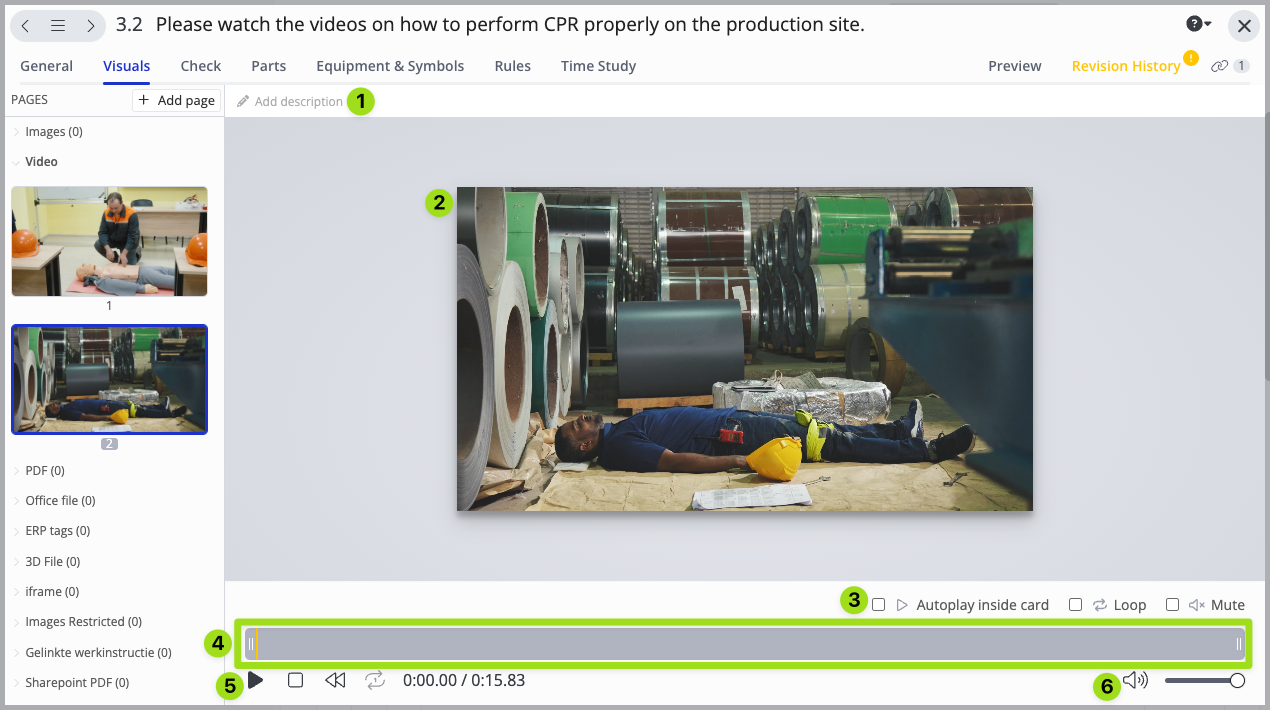
- You can add a description of the video here. This description will appear on the operator’s view.
- This is a preview of how the video will be displayed on the operator’s view.
- These are the settings that will be applied to the operator’s view. Tick on the checkbox(es) to select whether the video will autoplay (so an operator doesn’t need to click on the video to play it), loop continuously, and be muted.
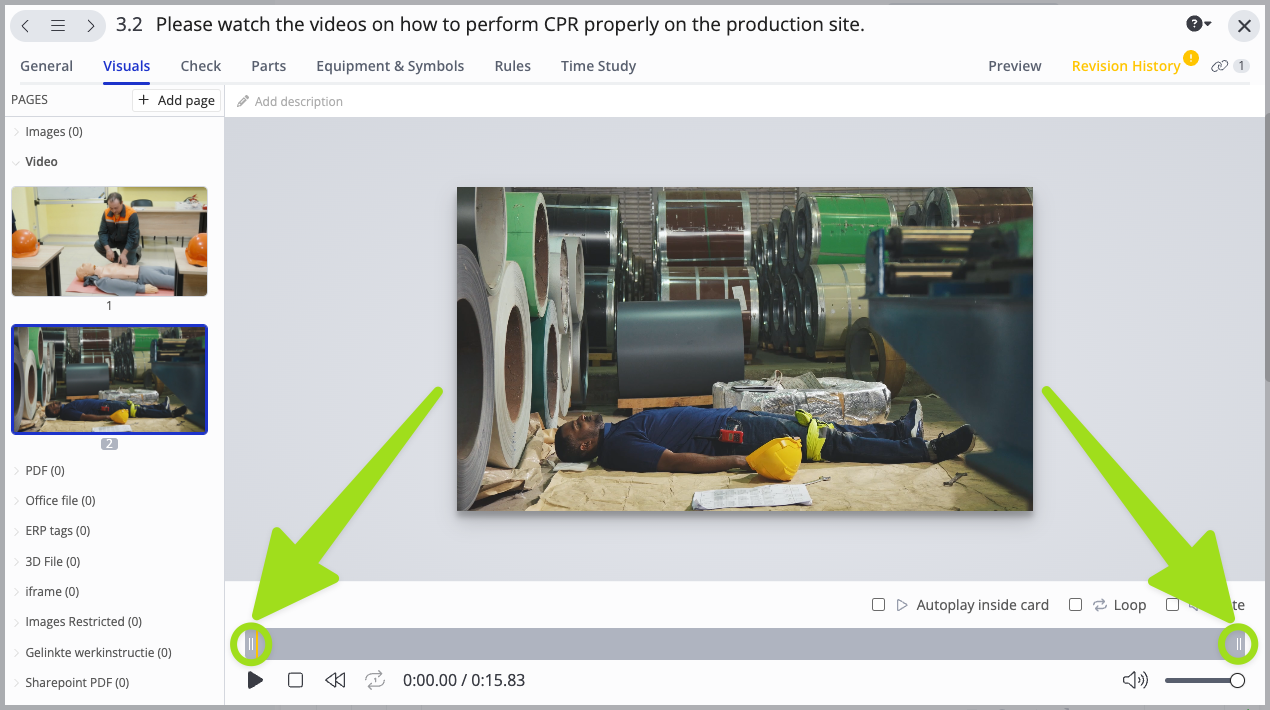
- This is the video timeline bar. It’s used to track playback progress and navigate to a certain point within the video. In addition, you can also use this tool to trim the video. Simply drag the left trim handle to determine the video’s start point, and drag the right trim handle to determine the video’s end point (as shown in the image below):
- These are the buttons that you can use for your video preview (the play, stop, rewind, and looping buttons). These buttons will only apply to the video preview (as indicated on No.2), but they will not affect the video on the operator’s view.
- Select the sound volume of the video preview. Similar to No.5, this setting will only apply to the video preview, but not to the operator’s view.
Viewing a Video as an Operator
A video in an instruction step is meant to be viewed by an operator. Here’s how an operator can view it:
- Navigate to the instruction step that contains a video.
- Click on a video to play it (unless the admin has set it to autoplay mode – in which the video will automatically play).
- You can adjust the video’s volume by clicking on the loudspeaker icon. Additionally, you can also download the video, adjust the video’s playback speed, or open the picture-in-picture viewing mode by clicking on the three-dot icon on the bottom right corner of the screen.
How to Delete a Video from an Instruction Step
- Navigate to an instruction step where you would like to add a video, and open it.
- Click on the “Visuals” tab.
- Right-click the video that you would like to delete.
- Click on “Delete page”.
- Click on “Remove”.