
Events in a Planning Tab (for Training Activities)
What Is an Event?
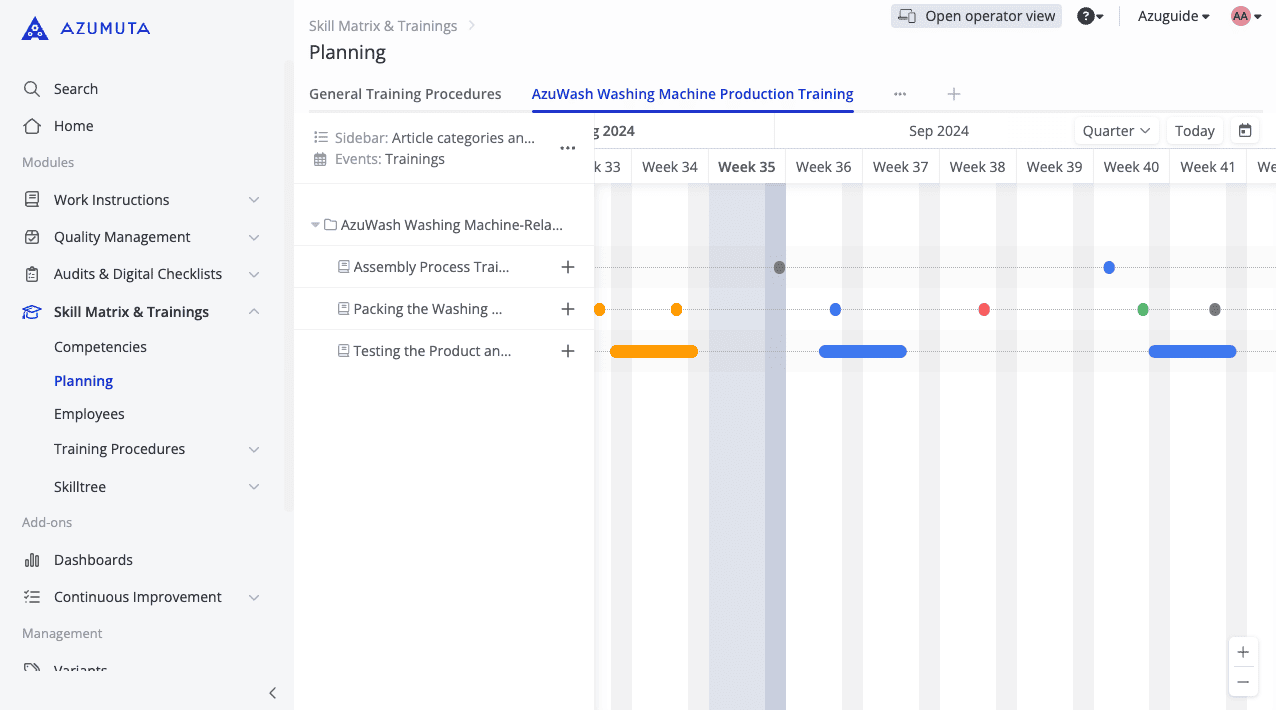
An event is an occurrence that has happened/will happen and is included in a planning tab. Each dot on the screenshot above represents an event. There are several things to know about these dots
The longer an event is, the larger the dot is. Conversely, the shorter an event is, the smaller the dot is.
For example, a Testing the Product and Quality Control Training session in the example above takes an entire week to finish. Meanwhile, a Packing the Washing Machine Training session takes a day to finish. In addition, an Assembly Process Training session only takes 1 hour to finish. These differences in training session duration explain why some dots are larger while some others are smaller
Additionally, each event dot is color-coded. Here’s the meaning of each color:
- Green dot: The event was a success.
- Red dot: The event was a failure/yielded unsatisfactory results.
- Blue dot: The event is still ongoing.
- Orange dot: The event took place in the past, but it hasn’t been executed yet.
- Grey dot: The event will take place in the future and hasn’t happened yet.
How to Configure Events in the Planning Tab
Just like the sidebar, You can also configure events in the planning tab. Here’s how to access the event settings:
- Click on “Skill Matrix & Training” on the homepage sidebar.
- Click on “Planning”.
- Select the targeted planning tab.
- Click on the three-dot icon.
- Click on “Configure calendar events”.
We will further explain the event settings in the guide sections below.
Event Settings: Generic

- If you click this, then all events will be linked to their training spot.
- When you’re done configuring the sidebar settings, click on “Save” to apply the configured settings. The sidebar settings will automatically close.
- Click to close the sidebar settings without saving anything (no changes will be applied to the planning tab as well).
In addition, we will explain the more advanced configuration options below:
Events Snap to
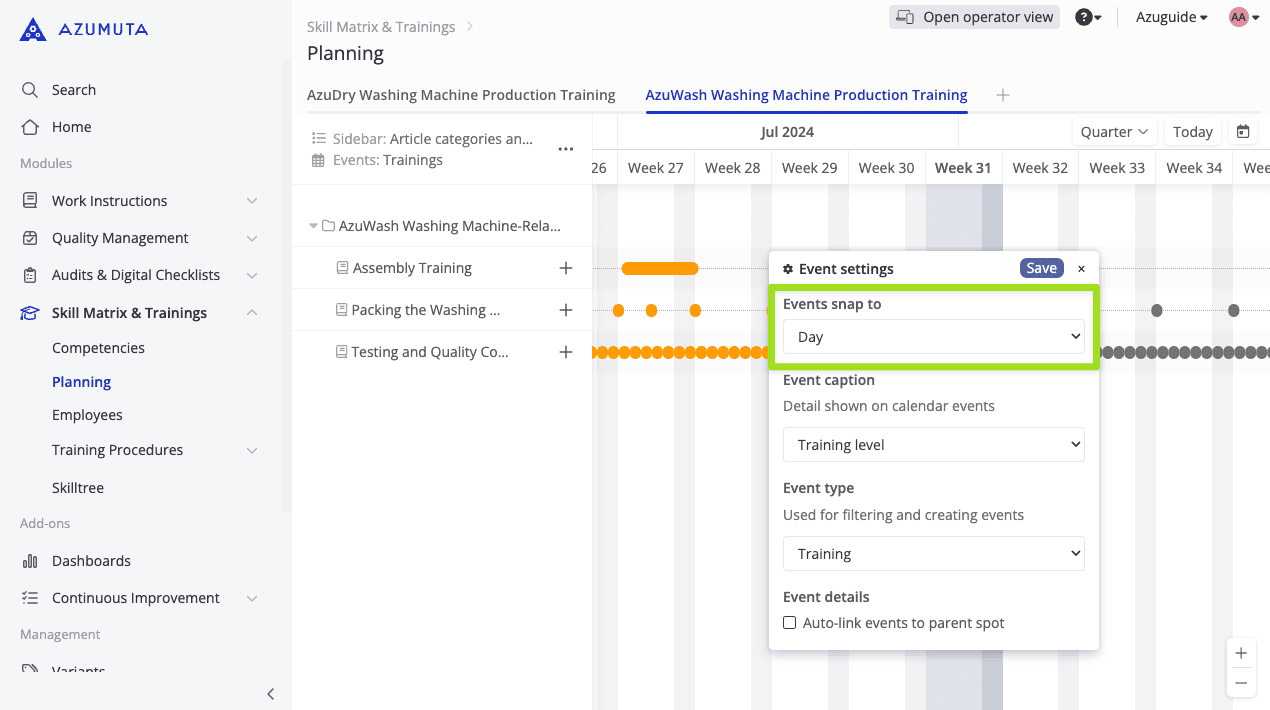
This setting is used to indicate the level at which you want to schedule an event. You can schedule an event on one of the following levels:
- Grid (recommended)
- Hour
- Day
- Week
- Month
When you schedule a new event, the duration of the time corresponds to the level that you have chosen.
For example, if you’ve chosen “Hour” as your level, then whenever you’re adding an event dot, the duration of that event (by default) is 1 hour. Of course, you can always edit that event’s duration later.
We recommend you to use “Grid” as your level. Thus, when scheduling an event, the duration will be the same as the zoom level at which the schedule view is. For example, if the zoom level is set to “day”, then an event will be, by default, scheduled with a duration of 1 hour. If the zoom level is set to “week,” an event will be, by default, scheduled with a duration of 1 day. And so on.
Event Caption
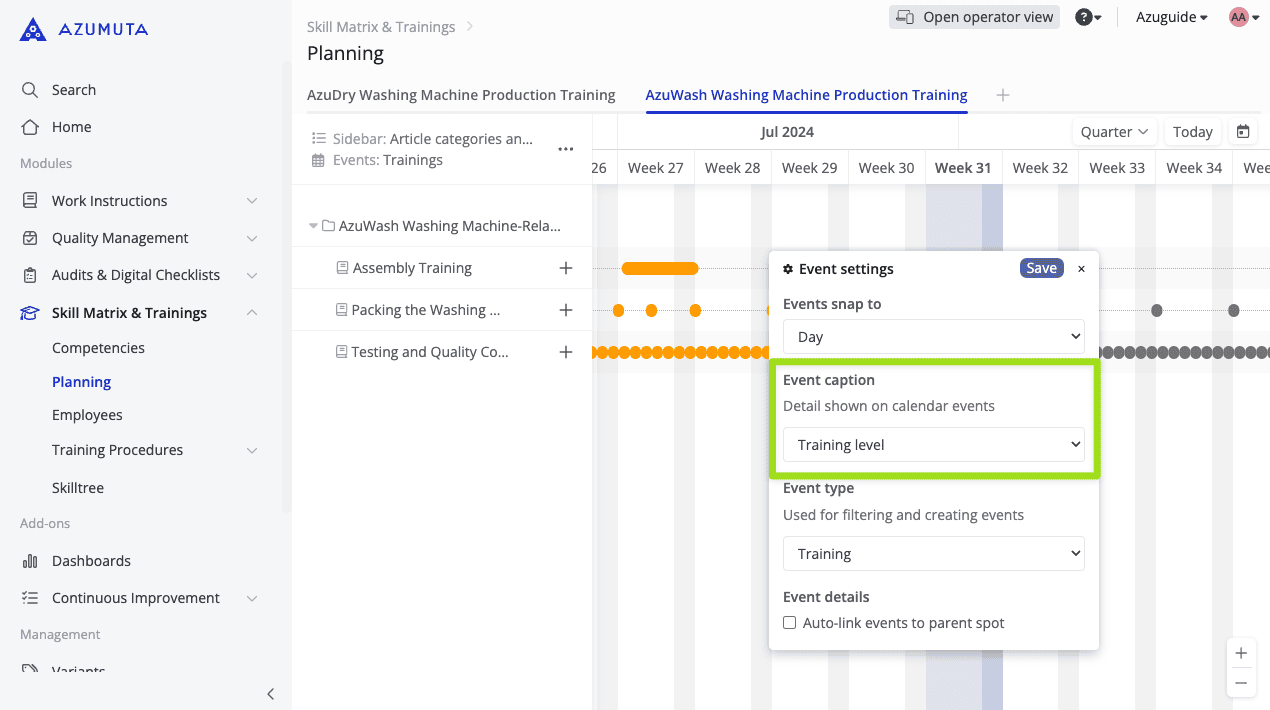
With this setting, you can choose which text to display on the existing event dots. This way, an admin can see more details about the event with just a single glance. There are several options to display at the event:
- The name of the training work instruction
- The name of the trainer
- Spot: (only applicable for audits – not for training activities)
- Average (only applicable for audits – not for training activities)
- Training level (the end score for that particular training session)
- Notes (you can write notes when clicking on an event, and they will be shown when you select this option)
- You also have the option to show no caption by selecting “show no caption”
Important to know: This setting only works if the event dot is large enough to display the text. If the event dot is too small, then no text will appear. The screenshot below illustrates well the difference between large event dots (where the text appears) and small event dots (where the text doesn’t appear).
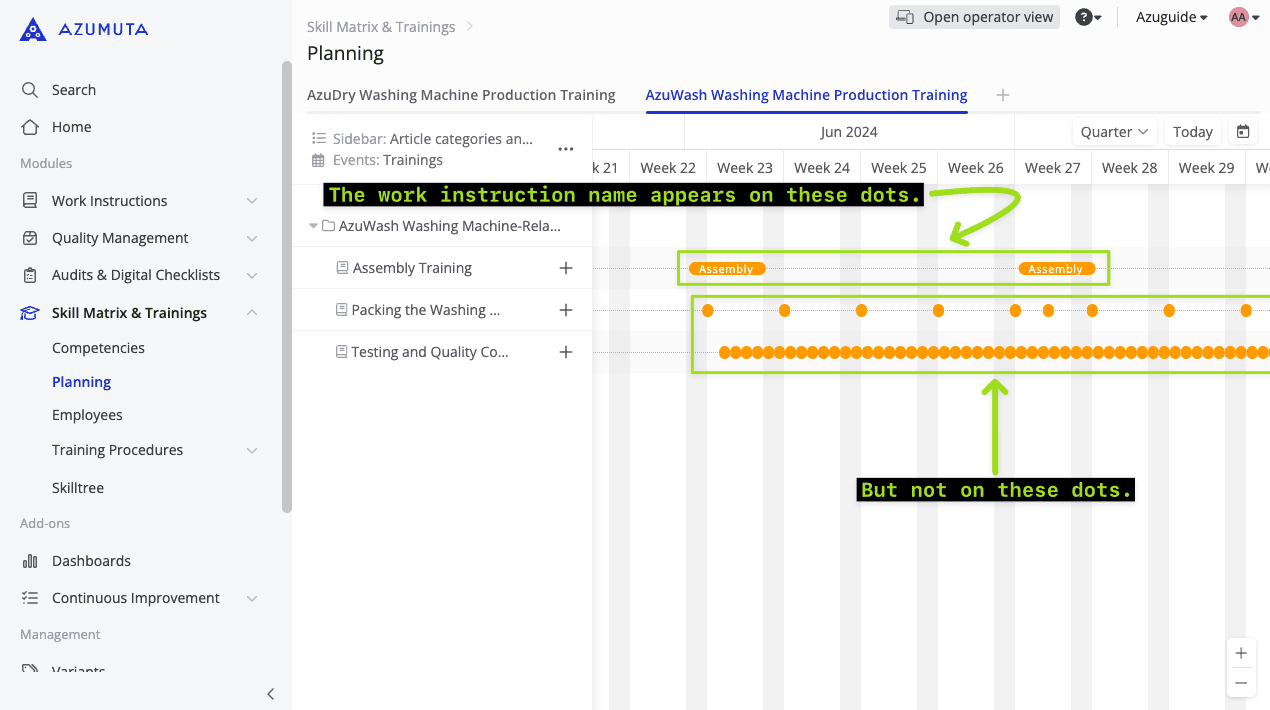
If the text doesn’t appear on an event dot, then you should lower your zoom level to the appropriate time zoom level. For example, if the event dot only lasts a few hours, then you should lower your time zoom level to “Day”. Afterward, the text will appear on that event dot.
Event Type
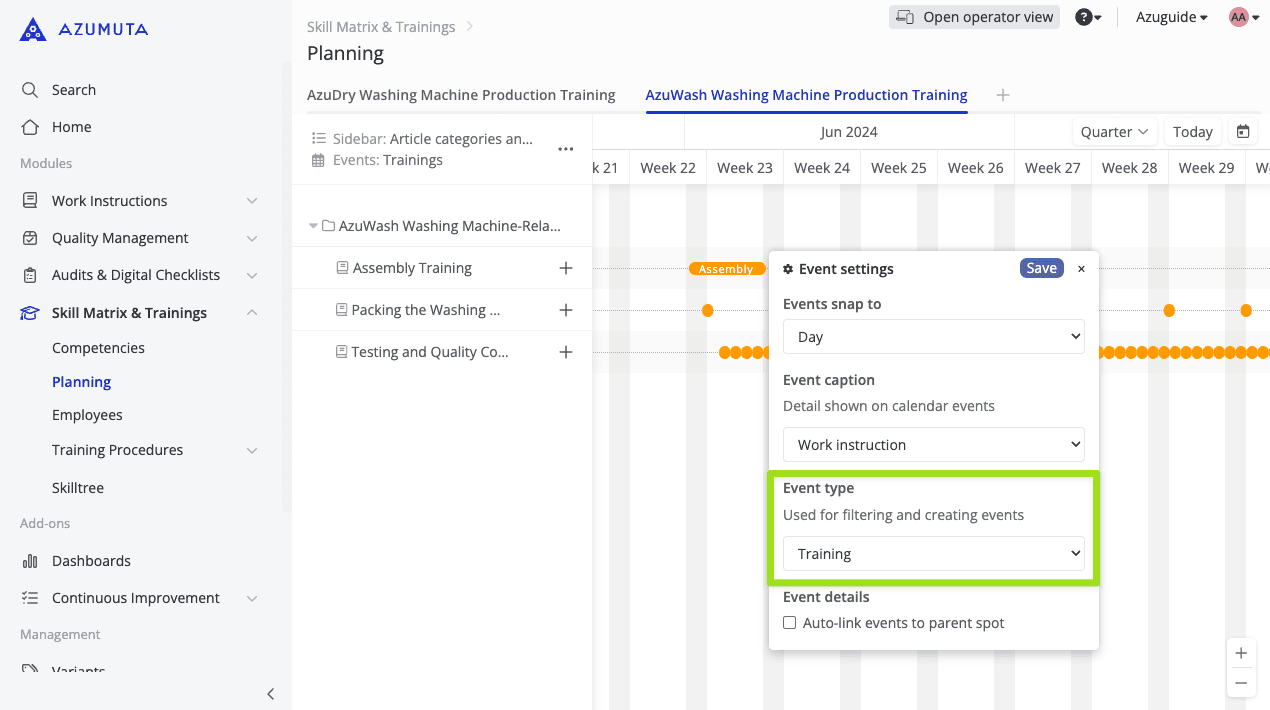
This setting allows you to filter the existing event dots on the planning tab. With this setting, you can choose to see either audit-related events only or training-related events only. This is a useful feature to declutter your planning tab.
By default, this setting is already applied to each module. Therefore:
- If you created a planning tab under the Audits & Digital Checklists module, then the default event type is “Audit”
- If you created a planning tab under the Skill Matrix & Training module, then the default event type is “Training”