
How to Add, Edit, and Delete a Part
How to Add a New Part to Your Workspace
- Click on “Resources” under “Management”.
- Click on “Parts”.
- Click on the yellow plus button.
- Fill in the available fields (only the image, the part number, and the description are mandatory).
- Click on “Add”.
How to Add a New Part Category
It’s a good practice to group your parts into several categories. Consequently, it’ll be easier for you to parts in your workspace.
- Click on “Resources” under “Management”.
- Click on “Parts”.
- Click on the plus icon next to existing part categories (if there are existing part categories already) or next to “All parts” (if there are no existing part categories yet).
- Type in the name of the part category.
- Click on “Add”.
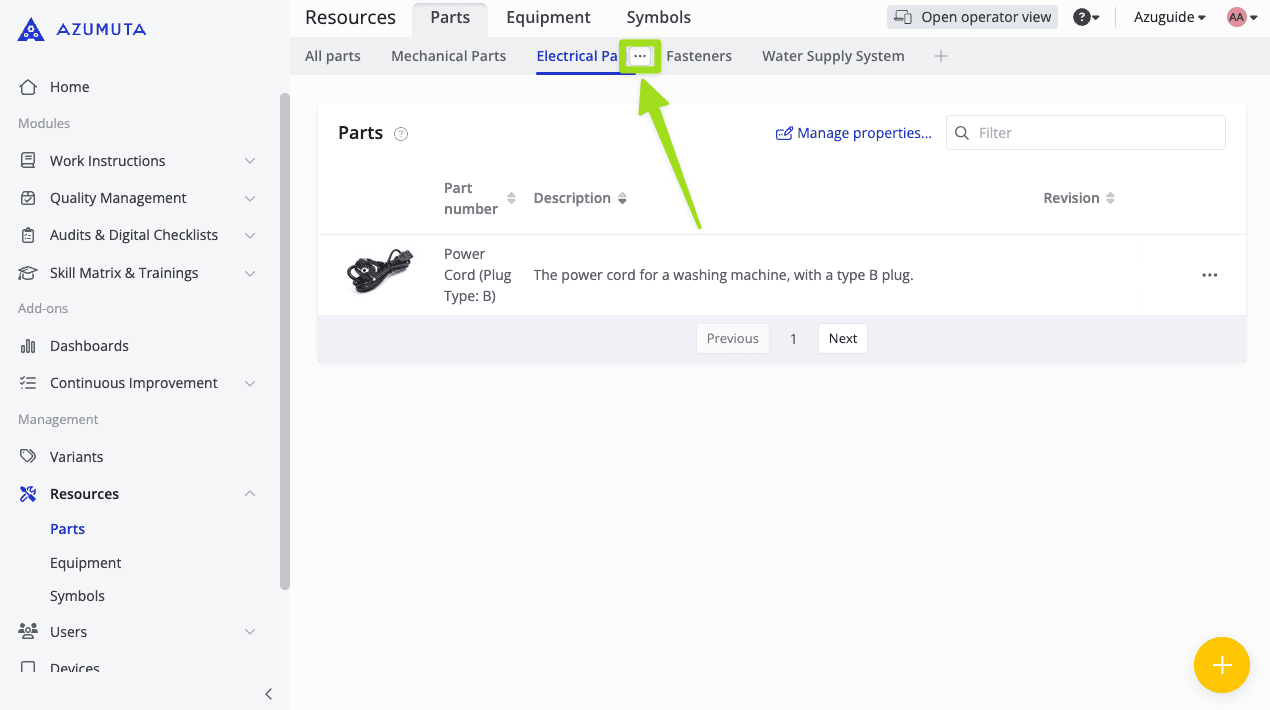
To edit or delete a part category, simply click on the three-dot icon next to the part category’s name, as shown in the image below:
How to Open the Part Editor
- Click on “Resources” under “Management”.
- Click on “Parts”.
- Click on the three-dot icon next to the part that you wish to edit.
- Click on “Edit part”.
Here’s what you can edit on the part editor:
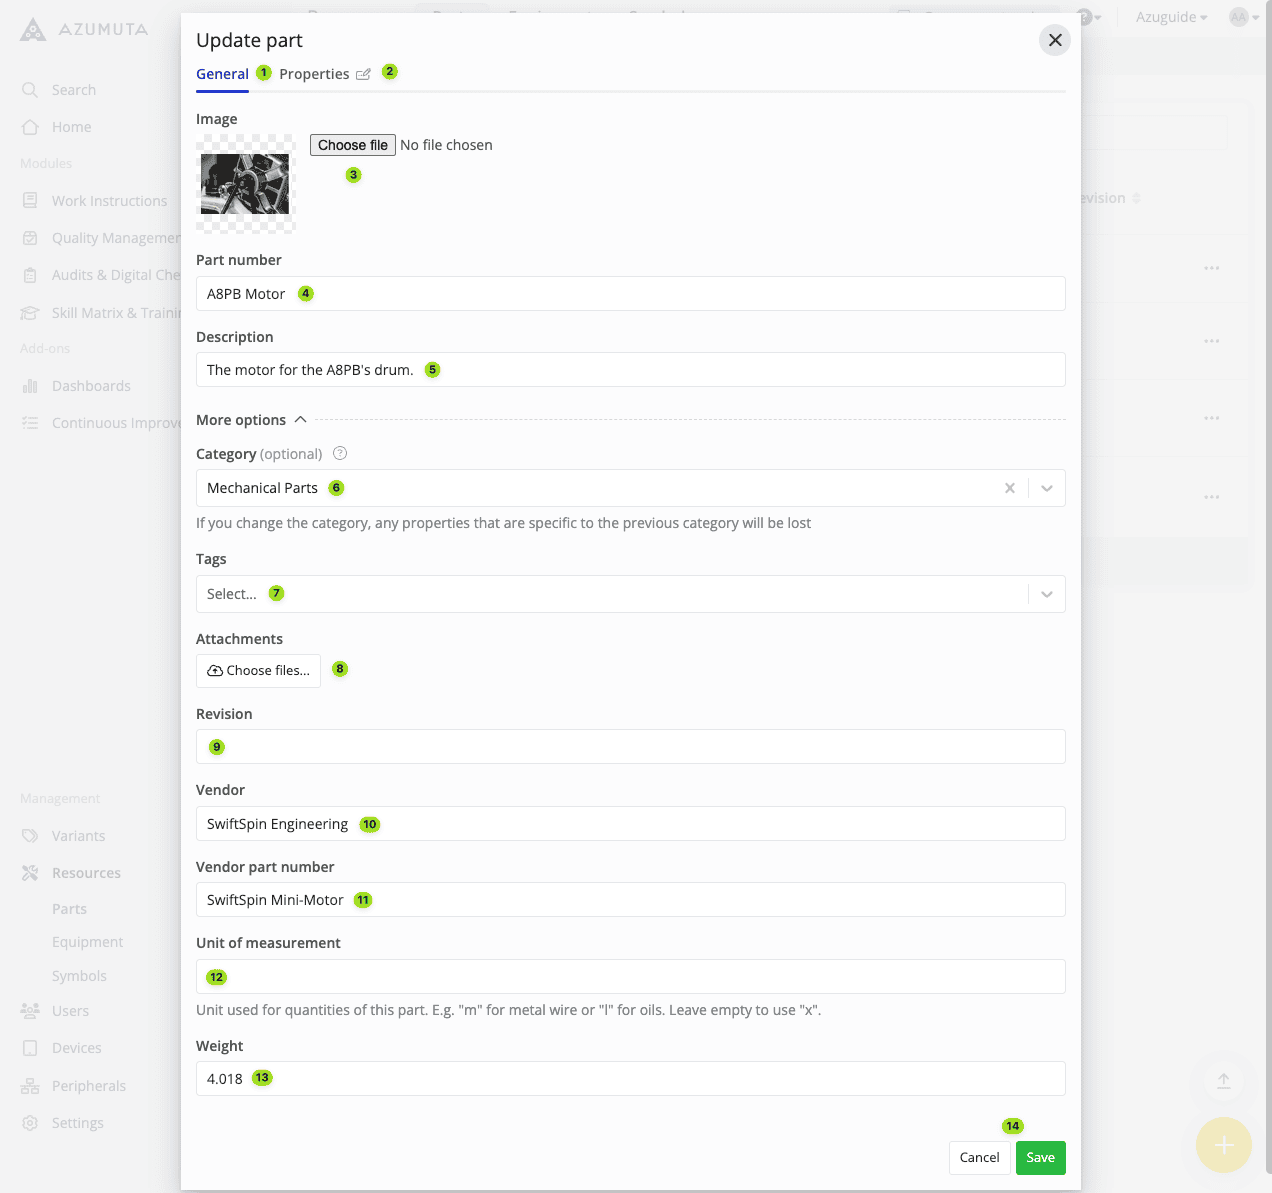
- The General tab, where you can edit a part’s main attributes.
- The Properties tab, where you can manage a part’s properties.
- Click to change the part’s image.
- Edit the part’s number/name here.
- Edit the part’s description here.
- Edit the part’s category here.
- Edit the parts’s tag(s) here.
- Add attachment(s) here.
- If there was any revision to this part, edit it here.
- Edit the part’s vendor/manufacturer name here.
- Edit the part name that was given by the vendor/manufacturer here.
- Edit the part’s unit of measurement here. This field is useful for parts that are uncountable and can only be measured. For example, a liquid paint can be measured in liters.
- Edit the part’s weight here.
- When you’re done with your edits, click on “Save”. However, if you would like to cancel your edits, click on “Cancel”.
How to Delete a Part from Your Workspace
- Click on “Resources” under “Management”.
- Click on “Parts”.
- Click on the three-dot icon next to the part that you wish to delete
- Click on “Delete part”.
- Click on “Delete”.