
Adjusting a Widget’s Timespan
In most Azumuta widgets, you have the option to filter data based on a specific timespan. This ensures that the widget displays only the data from within the chosen timespan and excludes any data from outside of that timespan.
How to Navigate to a Widget
Before going further, you must first know how to navigate to a widget. Here’s how:
- Click on “Dashboards” on the sidebar.
- Click on the targeted dashboard tab.
- Select the targeted widget within a dashboard.
How Do you Adjust a Widget’s Time Frame?
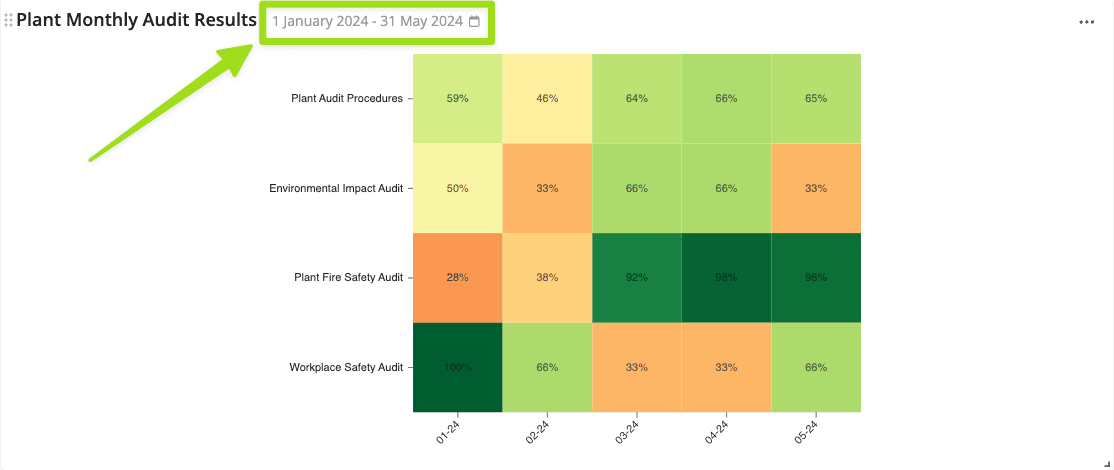
You can adjust a widget’s time frame by clicking on the date range next to the widget’s title, as shown in the image below. You can edit the widget’s date range and result group. We will explain about both types of edit further down below.
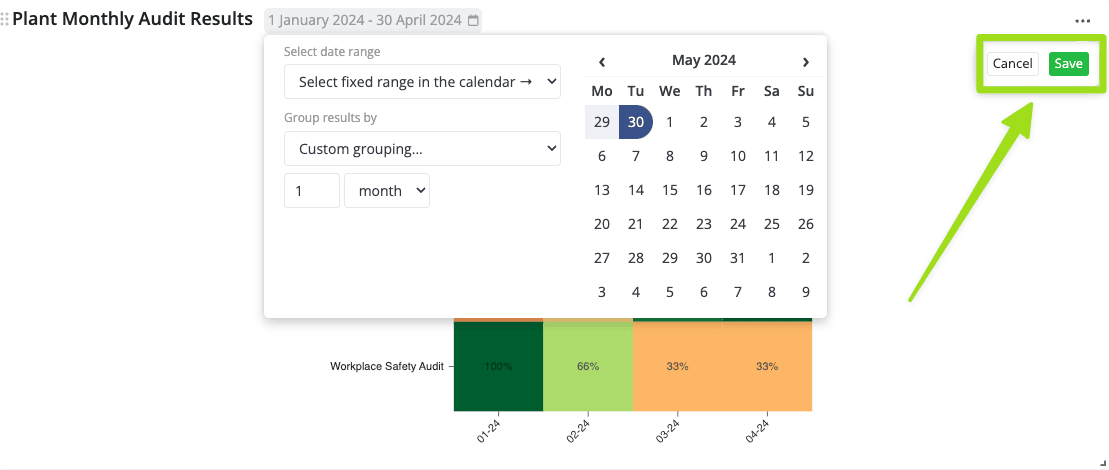
After performing the desired edits, don’t forget to click on “Save”, as shown below. However, if you would like to annul your edits, click on “Cancel”.
Editing the Widget’s Time Frame
To adjust the widget’s time frame, click on the dropdown menu under “Select date range”, as shown in the video below:
As shown in the video, you will have the following time frame options:
- Today
- Yesterday
- This week
- Last week
- This month
- Last month
- Custom rolling range
- Select a fixed range in the calendar
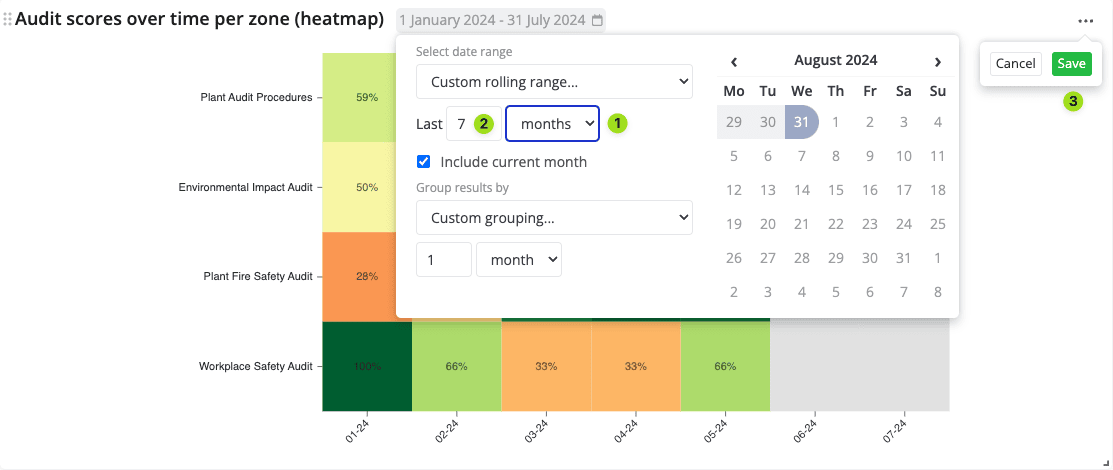
Custom Rolling Range
Use this tool to track historical data by using a rolling date selector.
- Choose the time unit (hours/days/weeks/months/years).
- Choose the number using the up/down arrows or by scrolling up/down using your mouse.
- Click on “Save” when you’re done.
Select Fixed Range in the Calendar
This tool is used to pinpoint a specific start date and end date using the calendar.
- Click on a date on the calendar. The first clicked date will be the start date of the time frame.
- Click on another date on the calendar. The second clicked date will become the end date.
- Click on “Save” when you’re done.
Adjusting a Widget’s Result Group
Besides adjusting a widget’s timeline, it’s also equally important to pay attention to its result group. The result group determines from which level of time the data on the widget will be displayed.
Is it based on daily data? Weekly data? Monthly data? Or something customized? You can adjust it by clicking on the following dropdown menu:
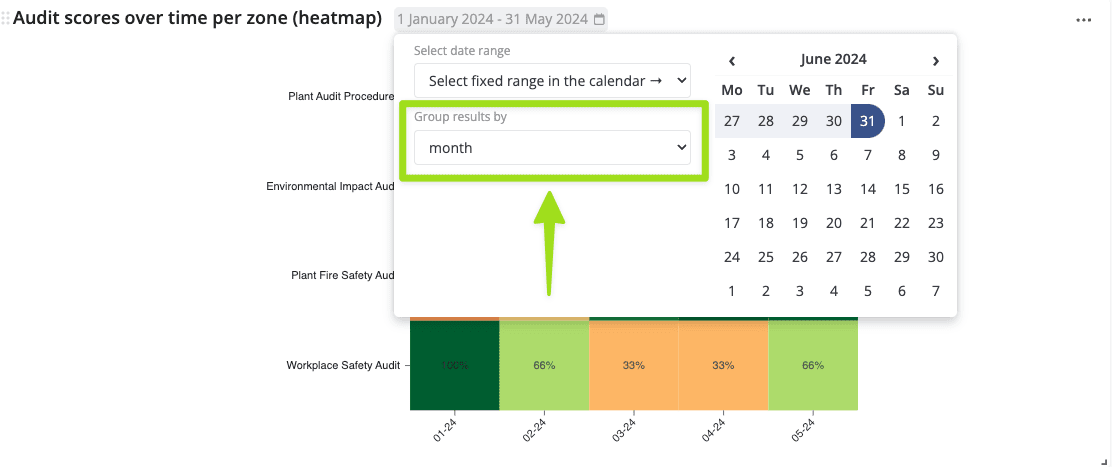
These are the recommended result groups based on the selected date range:
- By hour (if you choose “Today” or “Yesterday”)
- By day (if you choose “This week” or “Last week”)
- By week (if you choose “This month” or “Last month”)
- By month (when the date range is at least a year)
- You can also choose “Custom grouping” for other time frames.