
Peripheral Presets for a DYMO Label Printer
What Is a Peripheral Preset?
In Azumuta, a peripheral device-supported product check can be configured extensively to meet your shop floor needs. However, setting up a product check takes some time. If you have to manually set up a product check every time you would like to use it in an instructions step, it will take a large chunk of your valuable time.
What if there’s a way where you only need to set up a peripheral device-supported product check once, save this configuration, and then reuse it again in the future?
Well, peripheral presets are the answer to that. A peripheral preset is a peripheral device-supported product check configuration that has been saved and can be reused again perpetually. That way, you don’t have to manually configure it each time you would like to use it on an instruction step – saving you time in the process.
Note: Creating a peripheral present is optional. You can still use peripheral devices with Azumuta without peripheral presets.
How to Create a Peripheral Preset
Before creating a peripheral preset, make sure that you’ve integrated your DYMO Label Printer into your workspace.
With that being said, here’s how to create a peripheral preset for a DYMO label printer:
- Click on “Peripherals” under “Management”.
- Click on the “Presets” tab.
- Click on the yellow plus button.
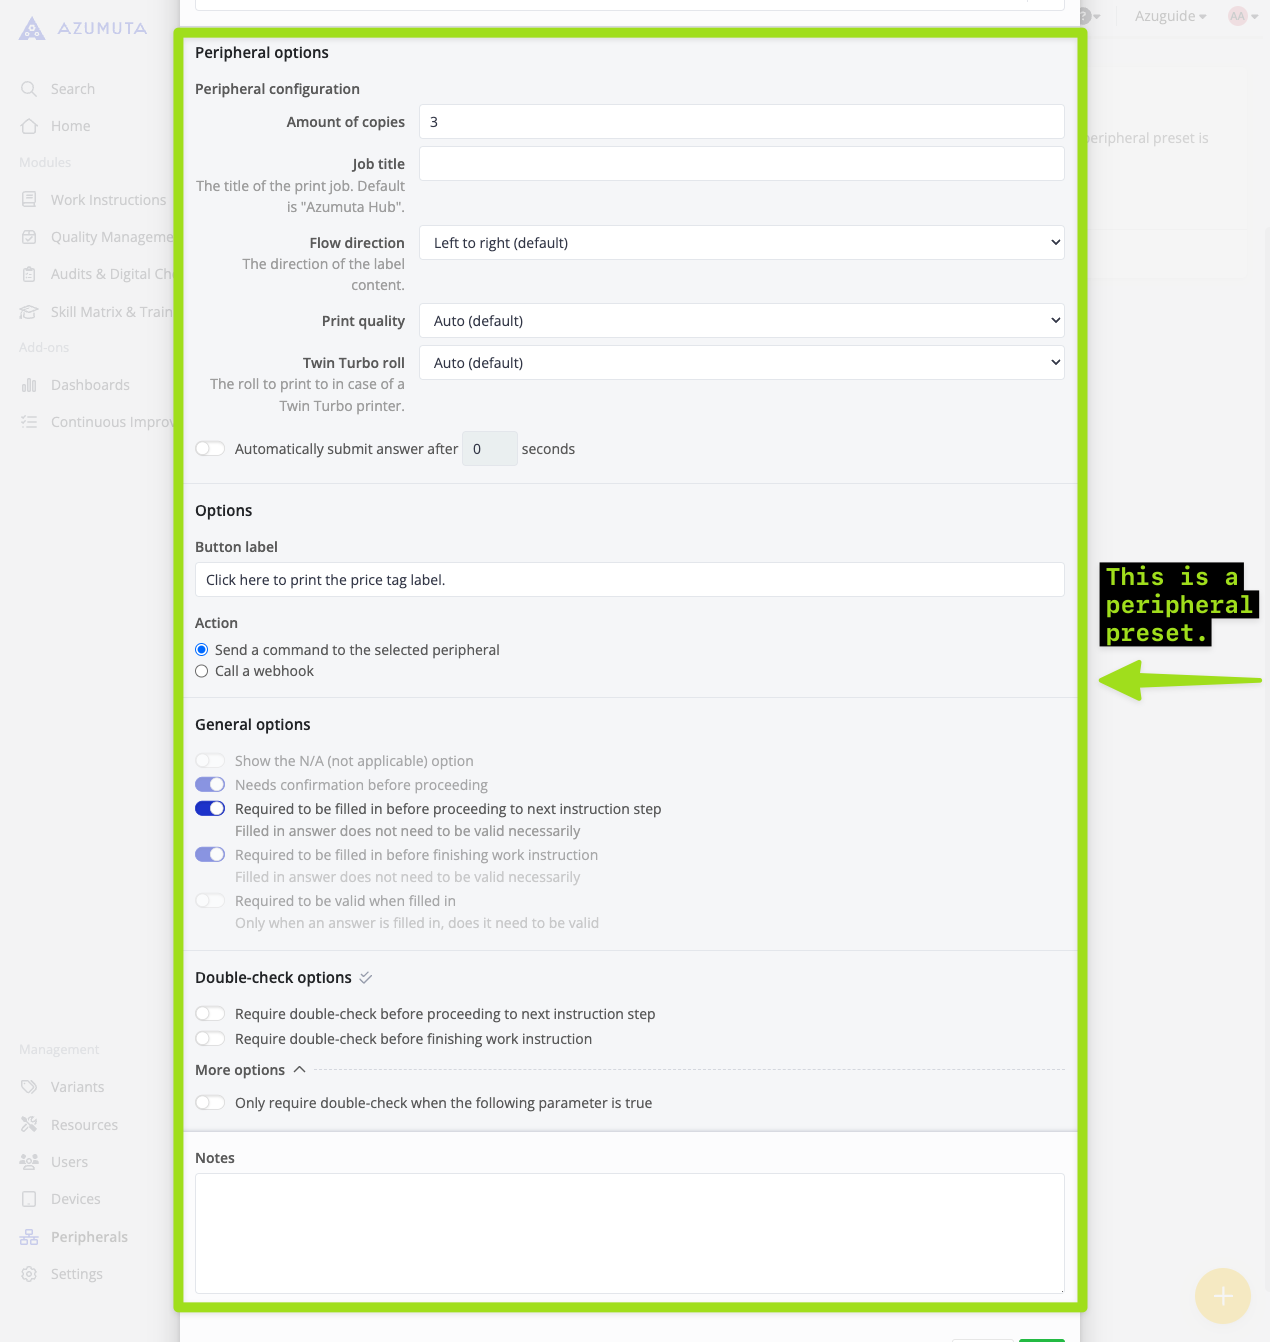
- Under the “Name” field, type in the peripheral preset’s name.
- Under the “Hub plugin” dropdown menu, select the hub plugin type that matches to your DYMO label printer type. Should you have any doubts, please contact us through our support@azumuta.com email.
- All fields under ”Peripheral options” are the same as those in any procedure check. See procedure check configuration options for label printing for more details.
- When you’re done, click on “Add” at the bottom of the menu.
How to Add a Peripheral Preset to a Product Check
After you’ve created the peripheral preset, you can use it on a procedure check (so you won’t have to manually configure that procedure check anymore in the future). Here’s how:
- Navigate to an instruction step where you would like to use that peripheral preset on, and click on “Open”.
- Click the “Check” tab.
- Select “Procedure”.
- Click on the dropdown menu under “Peripheral group”, and select the corresponding peripheral group.
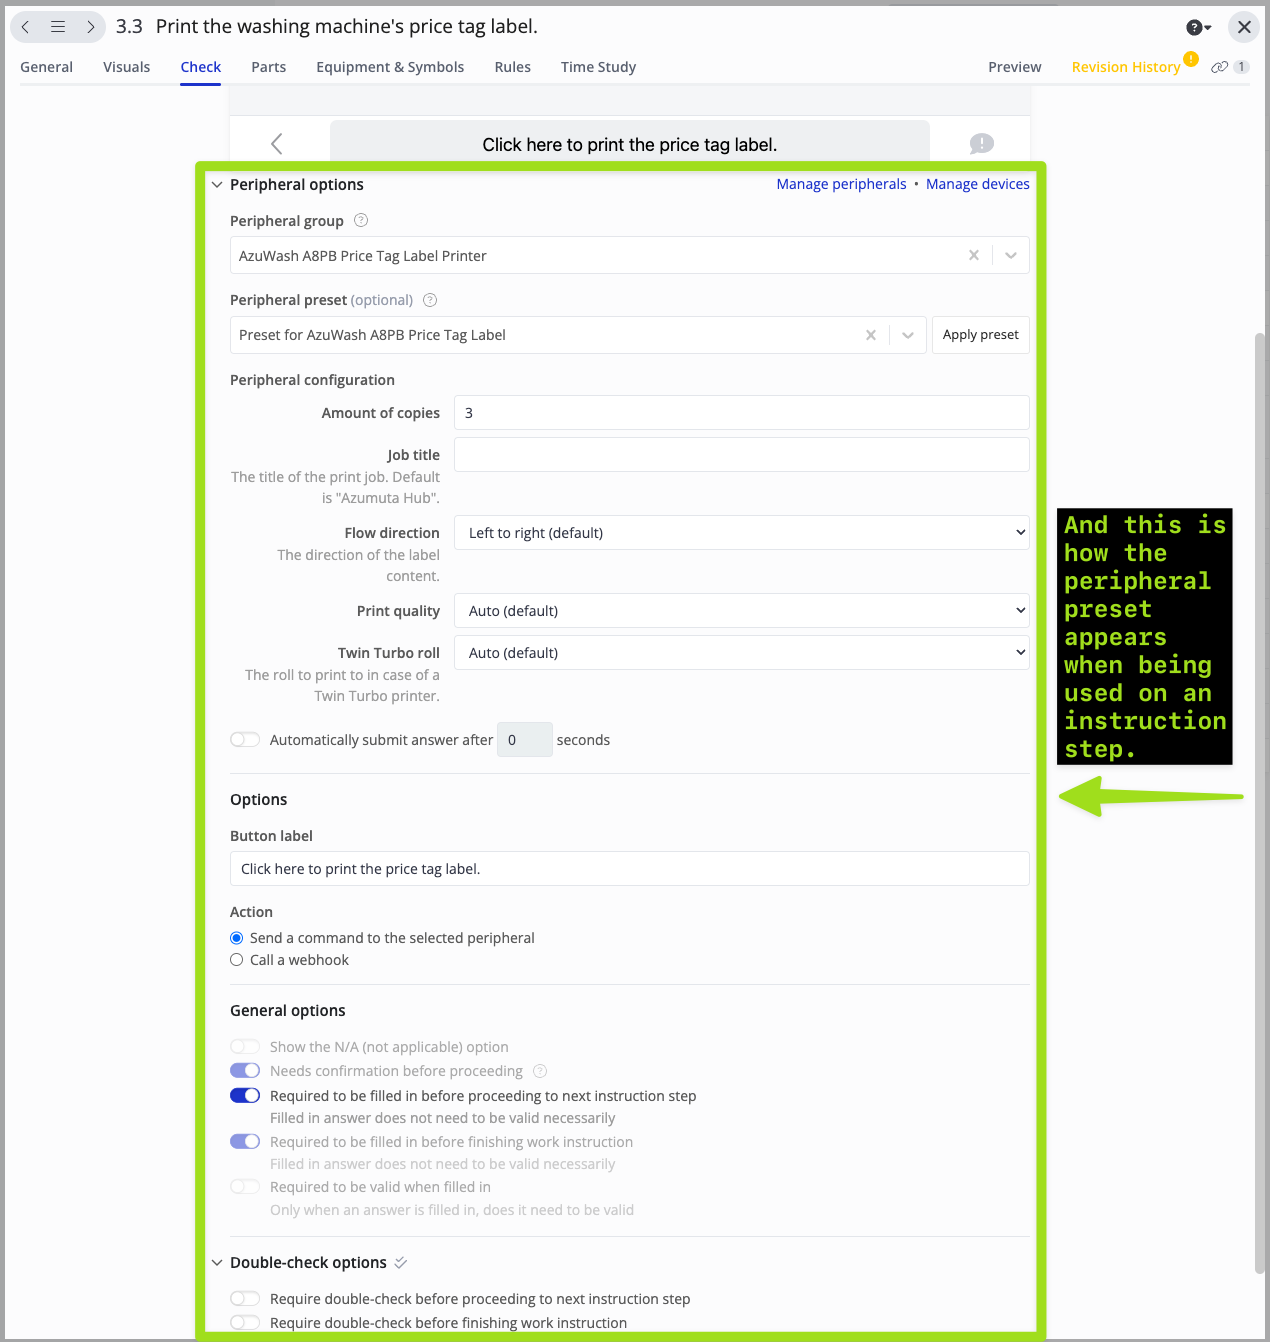
- Click on the dropdown menu under “Peripheral preset (optional)”, and select the desired peripheral preset.
- Click on “Yes”.
- The options underneath will be automatically configured to match the peripheral preset. However, you can still edit it manually, if desired.
How to Edit a Peripheral Preset
- Click on “Peripherals” under “Management”.
- Click on the “Presets” tab.
- Click on the three-dot icon next to the peripheral preset that you would like to edit
- Click on “Edit”.
- Perform the desired edits.
- After you’re done with your edits, click on “Save”.
How to See in Which Instruction Steps Is a Peripheral Preset Being Used
- Click on “Peripherals” under “Management”.
- Click on the “Presets” tab.
- Click on “Find Usages” next to the desired peripheral preset.
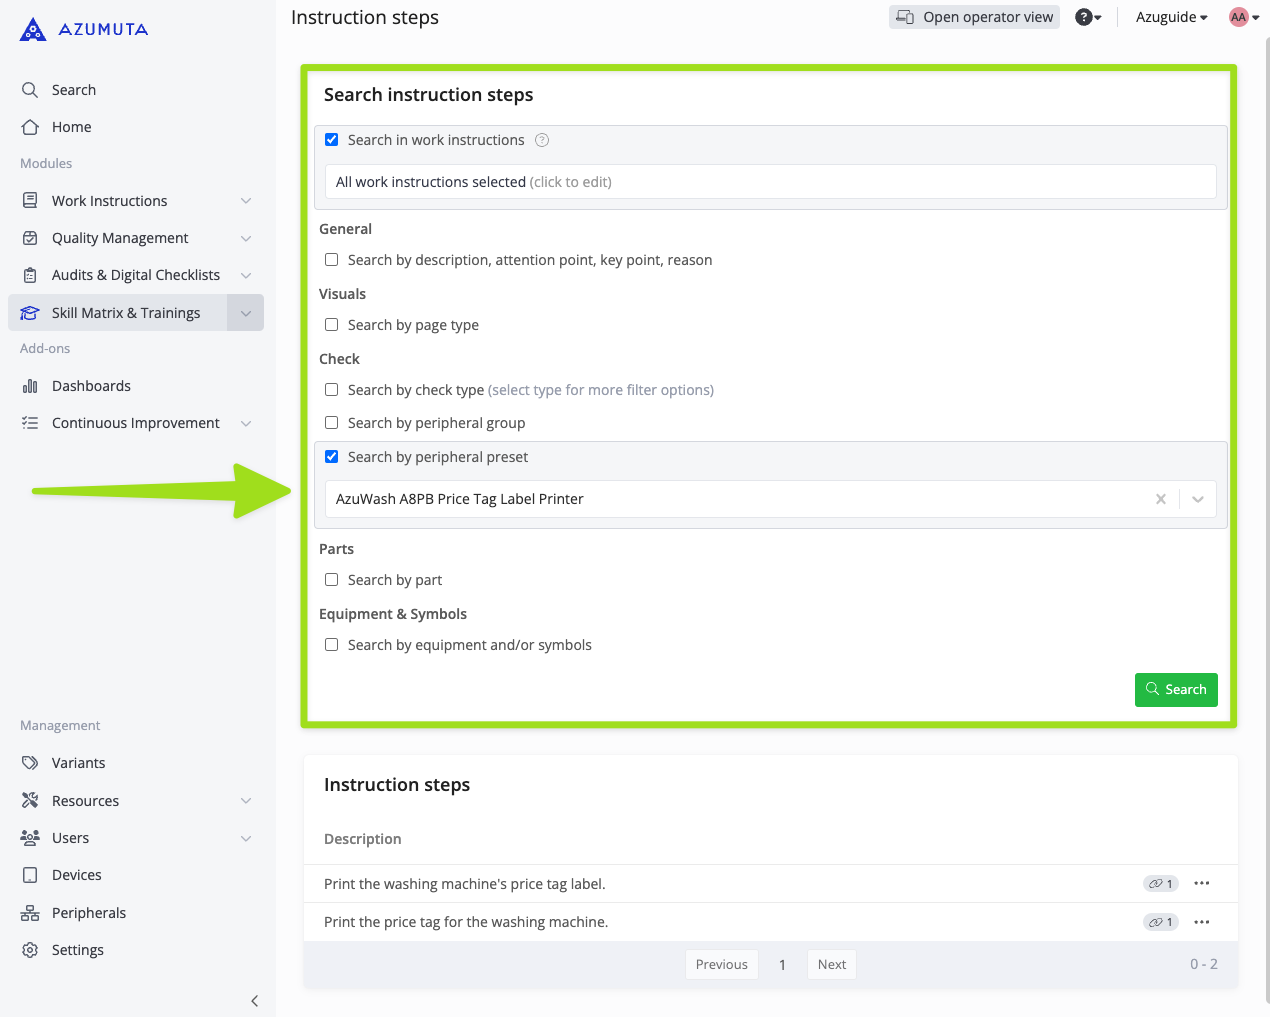
- Scroll down, and you will see the list of instruction steps that are linked to that peripheral preset under “Instruction steps”. You can also click on any of them, and you will be redirected to its instruction step editor afterward.
You can also use the tools highlighted in the image below to narrow your search:
How to Delete a Peripheral Preset
- Click on “Peripherals” under “Management”.
- Click on the “Presets” tab.
- Click on the three-dot icon next to the peripheral preset that you wish to delete.
- Click on “Remove”.
- Click on “Remove” again.